
Today I am sharing with you a little DIY Project that can make such a difference in a Craft Room or Laundry Room.
I am sharing how to make an Ironing Board Cover in less than 30 minutes.
Feel free to Pin this image but DO NOT COPY or/and paste. ©the36thavenue
DIY Ironing Board Tutorial

First open your fabric and sit the iron board right on top.
Using your ironing board as a template cut the shape of it about three to four inches away from the edge.

Done? Good!
After your fabric is cut make a 3/4 of an inch hem all around the fabric.
I like to use the iron to make mine sharp.

Now you are ready to sew.
Don’t give me the I don’t sew excuse. You can do this.
Turn the fabric around and sew the hem about 1/2 of an inch from the edge.

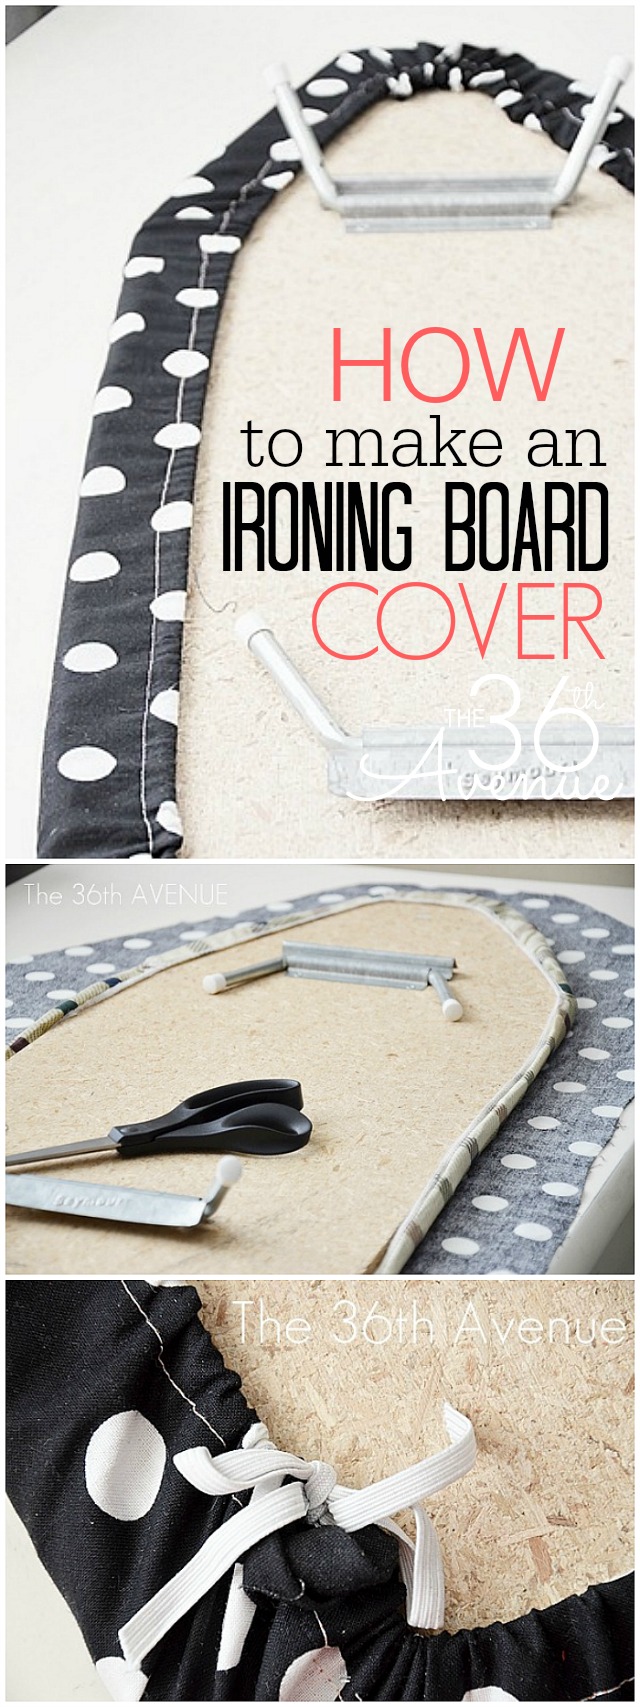
Make sure to leave one corner open so you can insert the elastic band inside and pull it out.
Easy!

Now we are ready for the elastic and last step.
The 1/4” elastic works perfectly.
The length of the elastic will depend on the size of your ironing board.

Insert the elastic inside of the hem.
I like to use a bobby pin to help me move the elastic along easily.

After I was done with this step all I had left was to carefully put the
new cover on my iron board. It feels like you are putting on a fitted sheet of a mattress.
Pull elastic so edges of cover are gathered making sure not to let the elastic slip inside your hem tunnel.
When it feels snug tie both ends of the elastic together.
Here is a picture.

You are done!

Here is how my new little ironing board looks in my Craft Room.
So cute!

My advice, don’t waste your time looking for a new cover in a store.
They are not pretty.
Just take a chance and make your own in about 20 minutes.
You are going to love it!
Thank you for visiting!
Besos
Desirée

Thanks for sharing, I wanted a pattern for doing this.
Thanks for sharing!
I finally learned to make an additional cover for my cover when I sew one. I tend to get one area slightly scorched and messy looking from working on some sewing project needing lots of starch. If I make a large dinner napkin sized square to lay on top I can do those heavy starch jobs there and just toss the square into the wash instead of the whole cover. I also use the square on top of flannel over a wooden tv dinner table for pressing when I quilt. Now my ironing board covers stay pretty much much longer.
Great tips! Thank you for sharing 🙂
I have been wanting a new ironing board cover for awhile now but did not want to pay the price. This is going on my list of “to dos”. I have tons of fabric (I may have a slight addiction) and all I’d need to buy is some elastic (maybe…I have a bunch of that too). This will be perfect! Thank you so much for sharing how you did this. And your line about the “but I can’t sew excuse” had me laughing. 🙂
Thank you so much Desiree!! I don’t iron because I have a hanging board and cannot find a cover. I’ll be making a cover this weekend!! Just a question, what material is used for under padding?? Thanks
Linda
Linda, I normally leave the old padding on 😉
Love it, thank you!!
I have one question: the black fabric isn’t dangerous to mix with the colors of the clothes we are ironing? Because of the heat? I’m new in the sewing world, I don’t understand nothing about fabrics and I really have this doubt about what fabric/color choose to make my own ironing board cover.
Thank you again! (:
Alex*
I haven’t had a problem so far.
do you suggest any specific type of fabric?
Kristen, I like to use 100 cotton since it is great for heat. I hope this helps!
Thanks for the idea-I have been meaning to do this–my ironing board in in a cabinet on the wall–so I will use your idea and attempt one of my own..
Also, what darling craft room.
I have been wanting to make an ironing board cover, but wasn’t sure where to begin. Thanks for the tutorial!
Great tutorial! Just the thing that I needed to get motivated to cover my board! Totally doing this today with big hugs, links and thanks back!
xo
Heather
Thank you so much Heather for the visit!