
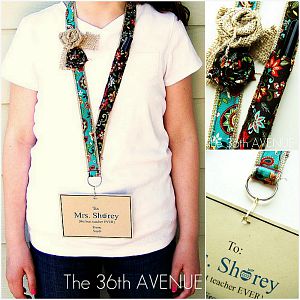
Back to School Days are almost here. All of the teachers at our school are required to wear their
identification badges everyday. So I decided to make a Badge Holder for my kid’s teachers this year.
identification badges everyday. So I decided to make a Badge Holder for my kid’s teachers this year.
No more of this!

I actually wear my house and car keys around my neck also {since it is the only way I can keep track of them}
I actually wear my house and car keys around my neck also {since it is the only way I can keep track of them}
and then I thought, how hard would it be to come up with my own key-badge holder?
Before I knew it there I was at JoAnns looking for “lanyard”.
So, let me show you what I came up with…
So, let me show you what I came up with…

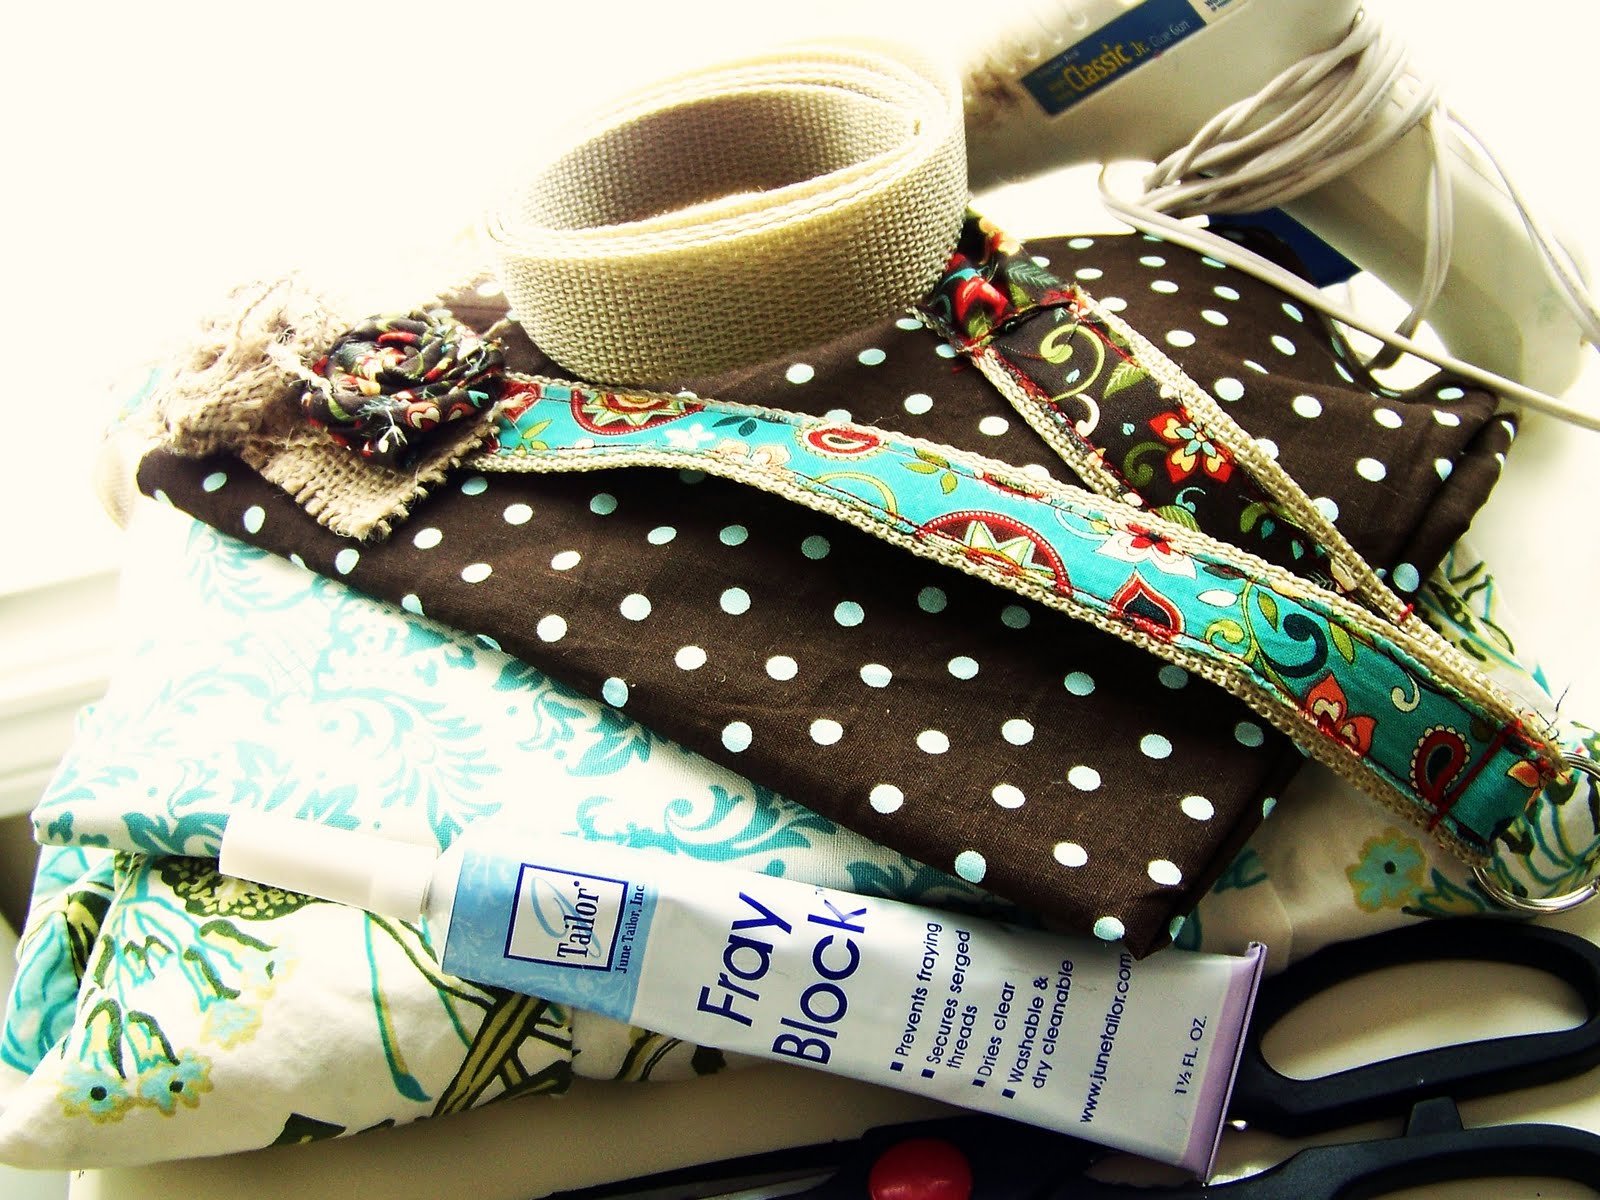
This is what you’ll need:
A small amount of leftover fabric {or you can use some cool ribbon},
the lanyard {a little bit over a yard} you can buy it at your local Fabric Store,
glue gun, scissors,
a key ring {I used the one from my old holder}
and Fray Block {optional}
You can even use an old badge holder
and just give it a makeover!
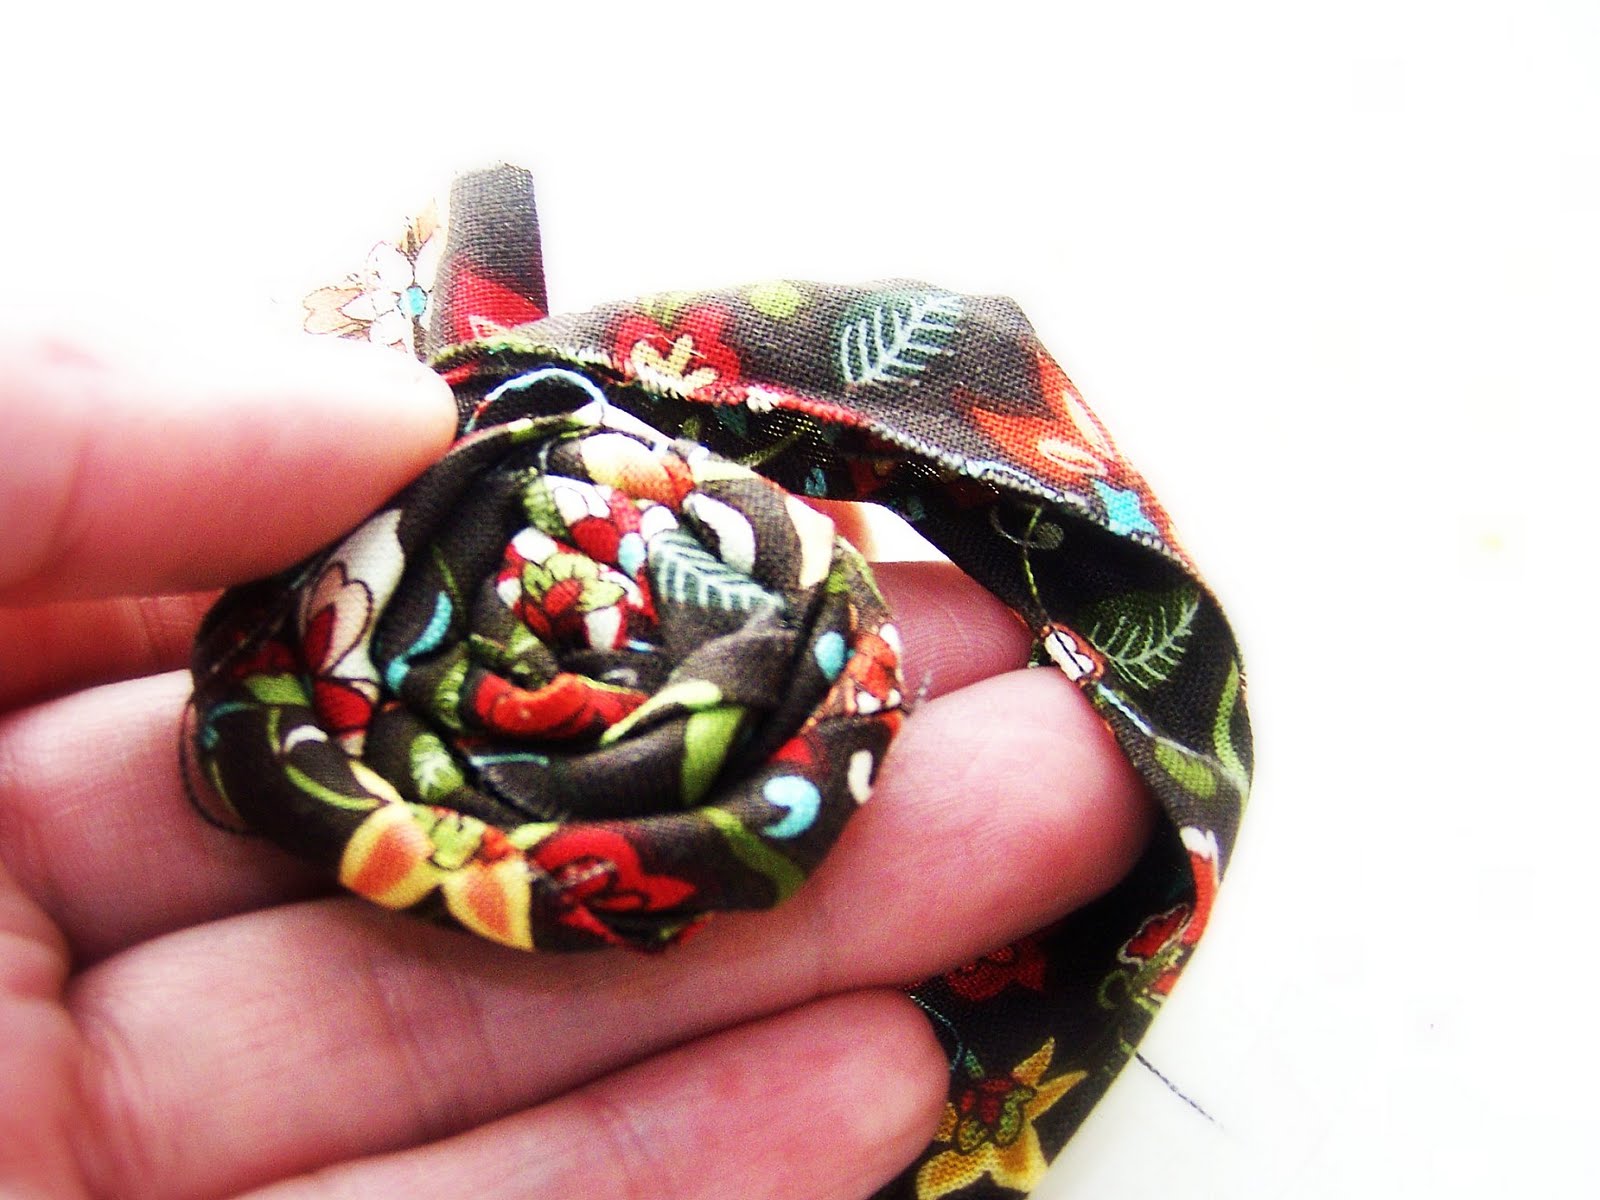
First I made my fabric flowers…
The burlap one I made back in the days of my bathroom makeover.
I used some hot glue while making the flower to hold the fabric together.
Then I cut two thin strips of fabric {the size will depend of the lanyard you get}
I always like to iron my fabric as I go, I found it
easier to work with that way.
{I am sure you can use ribbon instead of fabric}
I wanted mine badge holder to have an organic look and these fabrics were perfect!
I always like to iron my fabric as I go, I found it
easier to work with that way.
{I am sure you can use ribbon instead of fabric}
I wanted mine badge holder to have an organic look and these fabrics were perfect!

After cutting it was time to attach the strips to the lanyard.
Time to sew!
Time to sew!

Next step was easy,
I chose {in front of the mirror} where to place the flowers
and then I just hot glued them…
{Did you know that there is hot glue for fabric?
I chose {in front of the mirror} where to place the flowers
and then I just hot glued them…
{Did you know that there is hot glue for fabric?
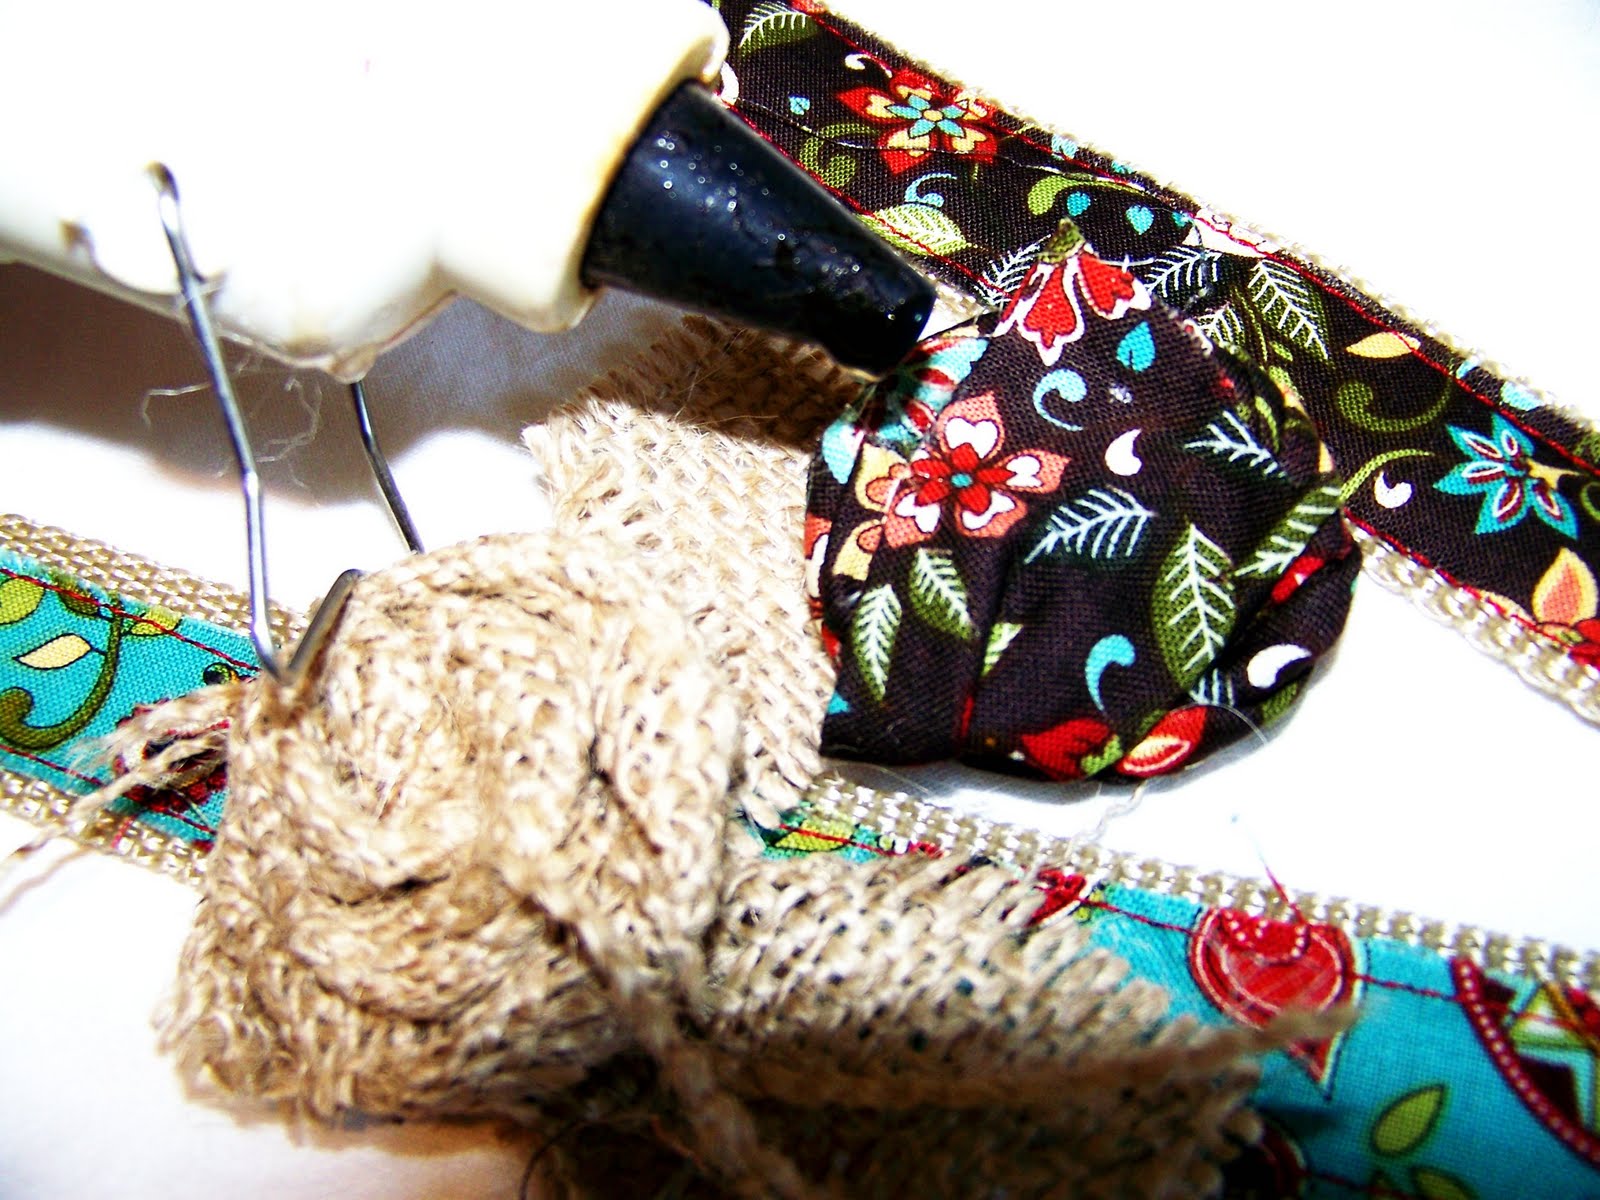
After it was time to choose where to place the pen packet.
I put the fabric on top of the pen to measure how much I would need.
Then I cut the fabric, ironed it and began to sew it.
{You kind of have to pleat the bottom of the packet since the fabric will not sit flat}
I put the fabric on top of the pen to measure how much I would need.
Then I cut the fabric, ironed it and began to sew it.
{You kind of have to pleat the bottom of the packet since the fabric will not sit flat}
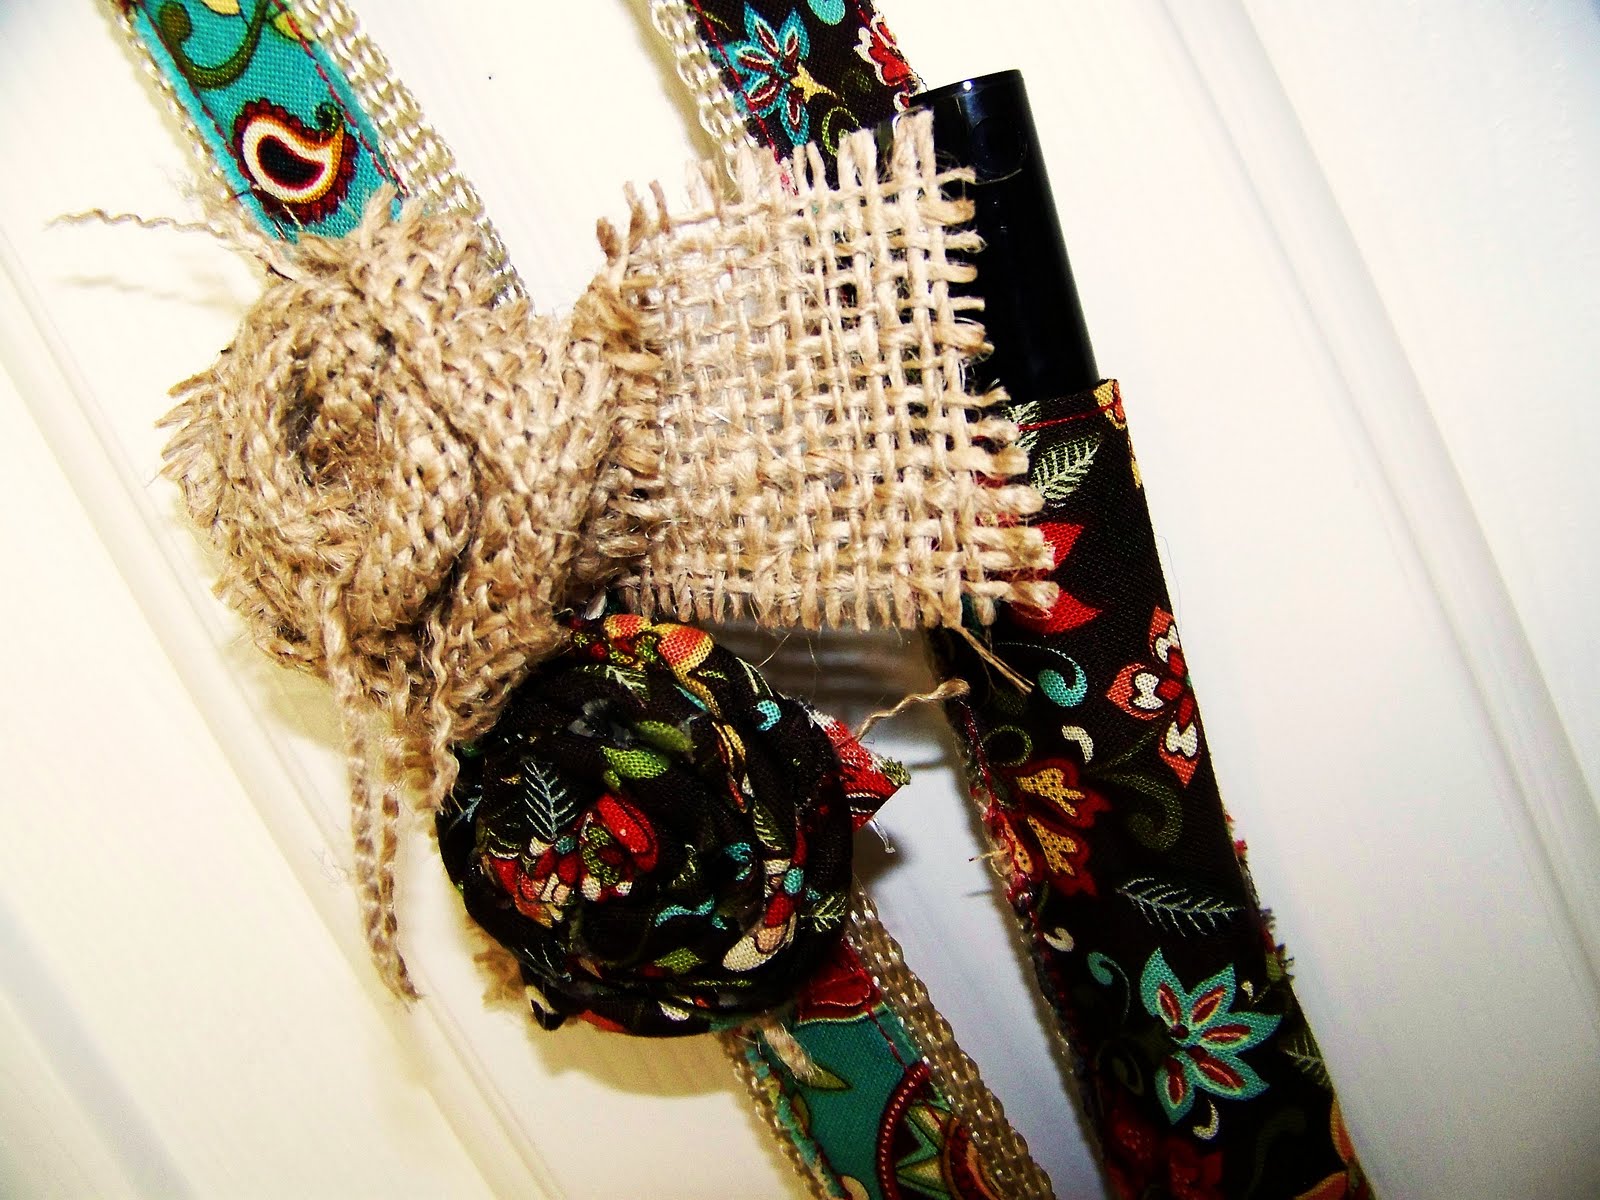
Here is a picture…

Well… at this point I was almost done…
Next thing was to sew the ends of the lanyard together
and make the loopwhere the key ring was going to be,
Next thing was to sew the ends of the lanyard together
and make the loopwhere the key ring was going to be,

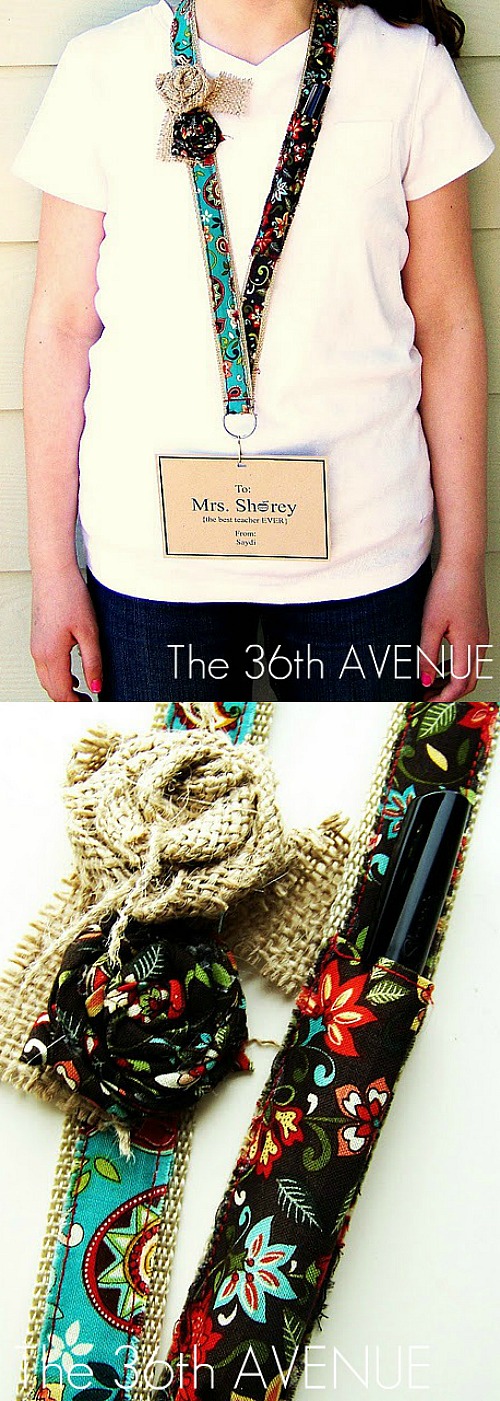
And then, in front of me there it was…
“The Last Day of School Gift”
for my children’s wonderful teachers…
and the new and improved key-holder for mama.


Here is how it looks while hanging…
-keep in mind these things while looking at the picture-
Because my sweet volunteer daughter is ten,
I had to tuck part of the lanyard behind her
{ so it wouldn’t hang too low}
So actually the embelishments hang lower on an adult.

That’s it…!
Now I better go and finish the other two.
I party at…


STOP: Before you go check all the other amazing
Link Parties on my Party page
where I visited and linked up as well.
Thanks and GO PARTY!

Love this idea! I break my badge lanyard for work at least once a year and am always looking for something less generic than the ones available at the company store.
I know I’m late to the party, but many workplaces require badge holders that go around the neck to have breakaways in case someone attempts to hold or strangle the person with it. Anyone got a crafty idea for making a breakaway that can easily be put back together if someone snatches your badge off?
Velcro!
This is a super super cute idea. I jsut have one question… Did the burlap on the back side rub or itch? I love burlap but I would be afraid that it would irritate the skin. Thanks for all your awesome ideas!
The back is not burlap is a tan lanyard… I hope it helps!
oh I see now! Thanks! I just love this idea! It is adorable
That is a fantastic idea!!
Thank you so much for linking this up to {nifty thrifty sunday} as well!
Hugs,
Vanessa
That is a fantastic idea!!
Thank you so much for linking this up to {nifty thrifty sunday} as well!
Hugs,
Vanessa
very cute
very cute