

It is pretty amazing to me what a little bit of paint,
creativity and thinking outside of the box can do for you…

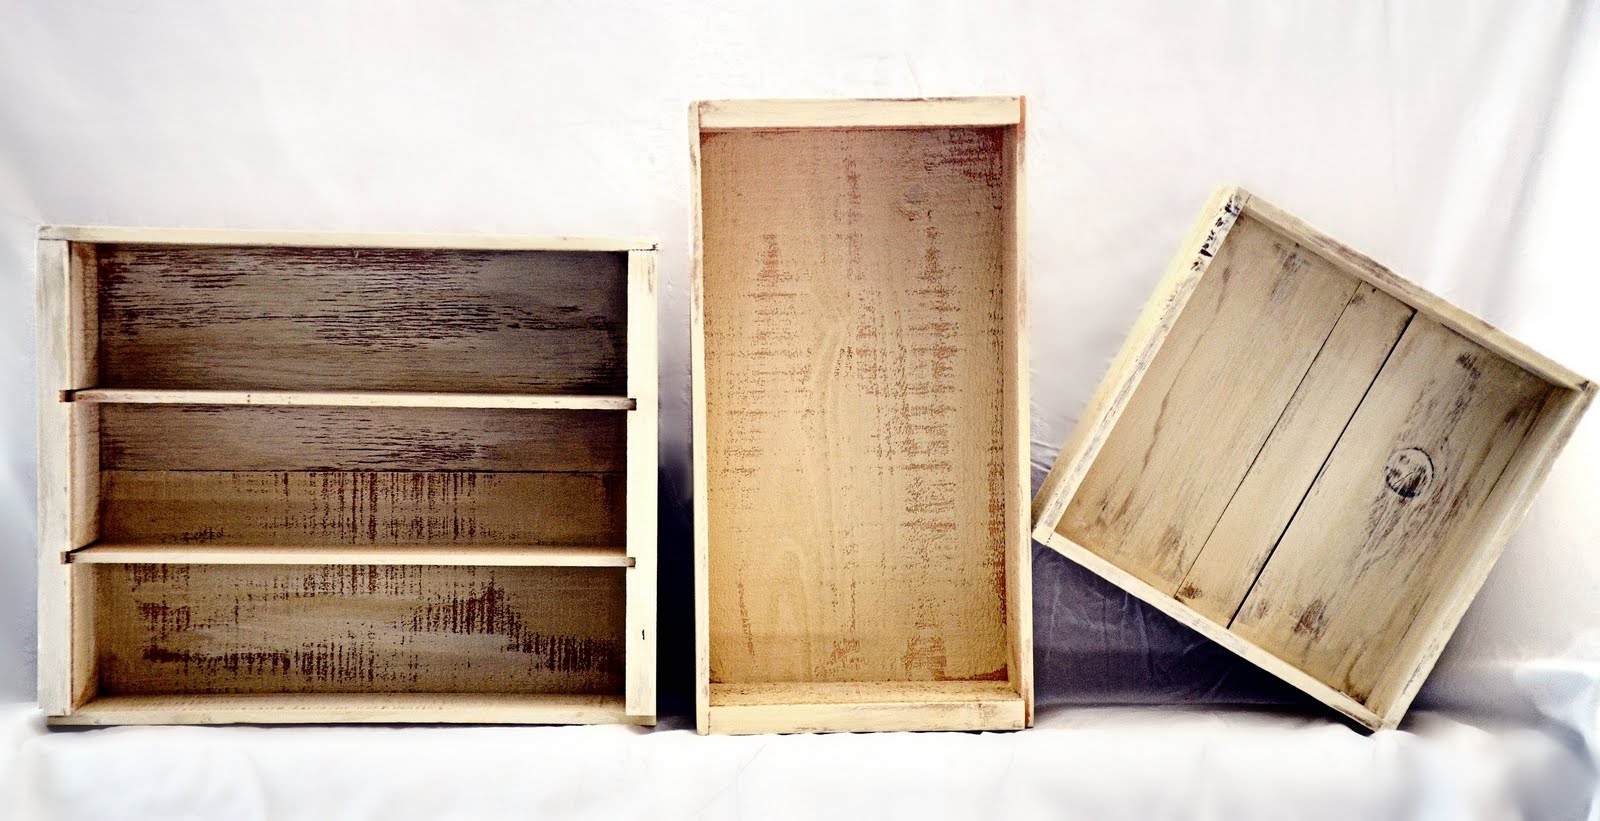
and sanded to let the wood come through the paint.
Looking better already…
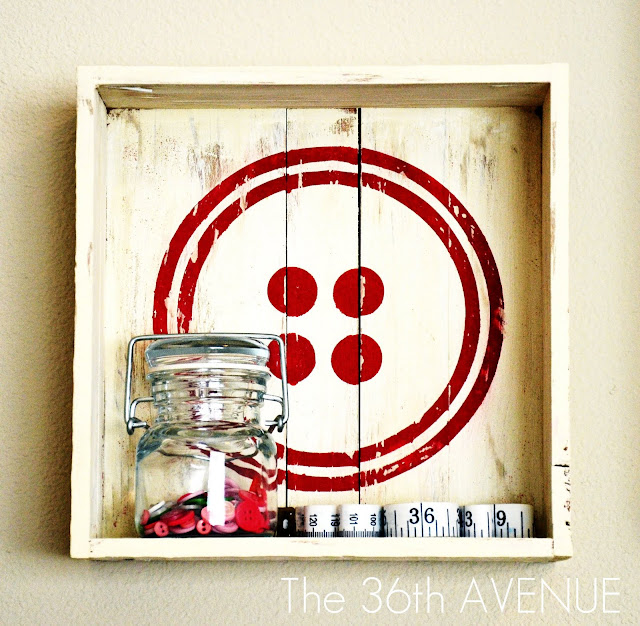
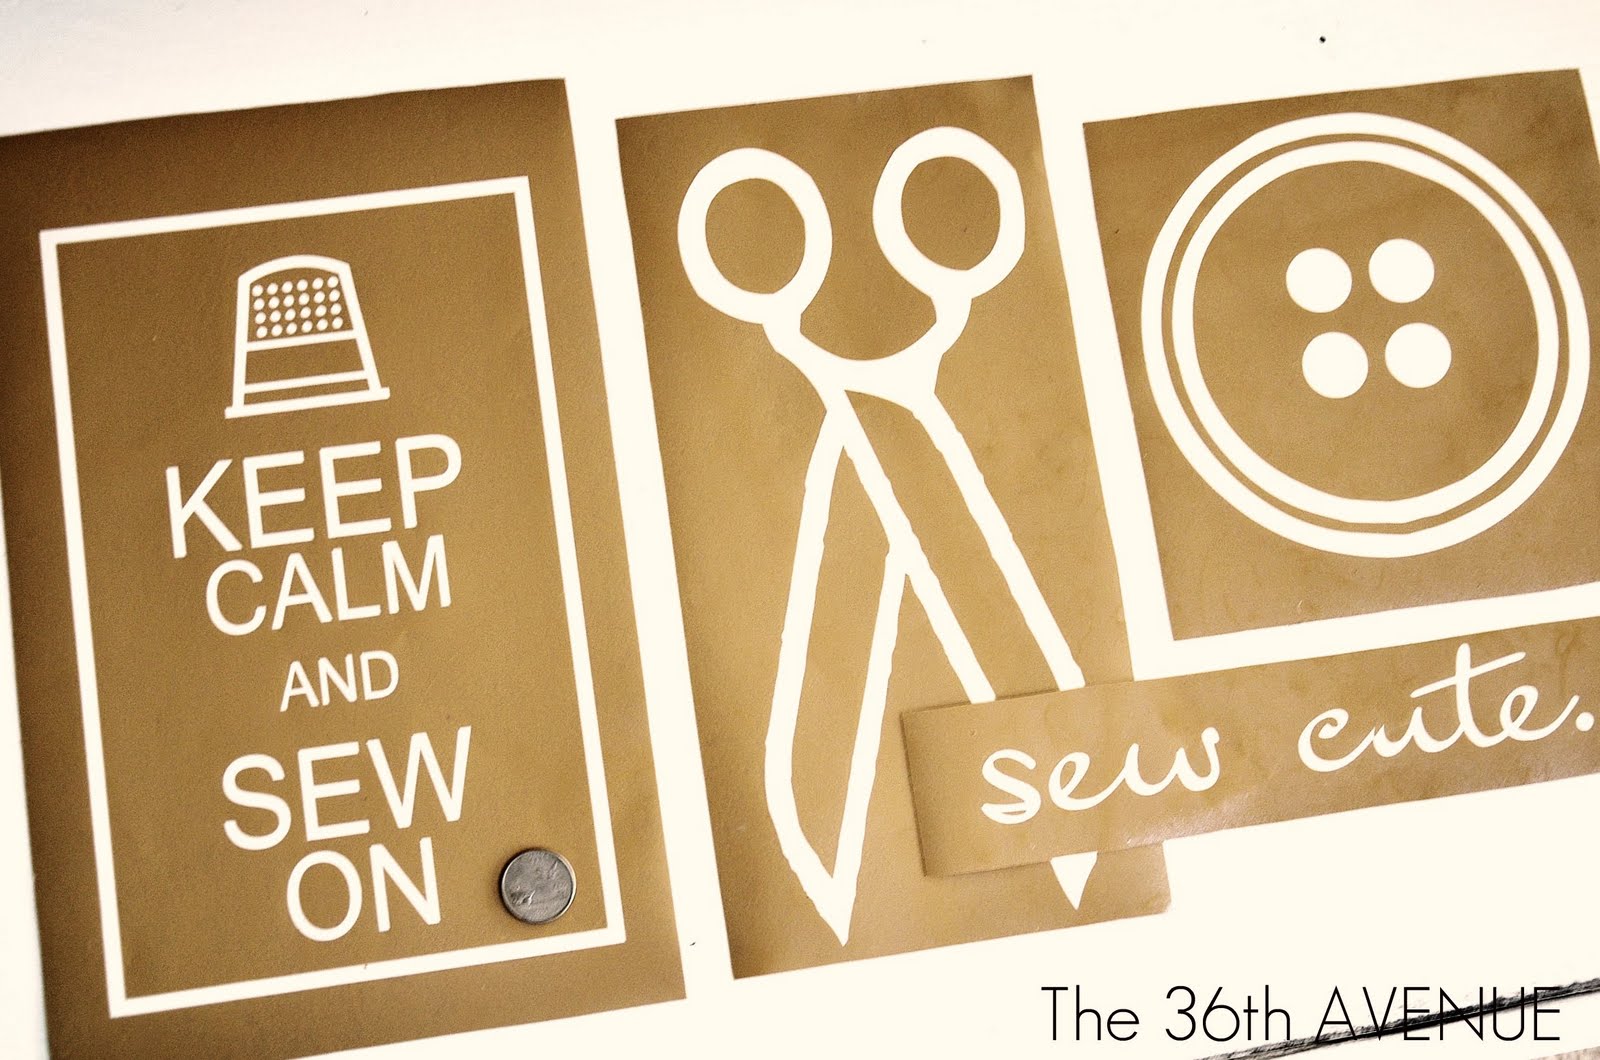
I want my project to have a touch of “whimsical-vintagesh” feeling
so I designed and made some vinyl stencils to accomplish that.
I applied them, painted the images in red and peeled it off….
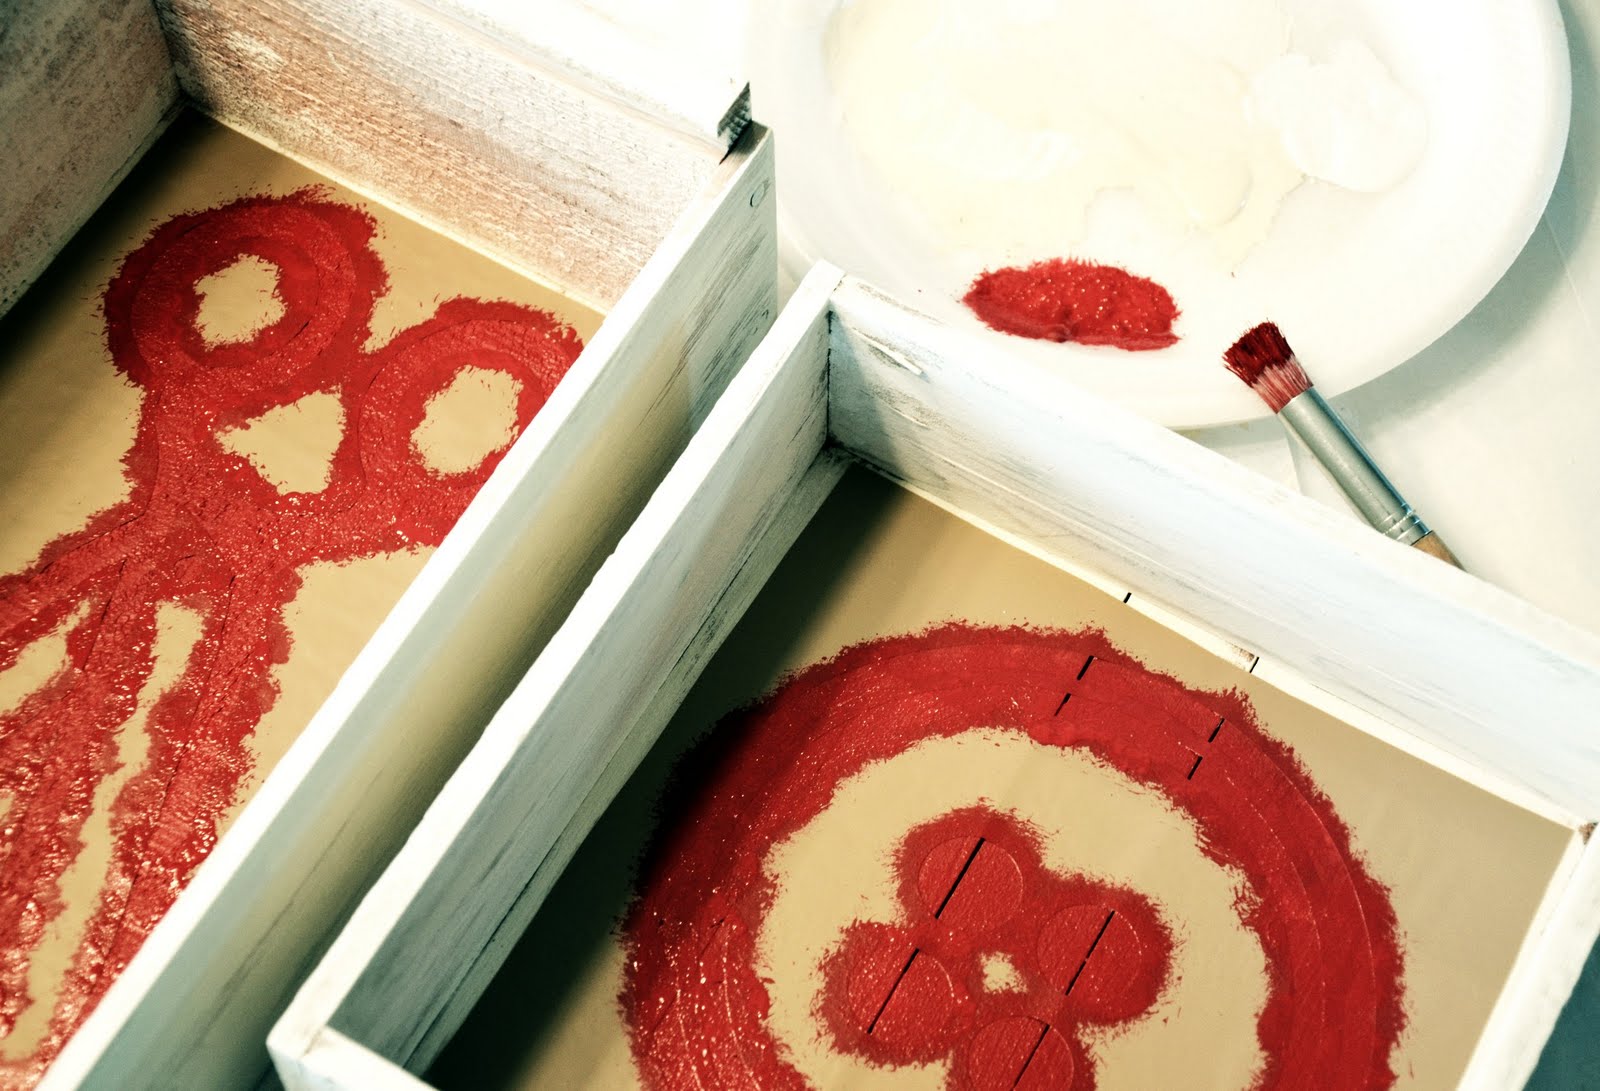
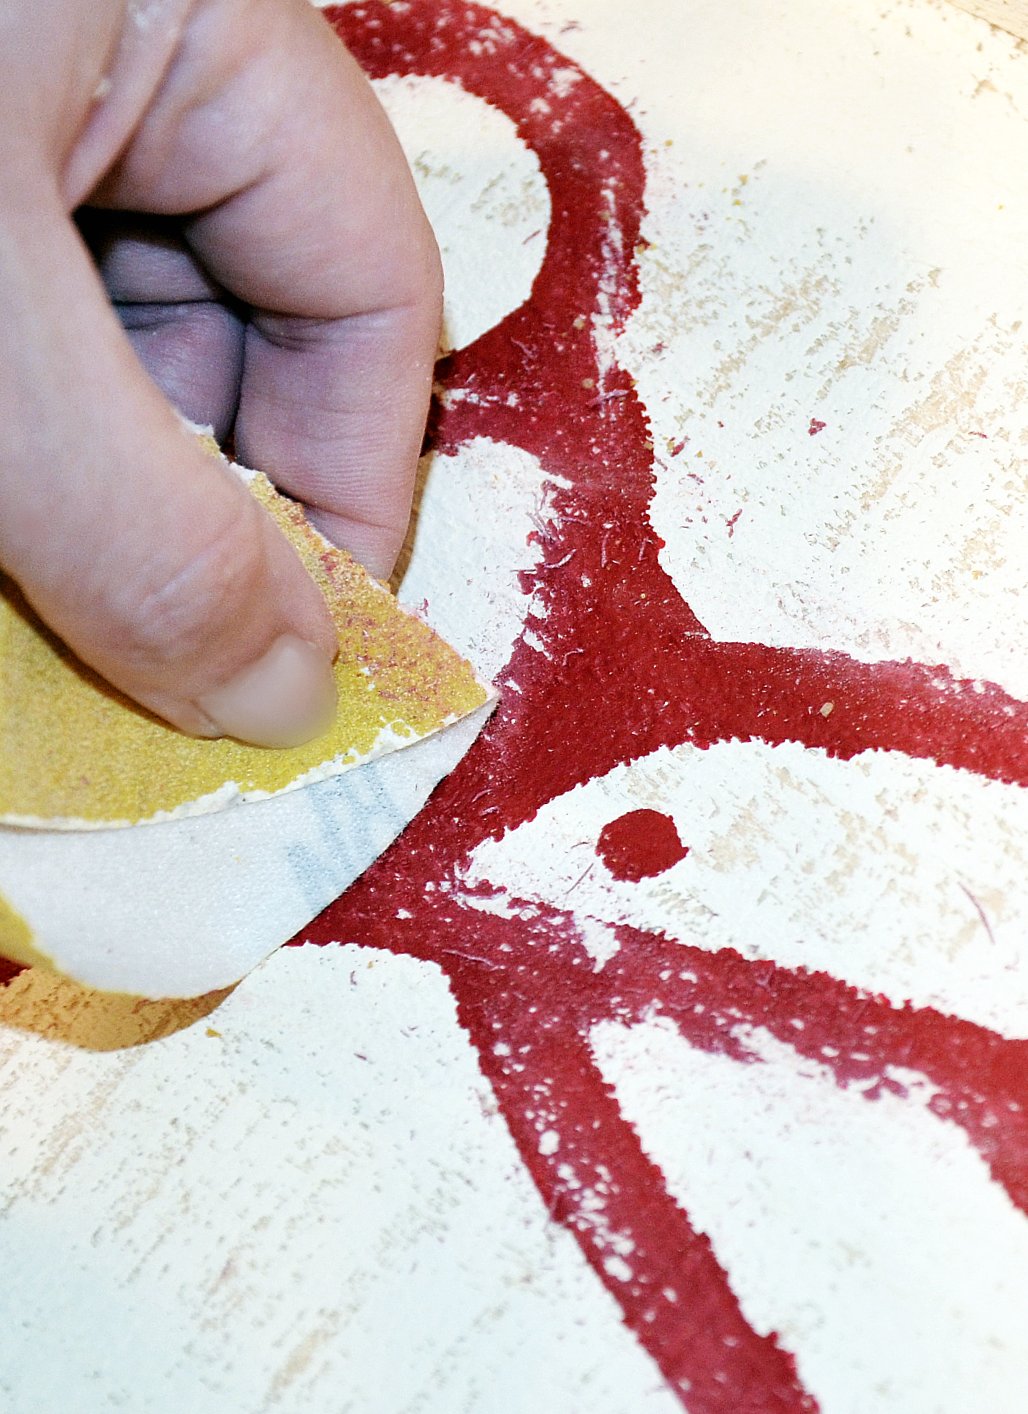
One of the things that I love about using vinyl as a stencil instead of regular vinyl
is that you can antique whatever you do with it. So my next step was to sand the button and scissor.
but in the mean time you can take a look of what I did with the larger lid.
Here is a mini tutorial:
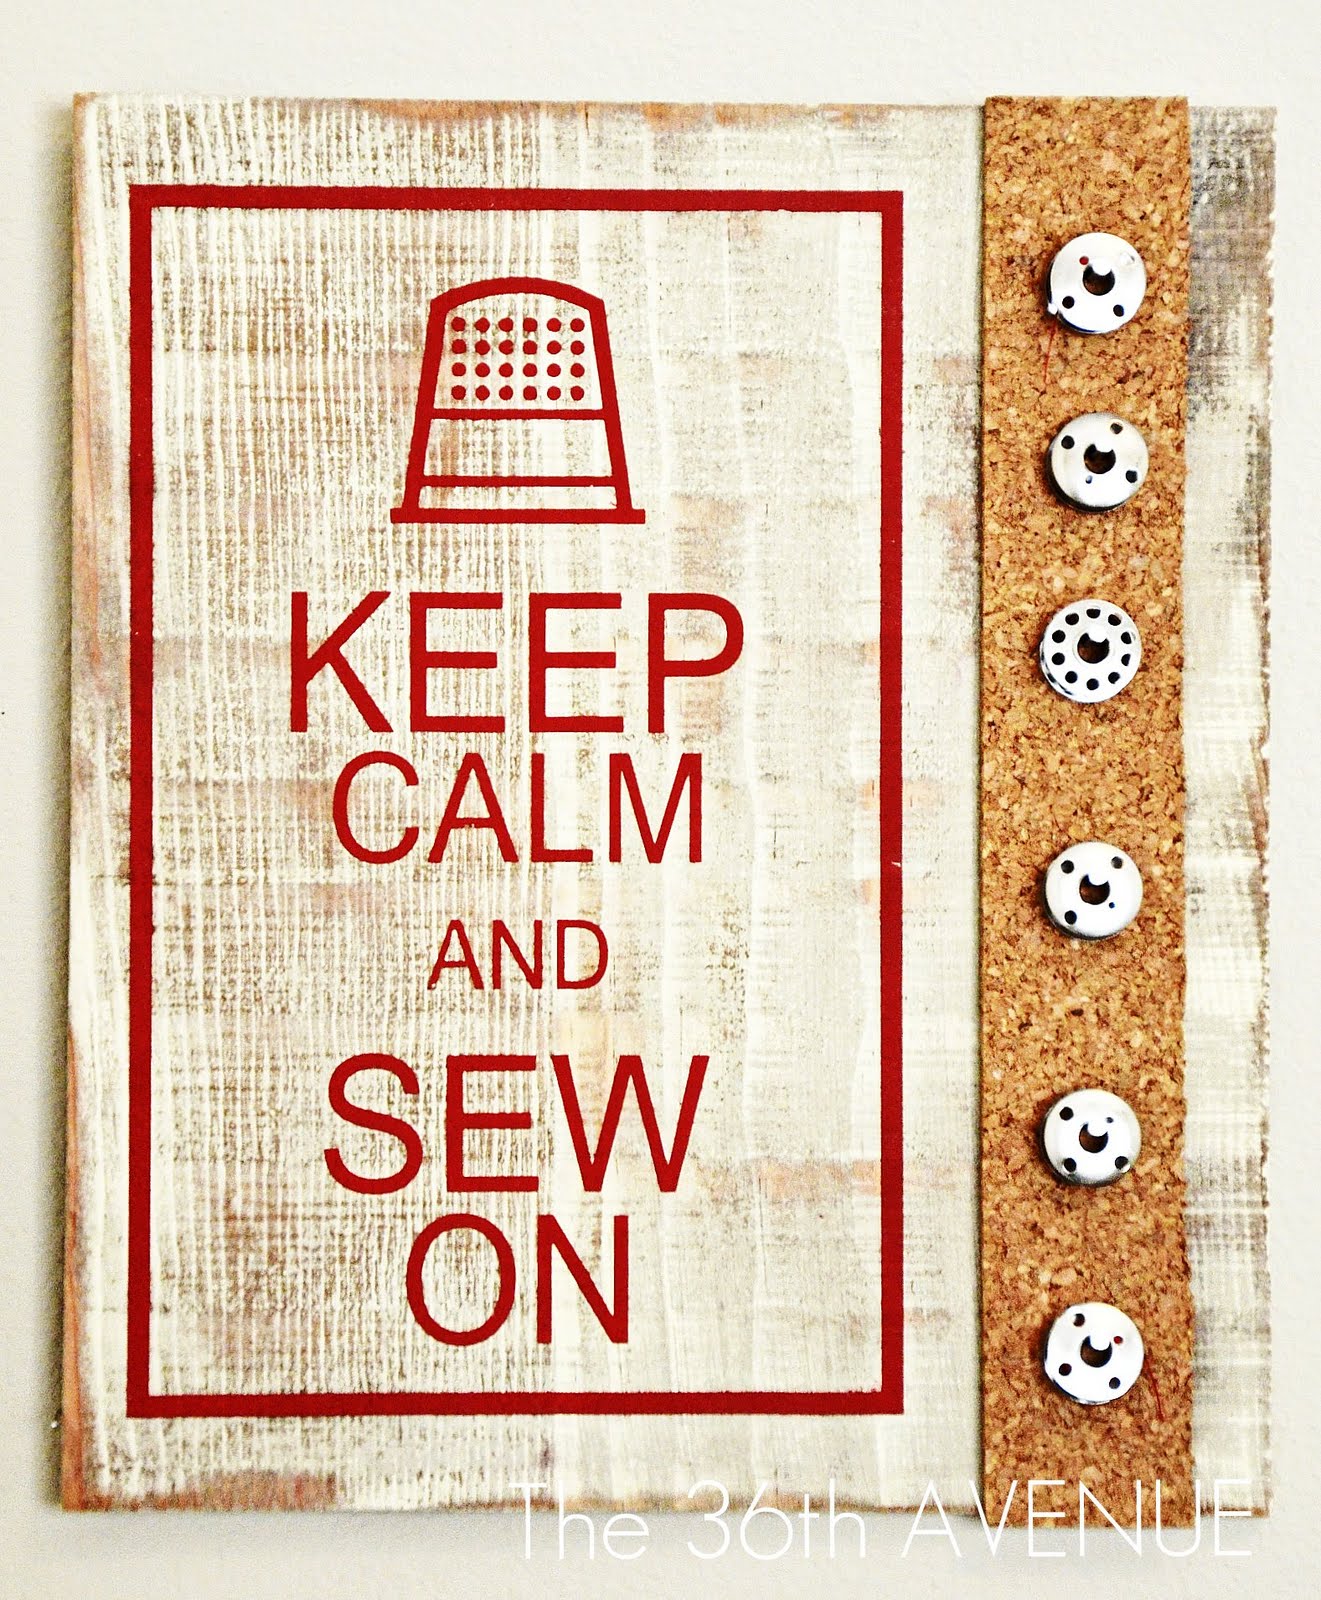
sanded, refinished it, stenciled it and painted, added some cork board, and a little hanger in the back…

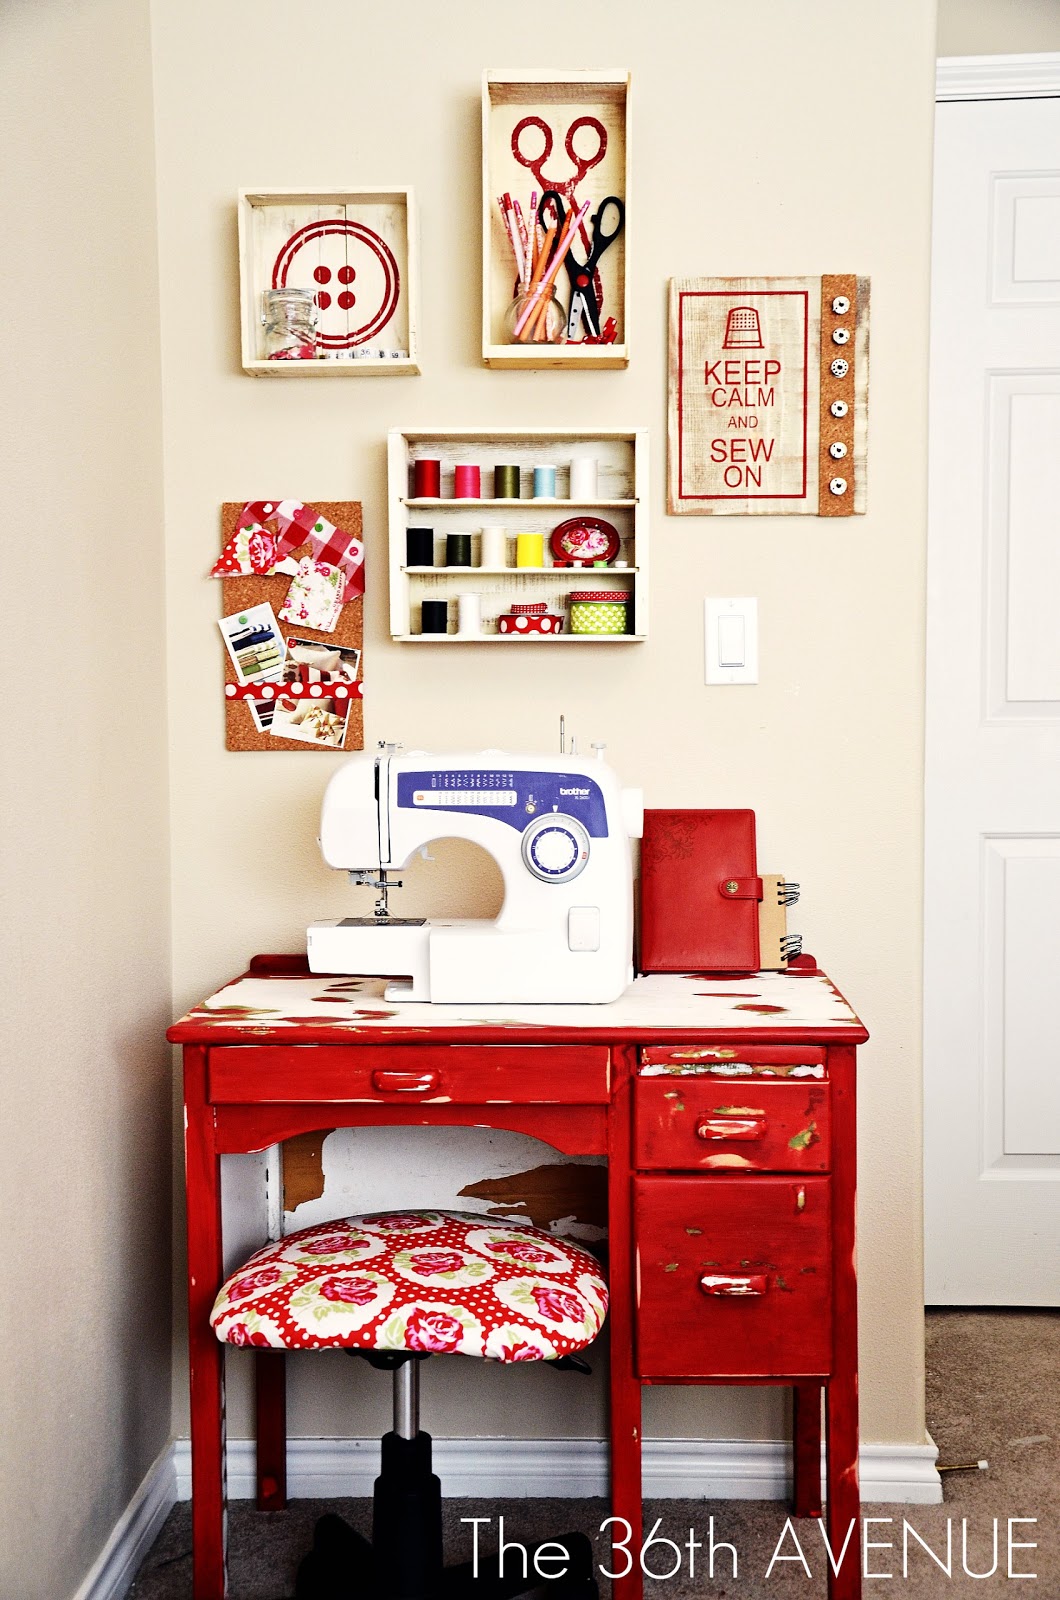
So are you ready to see my little corner now
all dressed up and accessorized?
Here it is…
{…if you are wondering about the redlicious desk and the chair… well let’s say those two have an EXTRAORDINARY moment of their own. ;)}
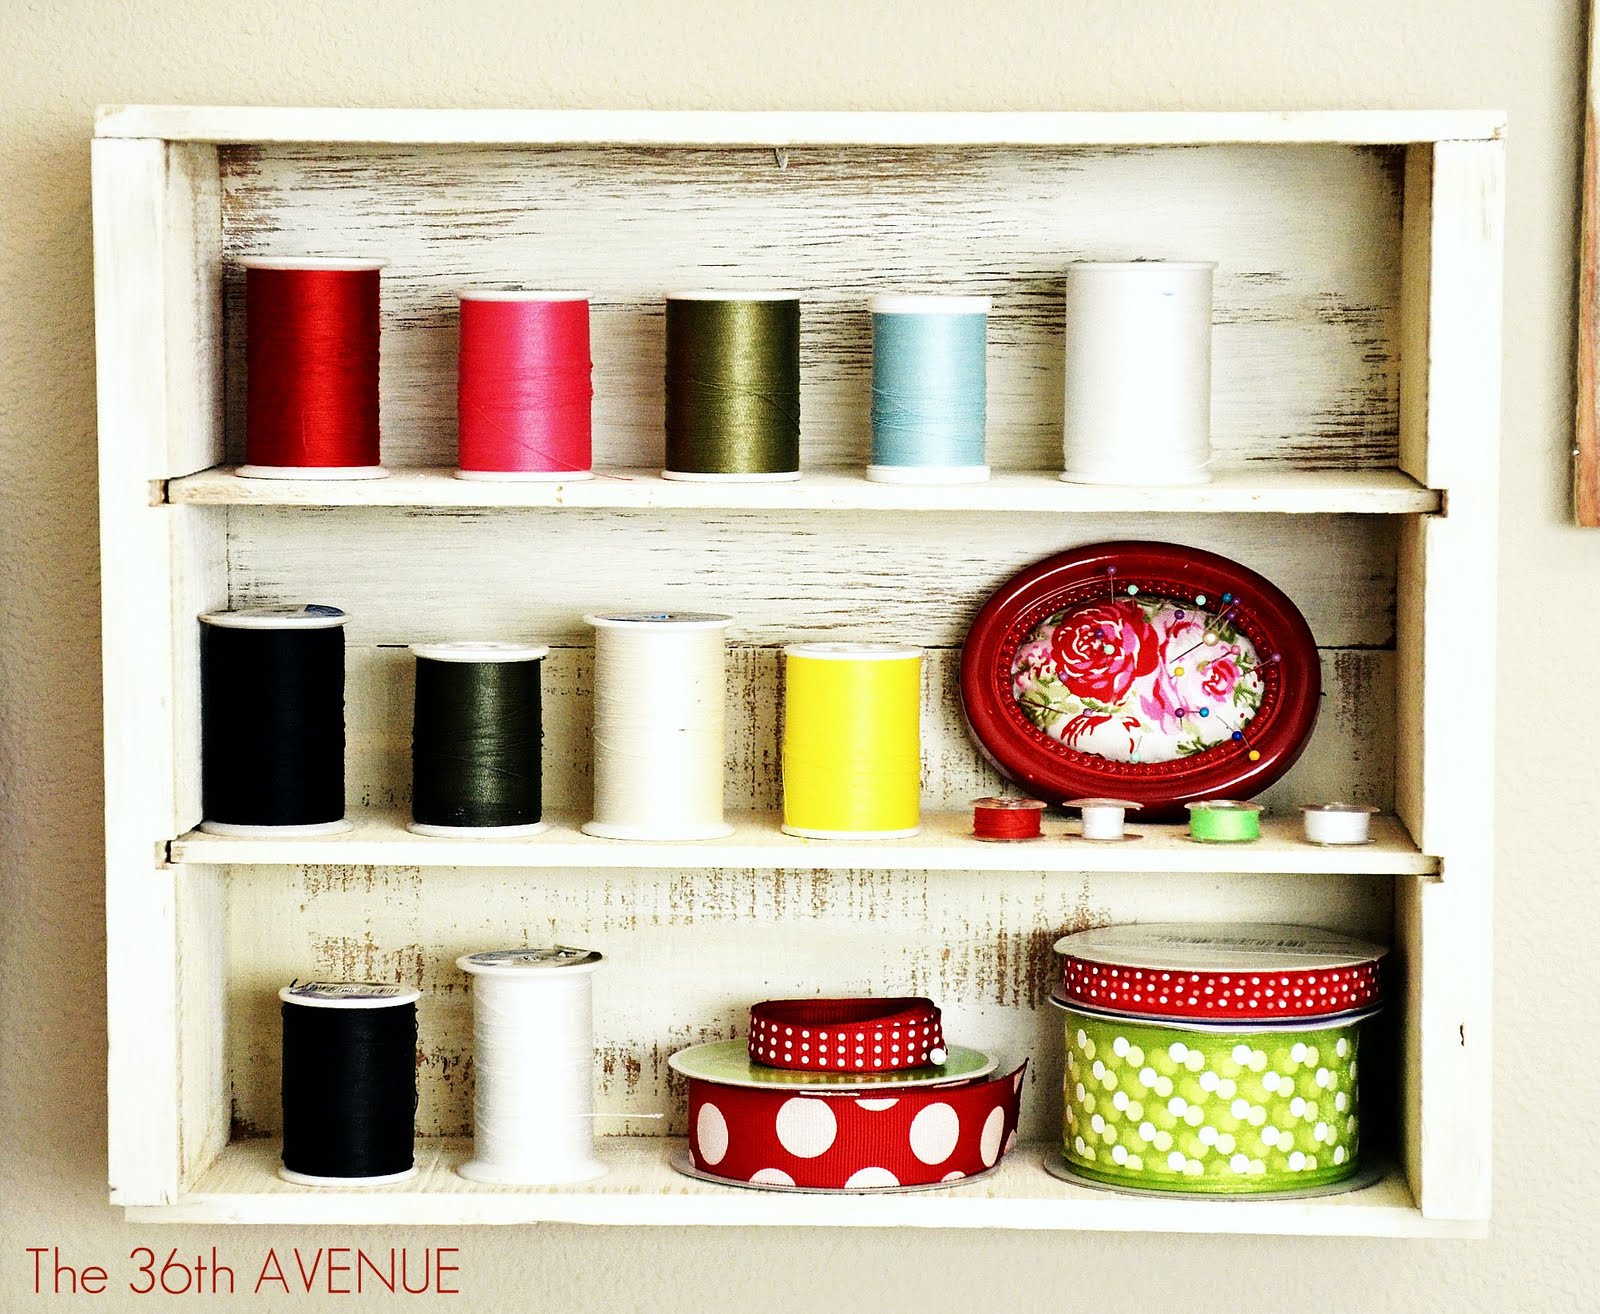
Take a closer look…Box One , I mean Shelf ONE: The thread holder…


made my new sewing corner…

…from ordinary to EXTRAORDINARY!
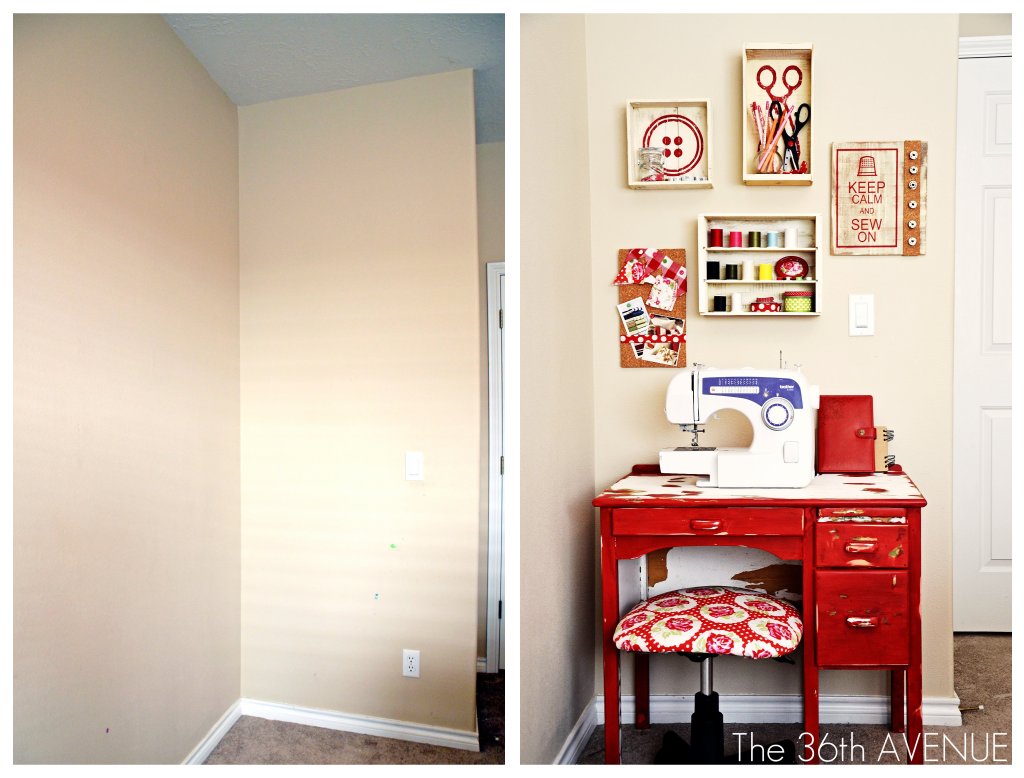
So next time you go to the Thrift Store think outside of the box…
and you’ll see what amazing things you come up with.
~ THIS POST WAS ORIGINALLY POSTED ON U-CREATE ~
{GIVEAWAY}
Yes, I am giving away 3 NEW SETS of my Vinyl Stencil Collection: …Sew Cute!
{click HERE for more details and enter to win}


so sweet
do you sell these stencils? i would really love the one with the thimble
Susan,
I don’t sell the stencils anymore… Thank you so much for stopping by!
Rebeca,
Amei seu cantinho de costura, muito inspirador!
Parabéns!
beijos
Paty
Muchisimas gracias Patricia!
Besos para ti tambien 😉