
Hello 36th Avenue readers!
My name is Angelina and you can find me blogging over at Ruby Jean’s.

I LOVE everything from Crafting, Sewing, Diy projects, Antiquing and trying out new recipes is always fun.
I am so VERY thrilled to be here today and I look forward to sharing some fun tutorials with you in the future.
Today I will be sharing with you a….

The fabrics that I chose for this particular apron are Satin Polyester Blends.
You really could use just about any fabric for this project.
I went with Holiday themed colors, the brown is the one you will see in today’s tutorial. I have plans on making a Winter Apron with the Red.

Draw out a basic Apron shape pattern ( according to your size need or preference ).
Cut out pattern and place on top of your fabric.

Because the main body of your apron is going to be gathered, you DON’T want to cut it to exact size.
Instead cut it Longer and a bit wider then your apron pattern, as you can see in the bottom Left photo.
Gather the sides.

With your contrasting fabric, cut two strips. I cut mine at 5 inches wide and folded and pressed in half, then ruffled the outside edge.

Using my Pattern piece I cut one piece of cotton fabric in the Exact shape of the pattern.
I placed that on top of my gathered pieced (right sides together), then began to pin my Brown Ruffled strip in between the two apron pieces.

Continue pinning all around and then trim off the excess.

Stitch around your apron, leaving the top open for turning.

Top Apron Band:
I cut two strips 4inches wide and 1.5 inches longer than my my Apron width ( for turning under ).
Placing ride sides together stitch top edge ( seen below with white thread ).
Turn and press top edge and turn bottom edges under and press.
You will be sandwiching your apron in between the Apron Band.

Center your Apron in between your Band Strip and Pin in place.

Apron Strings:
I cut two strips 3 inches wide. (I left mine raw edged).
At the ends of the Apron band turn under your open edges and place your Apron Strings inside and Pin.
Stitch in place.

And there you have it.
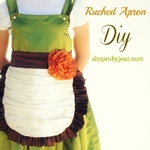
Your very own Ruched Apron.


These Aprons would also make a great gift for the hostess of that Holiday party you we will be attending.


This is also an Apron that can certainly be dressed up as well as given a more casual look if using Cottons.
And of course adding a Flower always gives it that added Special touch.


Since we all LOVE little bonuses, I thought I would share how I made the Fall Leaf Hair Clip.

I bought a package of Fall Leaves from Joann’s.

I Layered about 8 leaves and using a threaded needle I stitched 6 stitches ( being sure to catch all the leaves ).

Using my hot glue gun I glued an alligator hair clip to the back of my leaves.

Very Simple and Pretty all at the same time.

I do hope you enjoyed these tutorials and I also hope that this Fall Season be blessed, for
You and Yours.

Thank you again Desiree for allowing me to be a part of The 36th Avenue team,
I continue to enjoy my time spent here.
Blessings,
Angelina
Oh I LOVE her!
Make sure to visit Ruby Jean’s and check out Angelina’s
Mason Jar Pin Cushion Tutorial.

And don’t miss her adorable Apple Bag Tutorial.

Also follow Ruby Jean’s on Facebook, Twitter, and Pinterest.
You are going to love Angelina’s work.
Thank you so much for visiting with us!
Besos.
Desirée

This apron is beautiful! I found you on Pinterest and have included this apron in a round-up on my blog. Check it out: http://hotcommodityhome.blog.com/2013/04/17/diy-apron-round-up/
I love the apron and the hair clip! they would make a nice Sister Fall costume!
This is gorgeous!!
This is gorgeous Angelina!! you are one talented lady. 🙂
SO Gorgeous and easy ! I think I could even do it!! 😀