
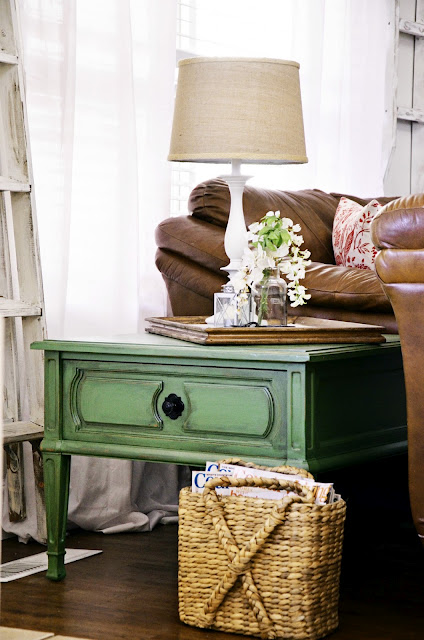
I love green and I love beautiful and easy furniture makeovers. Today I am going to share how to antique your furniture using paint, stain and wax. You are going to see how easy it is to give your old furniture a new look. Here is it our Greenlicious End table Tutorial.
Please do NOT copy and paste this image. ©The36thAvenue
The weather has not helped with my kitchen makeover. I hate being cold so my visits to the garage to continue painting my cabinets have slowed down dramatically this week. However yesterday I worked on some of the accessories for our kitchen, until this point I have showed you all the neutrals but today I am sharing with you my accent color: GREEN.

The inspiration behind it came from this awesome 7-up crate that I found at my favorite local store. Almost every Thursday my sweet friend Wanda Ann and I go visit there and look for little treasures. { I love you girl! } As soon as I saw these 1950 bottles and crate my heart stopped. I knew this was it!

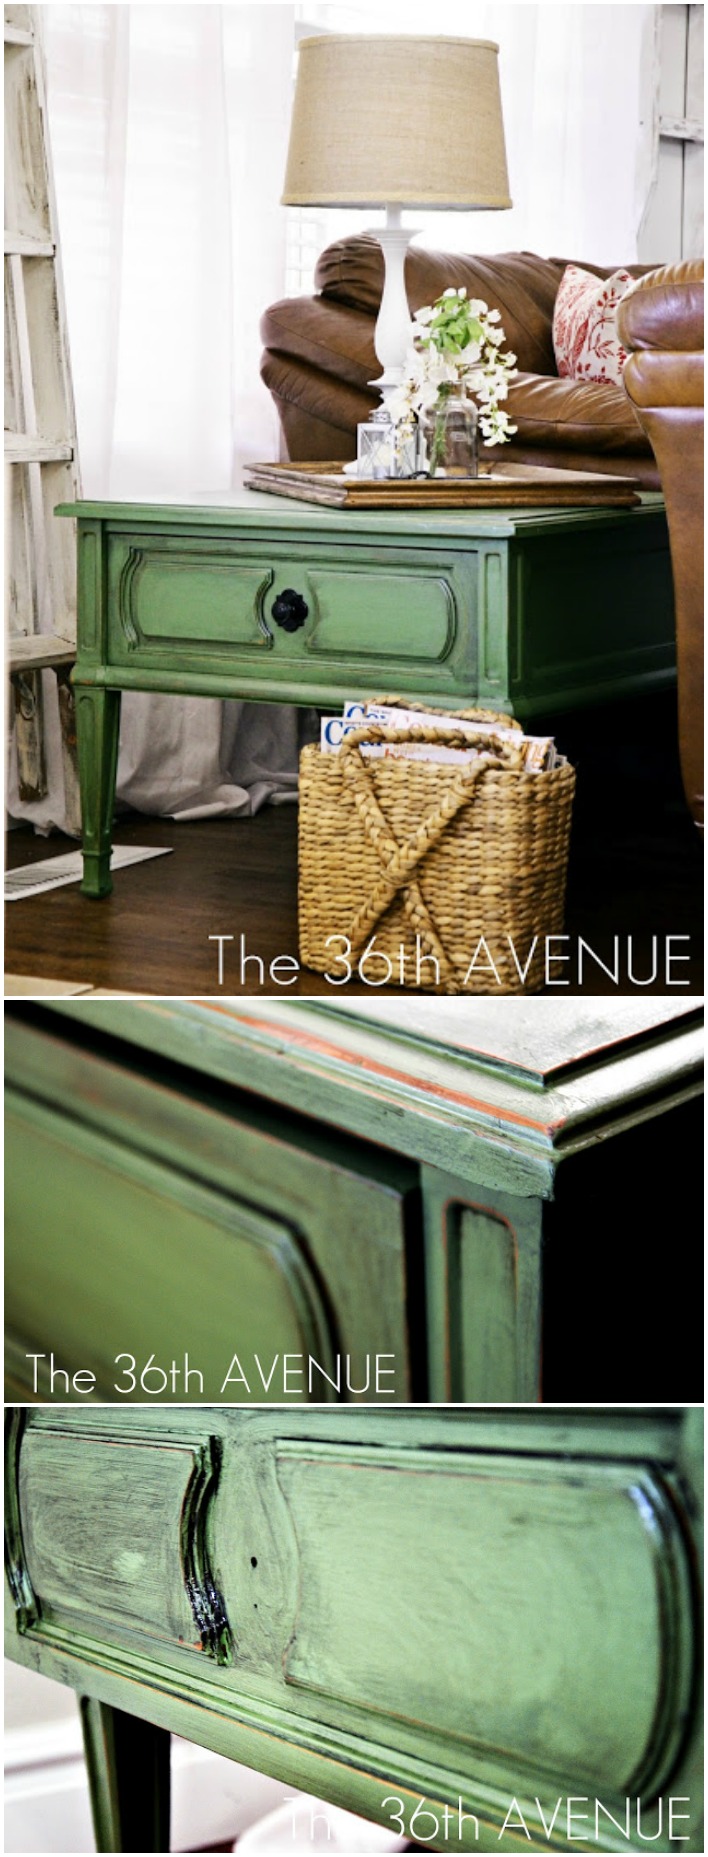
My kitchen is connected to an open family room, so it is like one BIG space. This is the accent piece that brings both areas together: my new old greenlicious end-table.
I am in love!

I had this table forever. I bought it years ago for $5.00…
SHUT the FRONT DOOR!
The poor thing has been abused since that day. This is how it used to look.
So SAD!

TUTORIAL
The materials you should use for painting furniture will depend on the type of finish and style that you want your furniture to have. I knew I was going to distress this piece so a good brush and a regular dollar store roller was good enough.
1
Clean It UP!
Don’t skip the prep work… it is as important as the painting part.
2
Start Painting!
I like to use the roller for the larger areas and the brush for the legs and the hard to reach places.

I used Olympic One paint for this project.

I LOVE that this paint has the primer included.
I came up with my own color but I found for you an almost identical one made by Valspar.
The name is: Cliveden Pasture 6001-6C

Check out also Woodlawn Promised Land 5007-6C by Valspar.
This last one is a little deeper but still gorgeous.
3
Sand and antique.

How much you sand is up to you and your taste.
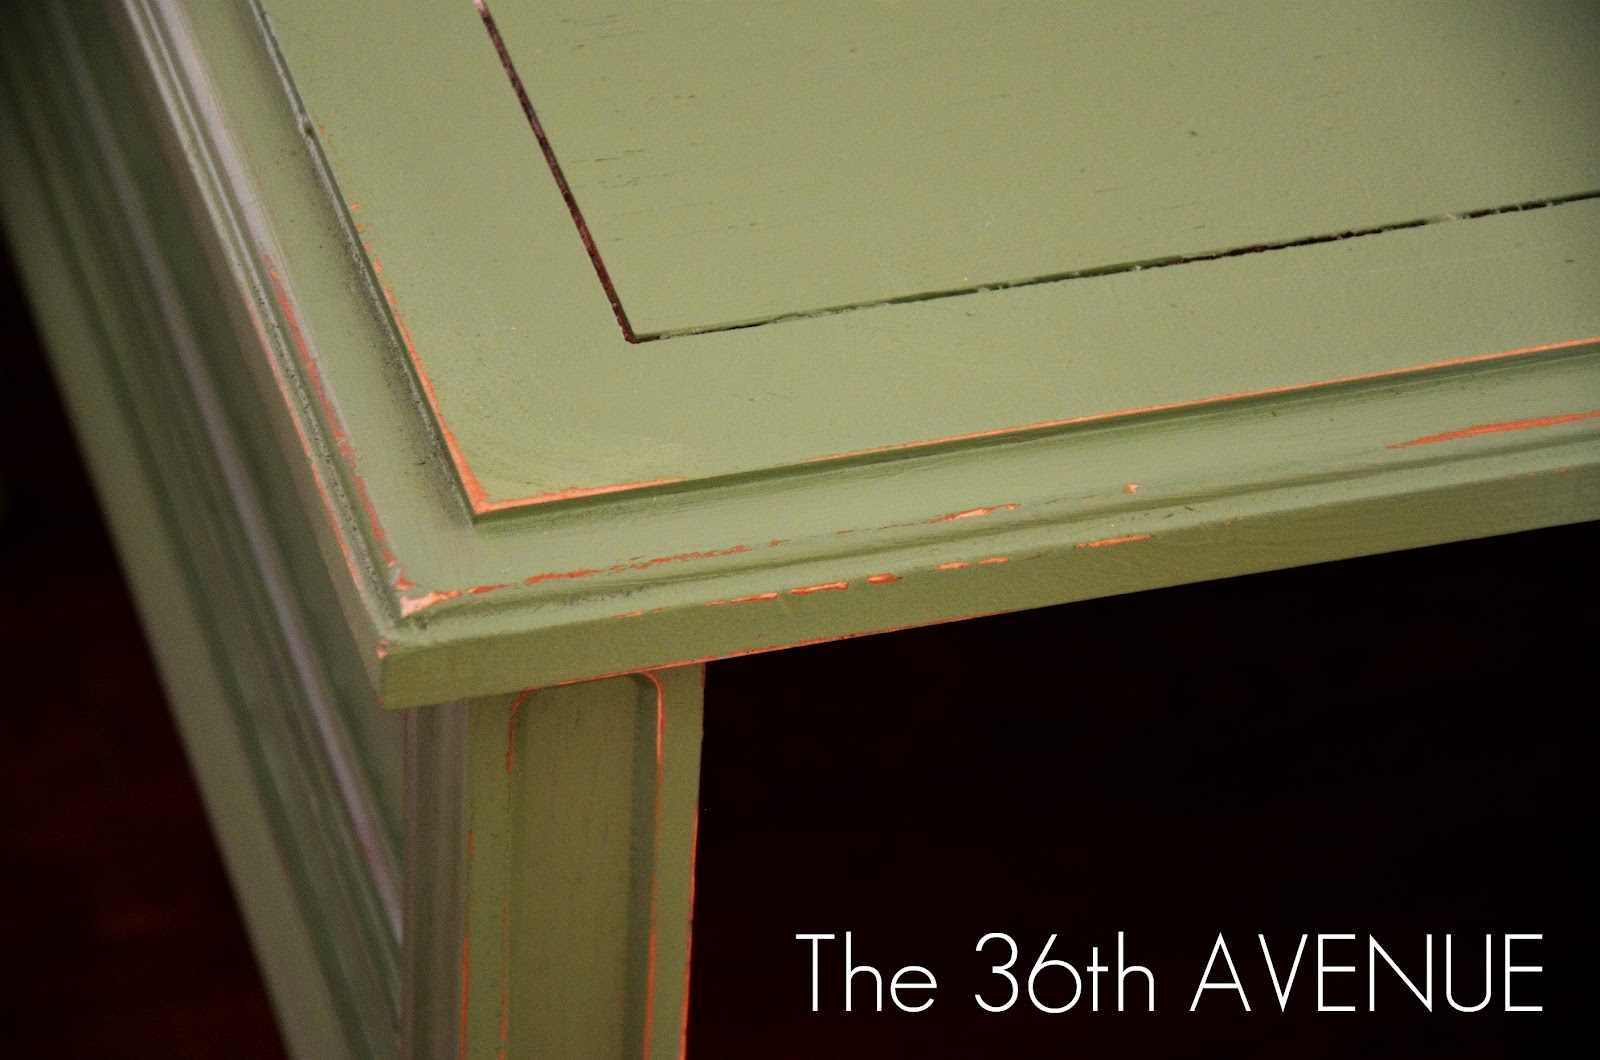
After the sanding was done I used Valspar Antiquing Glaze and with a rag I cover the table with it.

To finish with a damp cloth I removed part of the glaze until it looked pefect to me.

That was it!
Then I dressed our little table up and even Mimi changed her mind…
She doesn’t think that it looks like “poopie green” anymore 😉
What do you think?
Love it!
Here are some other home decor ideas that I love!
DIY Farmhouse Home Decor – Click HERE

How to Paint Laminated – Wood Veneer Furniture – Click HERE

Besos!
Desirée.

$5.00 what a bargain.Of couse you had to work/play with it .Great job.
Love that table!!! I have to give credit where credit is due…you have great pictures. All the pictures through your tutorials are really pretty. I always make sure my first and last are good, but the middle….well, it’s less than beautiful at times. Just letting you know your post is my inspiration to post beautiful pictures through the whole post! (even your paint brush pictures is pretty!)
Nice work!
–Katie
@ Creatively Living
Thank you Katie!
I think it looks fabulous! That picture looks like it’s out of a magazine–great job, I’m super jealous.
Love your green table!!! Awesome transformation…Happy Friday!
Lina @ Fancy Frugal LIfe
I love it! I have an old dresser in my living room that I’ve been waiting to paint because I just wasn’t sure what to do with it. I think your tutorial has giving me the inspiration I need! Thanks. 🙂
Anna
http://www.askannamoseley.com
Anna,
I can’t wait to see it!
ONE WORD- “LOVE”
Thank you my love!
Gorgeous! I LOVE how it turned out!!
Thank you Jamielyn,
Have a great weekend!
Love, love this! Beautiful transformation.
Thank you Kari!
Have a wonderful weekend my friend!
Love you tons!
Absolutely beautiful!! Gorgeous color, and an amazing finish!
oh, desiree…that table is wonderful! love the green!!!!
Maggie,
How are you?
Thank you for visiting my love!