

We love just about everything from crafts and recipes to style and history. Words cannot describe how excited we are to be guest blogging on Thirty-Sixth Avenue today! To be part of a blog that is so adorable, fun, inspiring, and uplifting is such a treat for us! We have a craft for you today that we hope you’ll enjoy! So grab your fabric scraps and some extra large popsicle sticks and come craft with us!
Did you see our cute fabric flower tutorial?
Well, check it out if you don’t know how to do them because you are gonna want to use them for this next project!
FABRIC FLOWER WOODEN STICK BRACELETS!
That’s a mouth full! Here’s what you need:
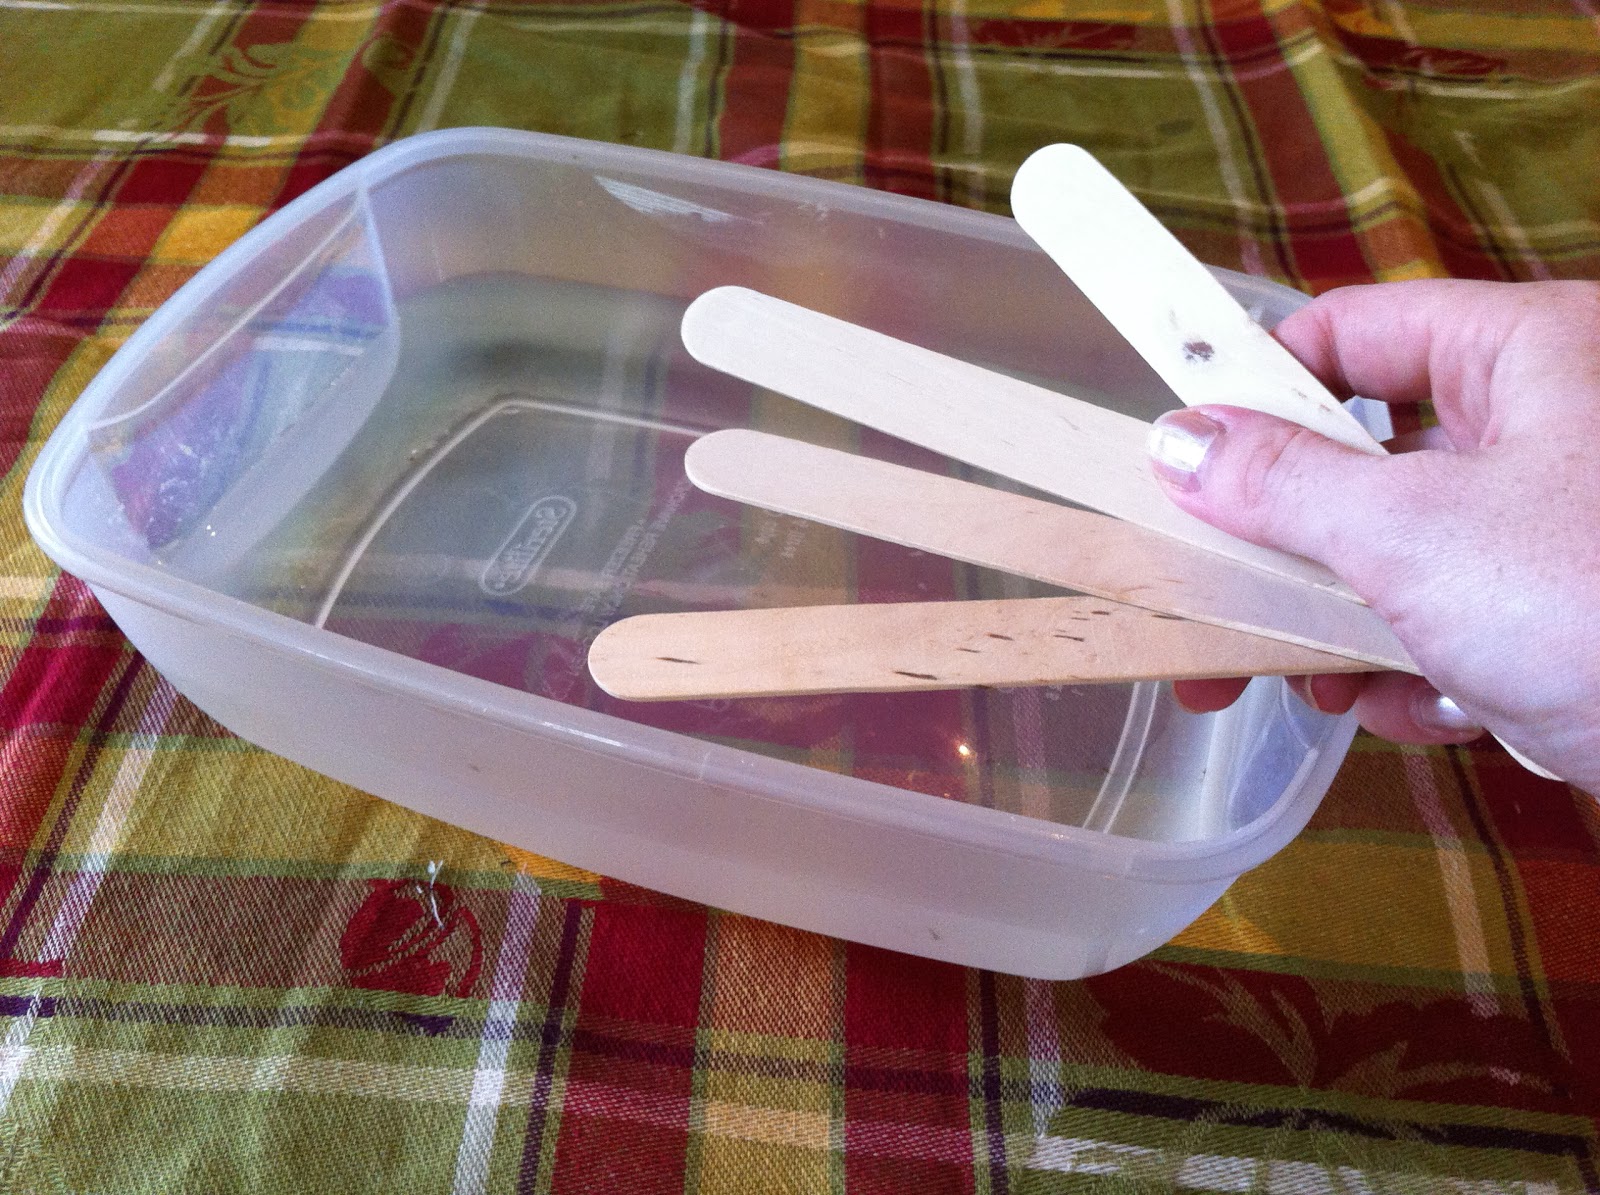
– Flat wooden sticks (ya, the HUGE kind the doctor uses to shove down your throat)
– Bowl of hot water
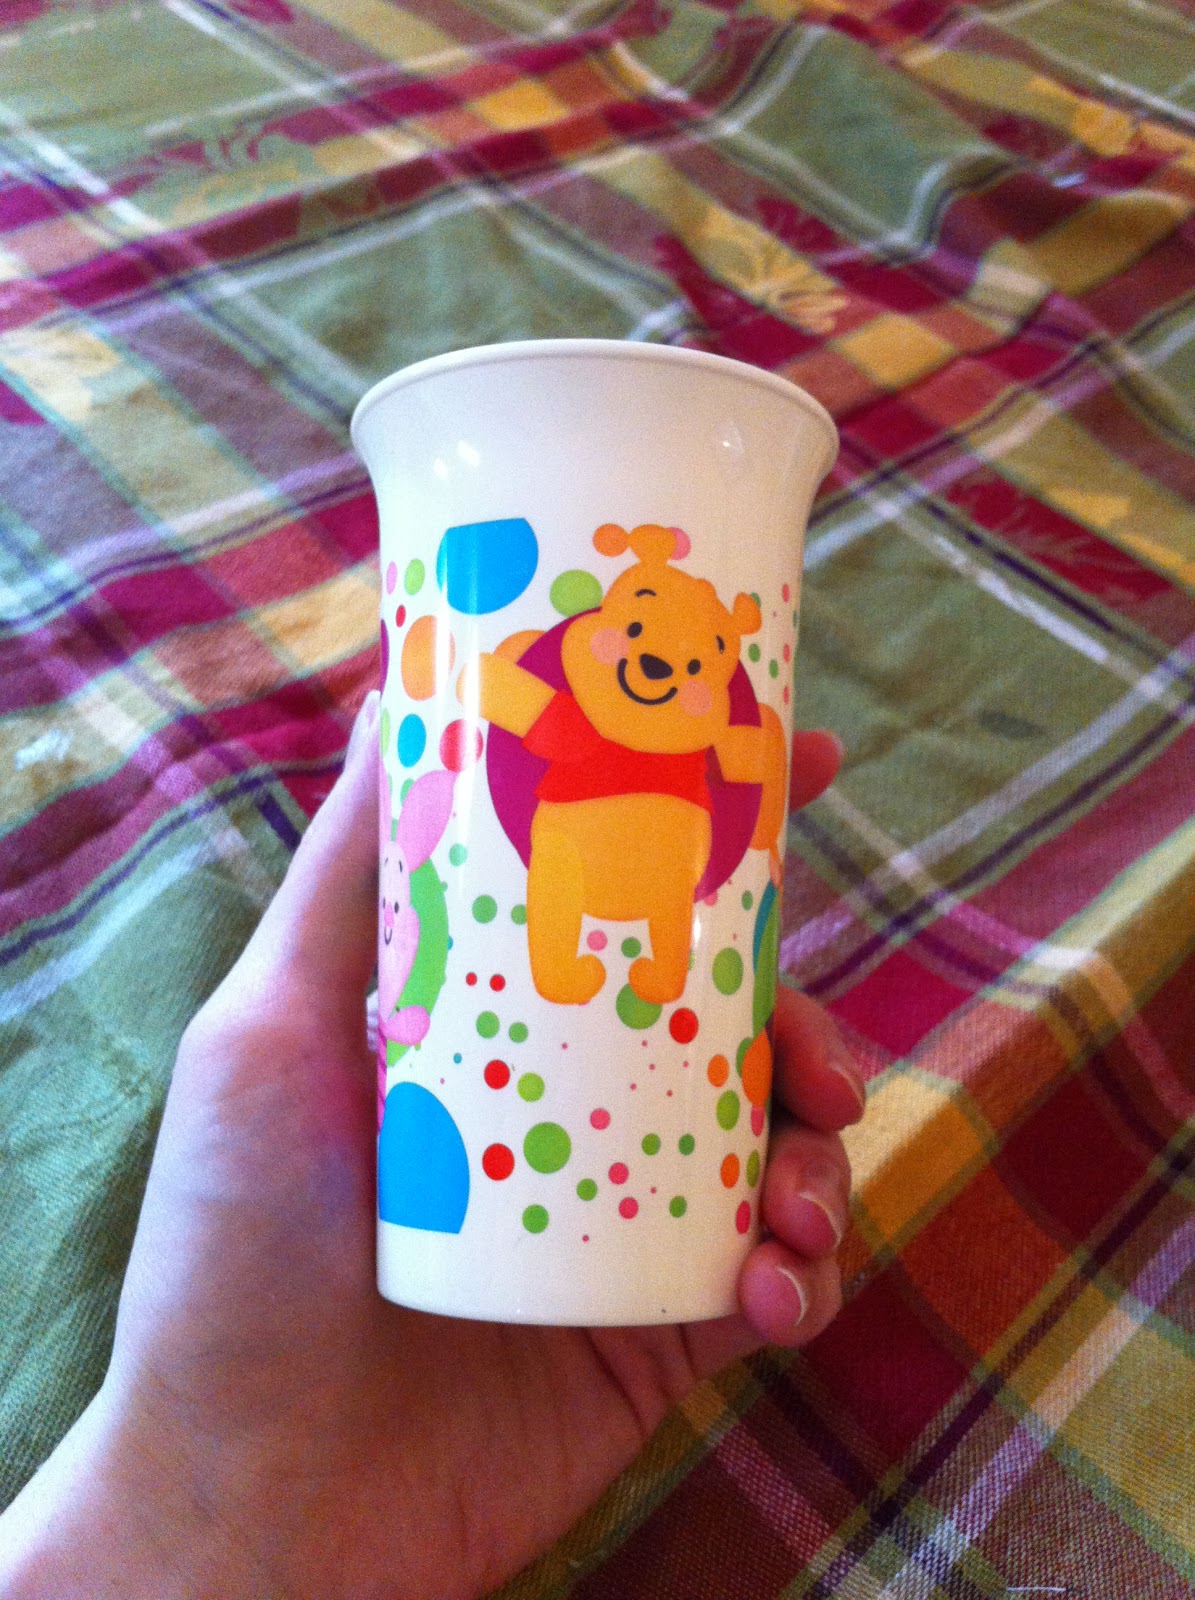
– Cup (the size of bracelet you want, the straighter the cup is up and down, the better it works)
– Fabric of different patterns and colors of your choice, cut into strips (see directions below)
– Hot glue gun
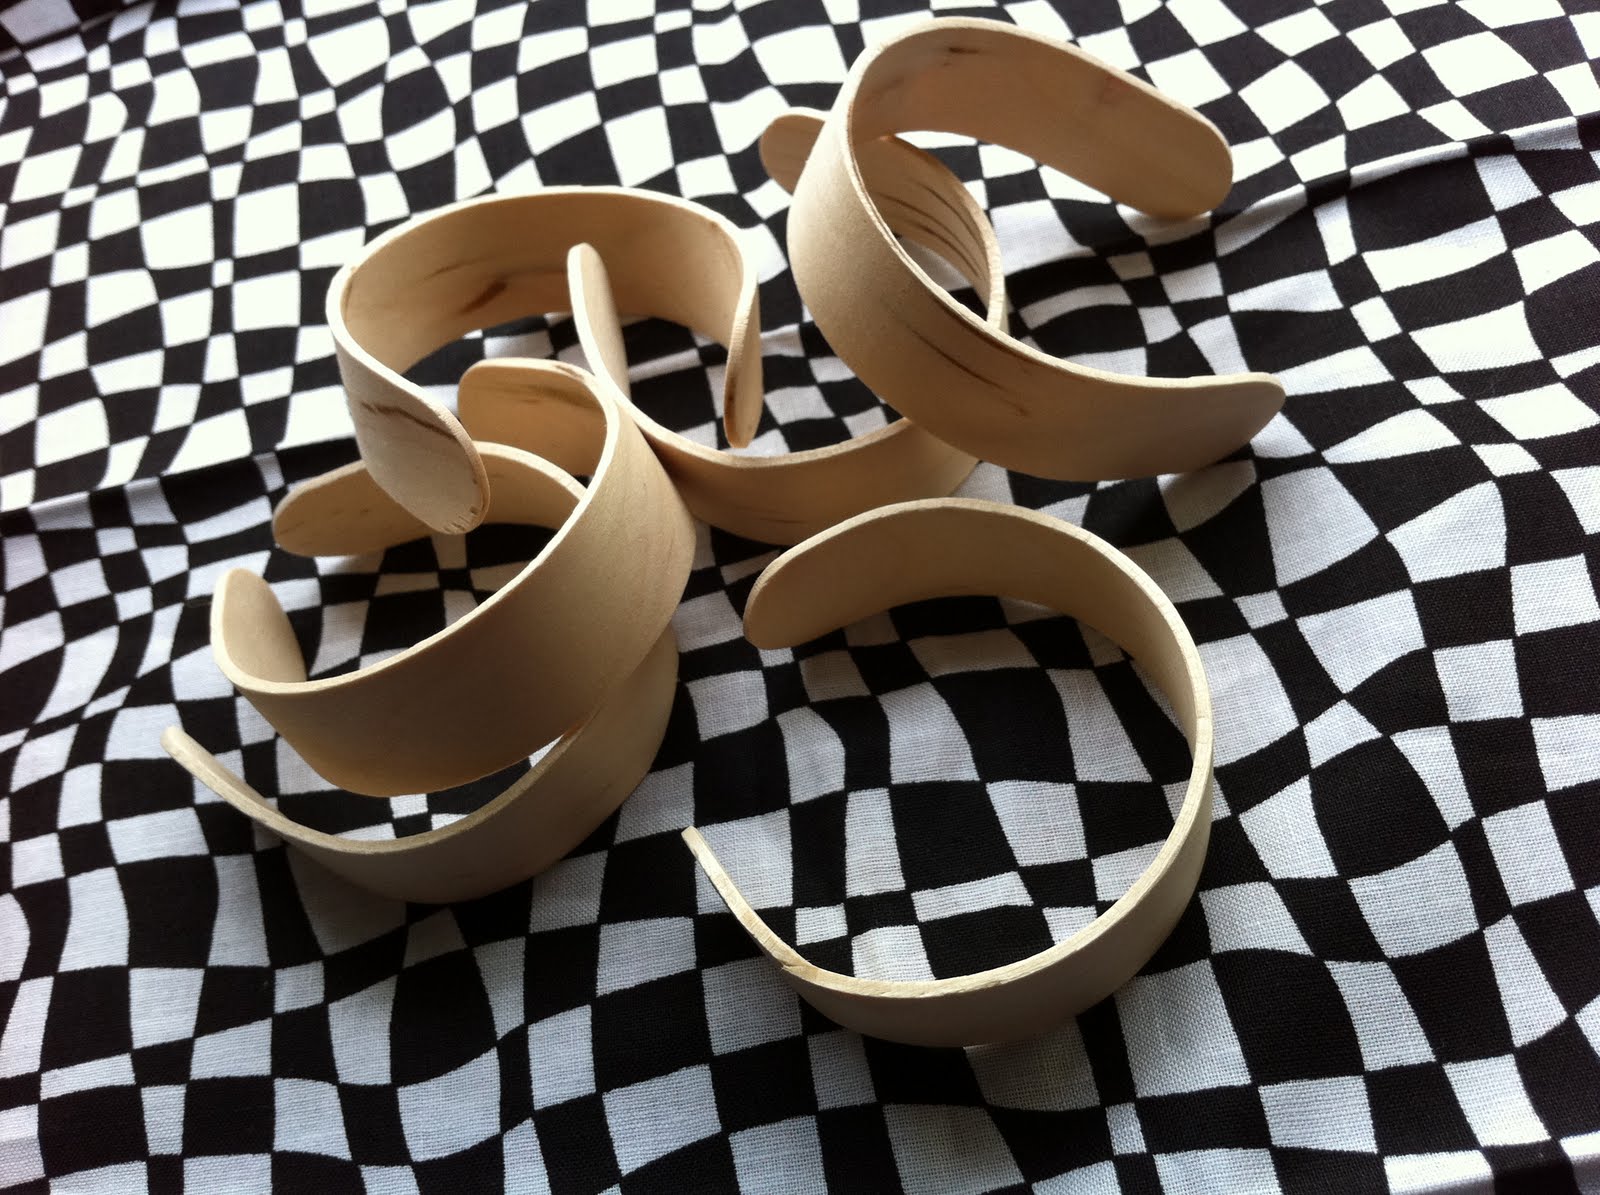
Put some sticks in a container of hot water. Let them sit there overnight.
Pooh Bear! Don’t laugh. This is the only cup that worked for me.
So you can see here, the sides of the cup are pretty parallel. And this cup is thin, if the cup is too thick, the bracelet opening will be too big and slide off. My cup was about 7 1/2″ around the outside. (My hand didn’t even fit inside.) So make sure you get a cup close to your wrist size. And it may have to be a toddler cup. 🙂
I forgot to take a picture of me molding. But work the wood around the outside of the cup first, bending all parts of the stick slightly. Don’t just go bending the bracelet straight into the cup, because it will brake or be misshapen. Work with the wood and be patient as you get it in the cup in a nice circle with all areas bent equally.
In the morning, they should come out of the cups easily and hold their shape.
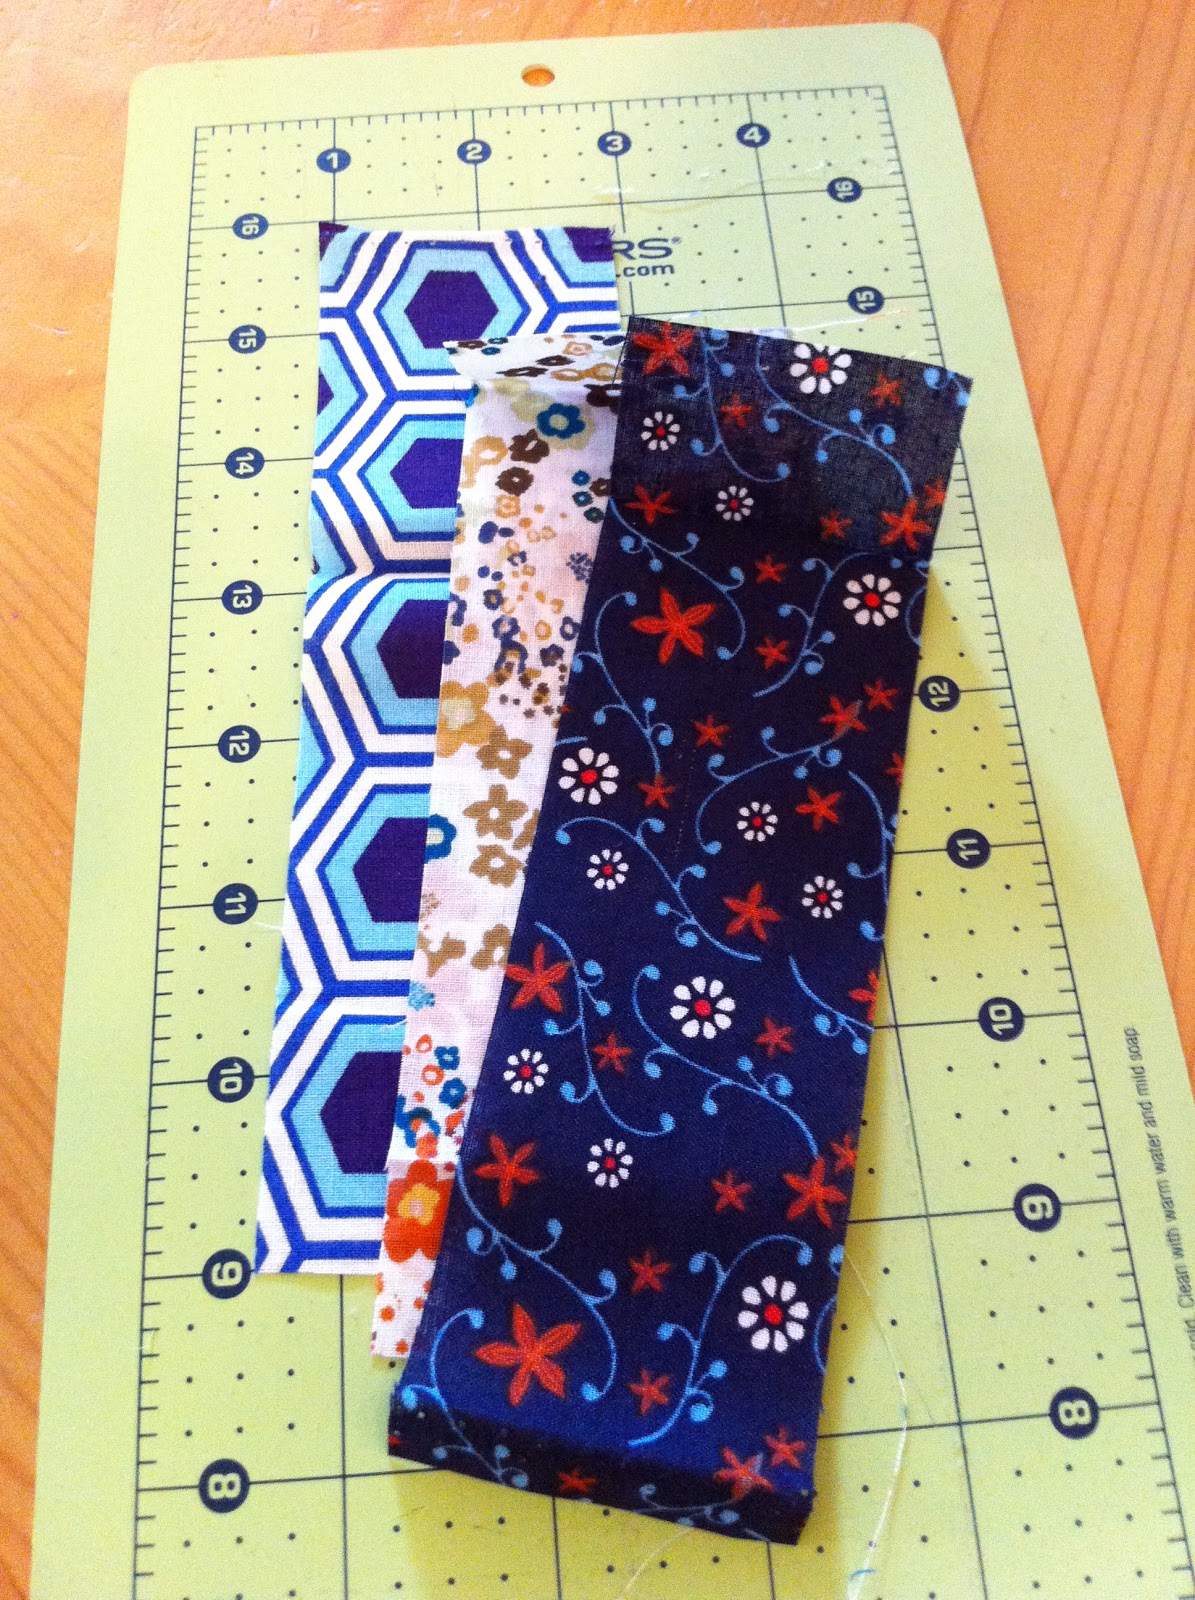
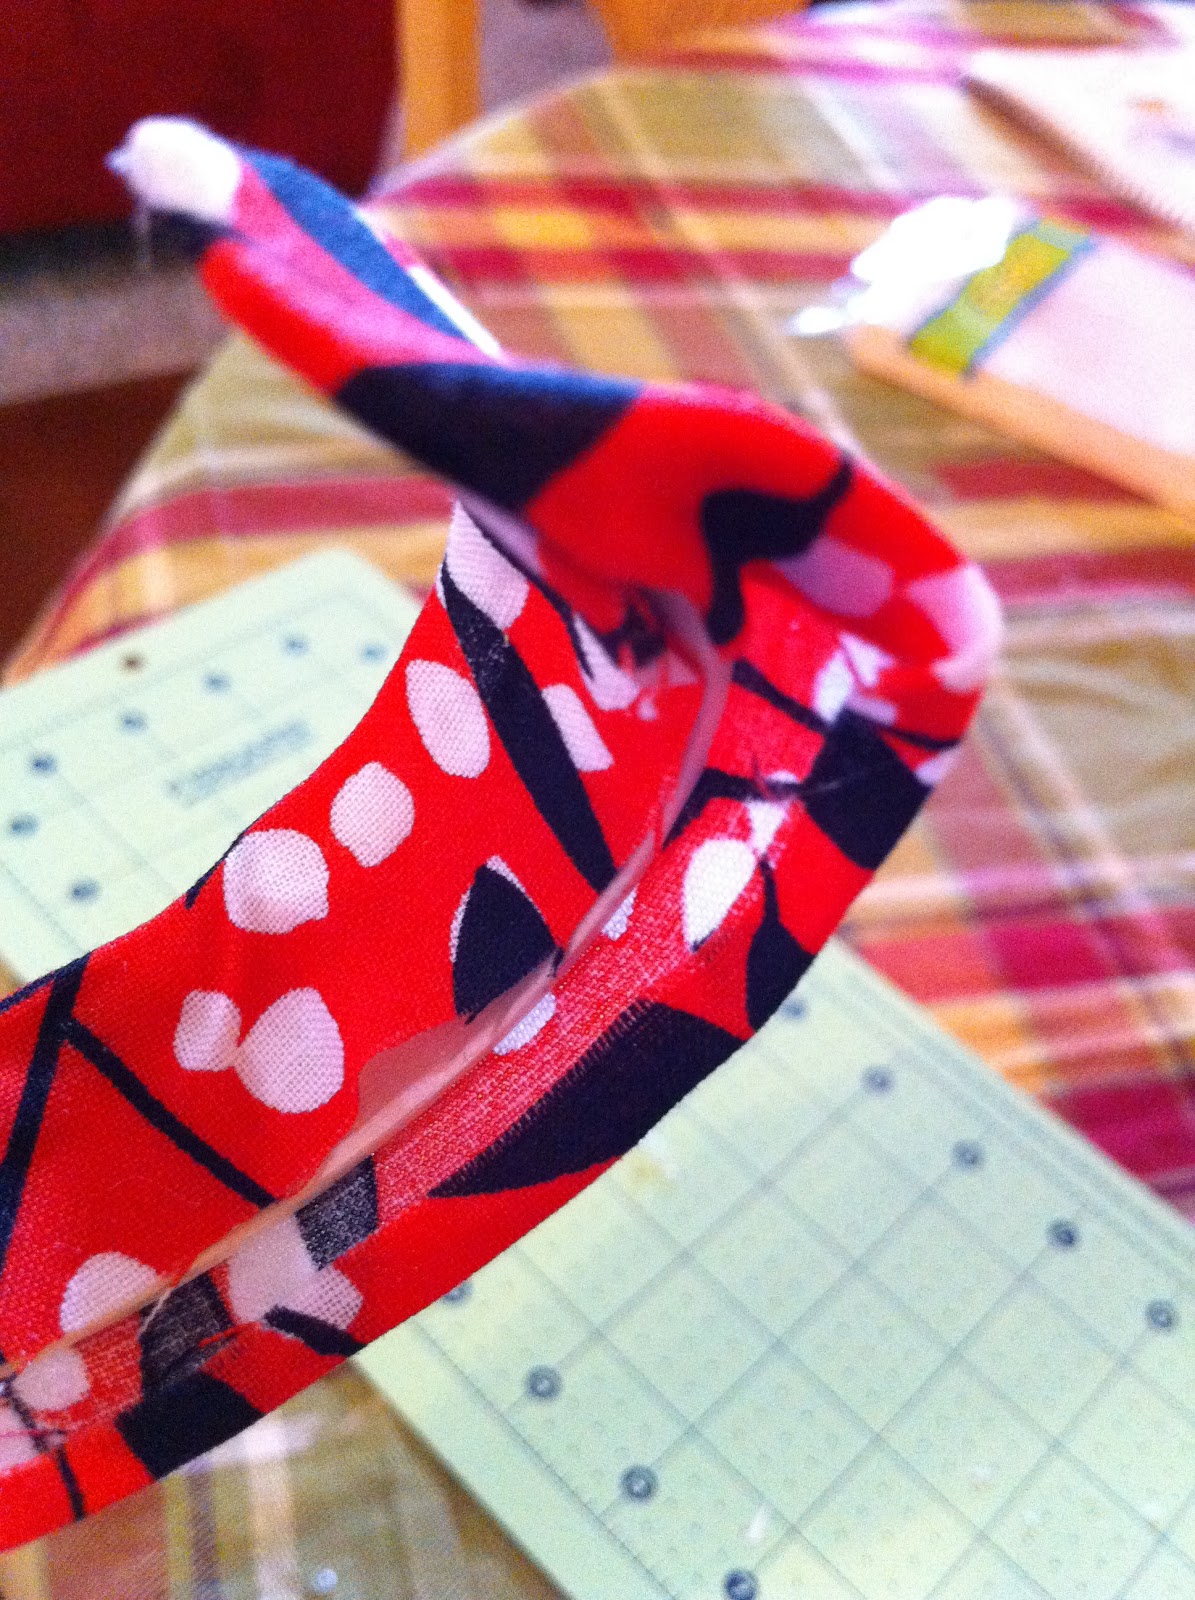
Next, you need to cut strips of fabric double the width of your stick, and 1 inch longer, so my stick was 1″ by 6″ and therefor, my fabric was 2″ by 7″. Make sense? Hope so.

My strips all ready to go!
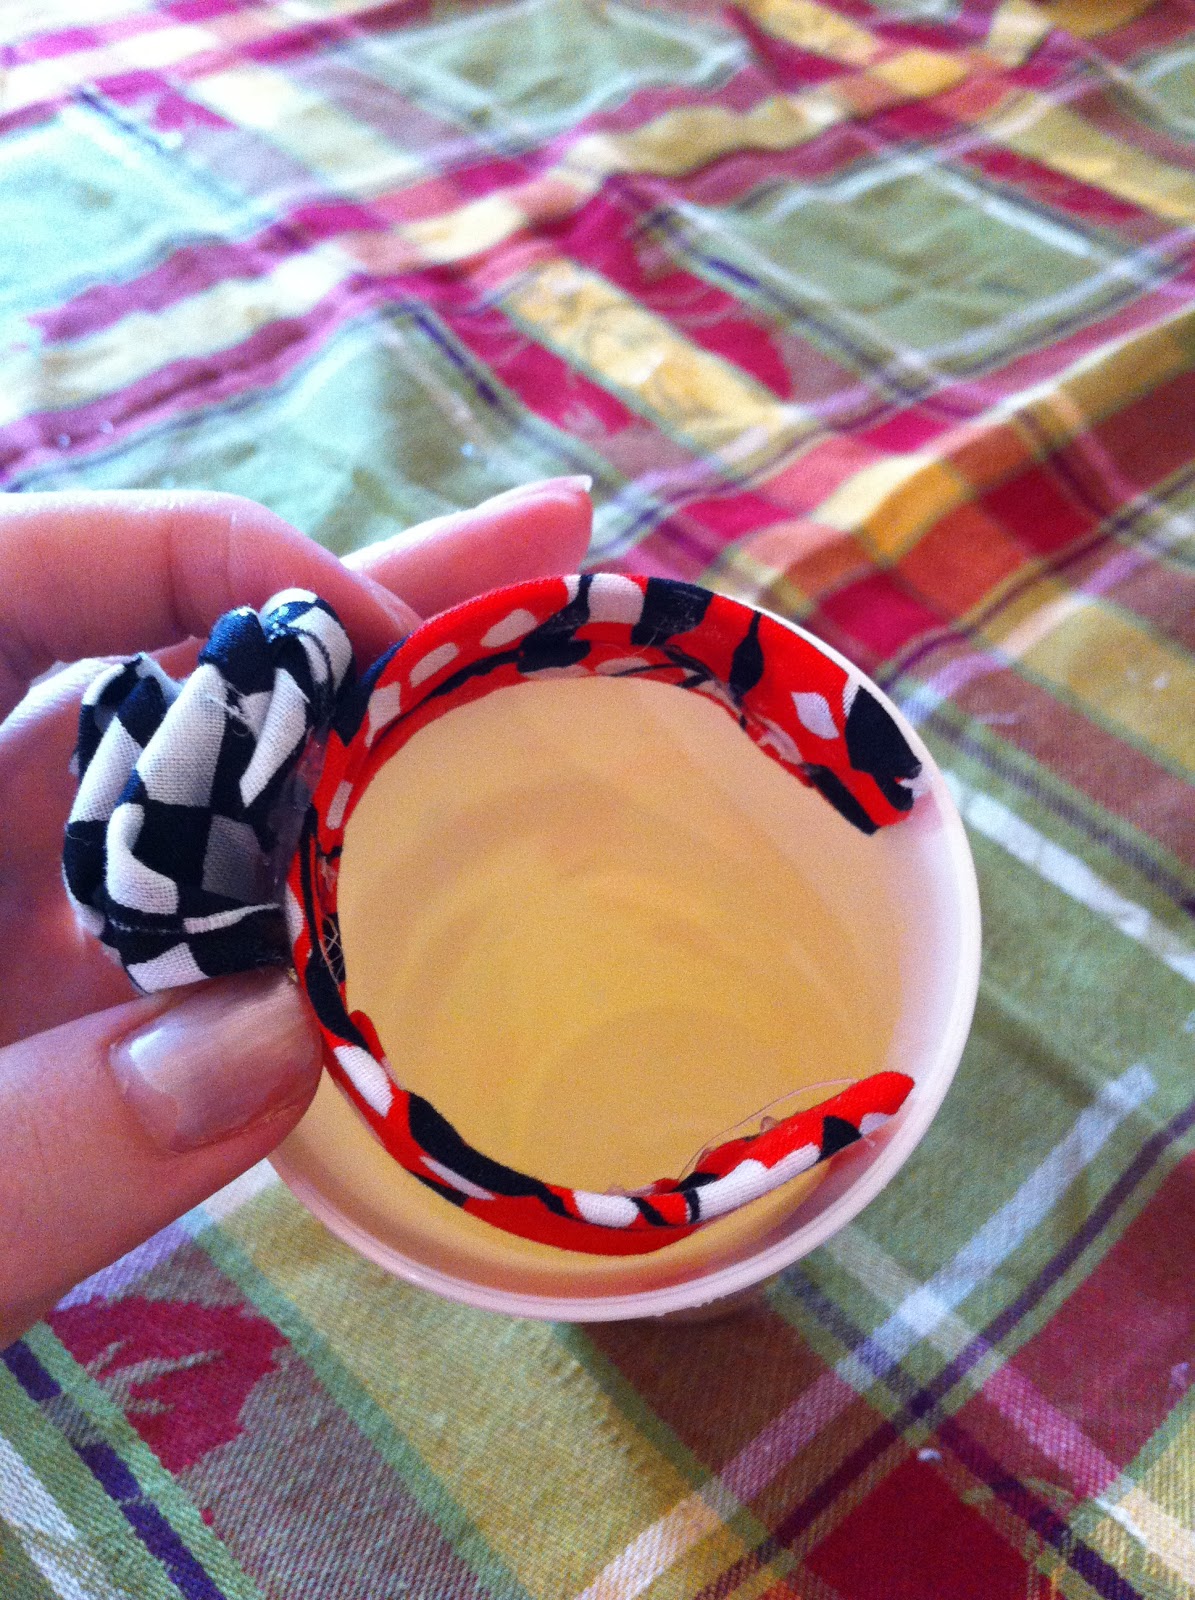
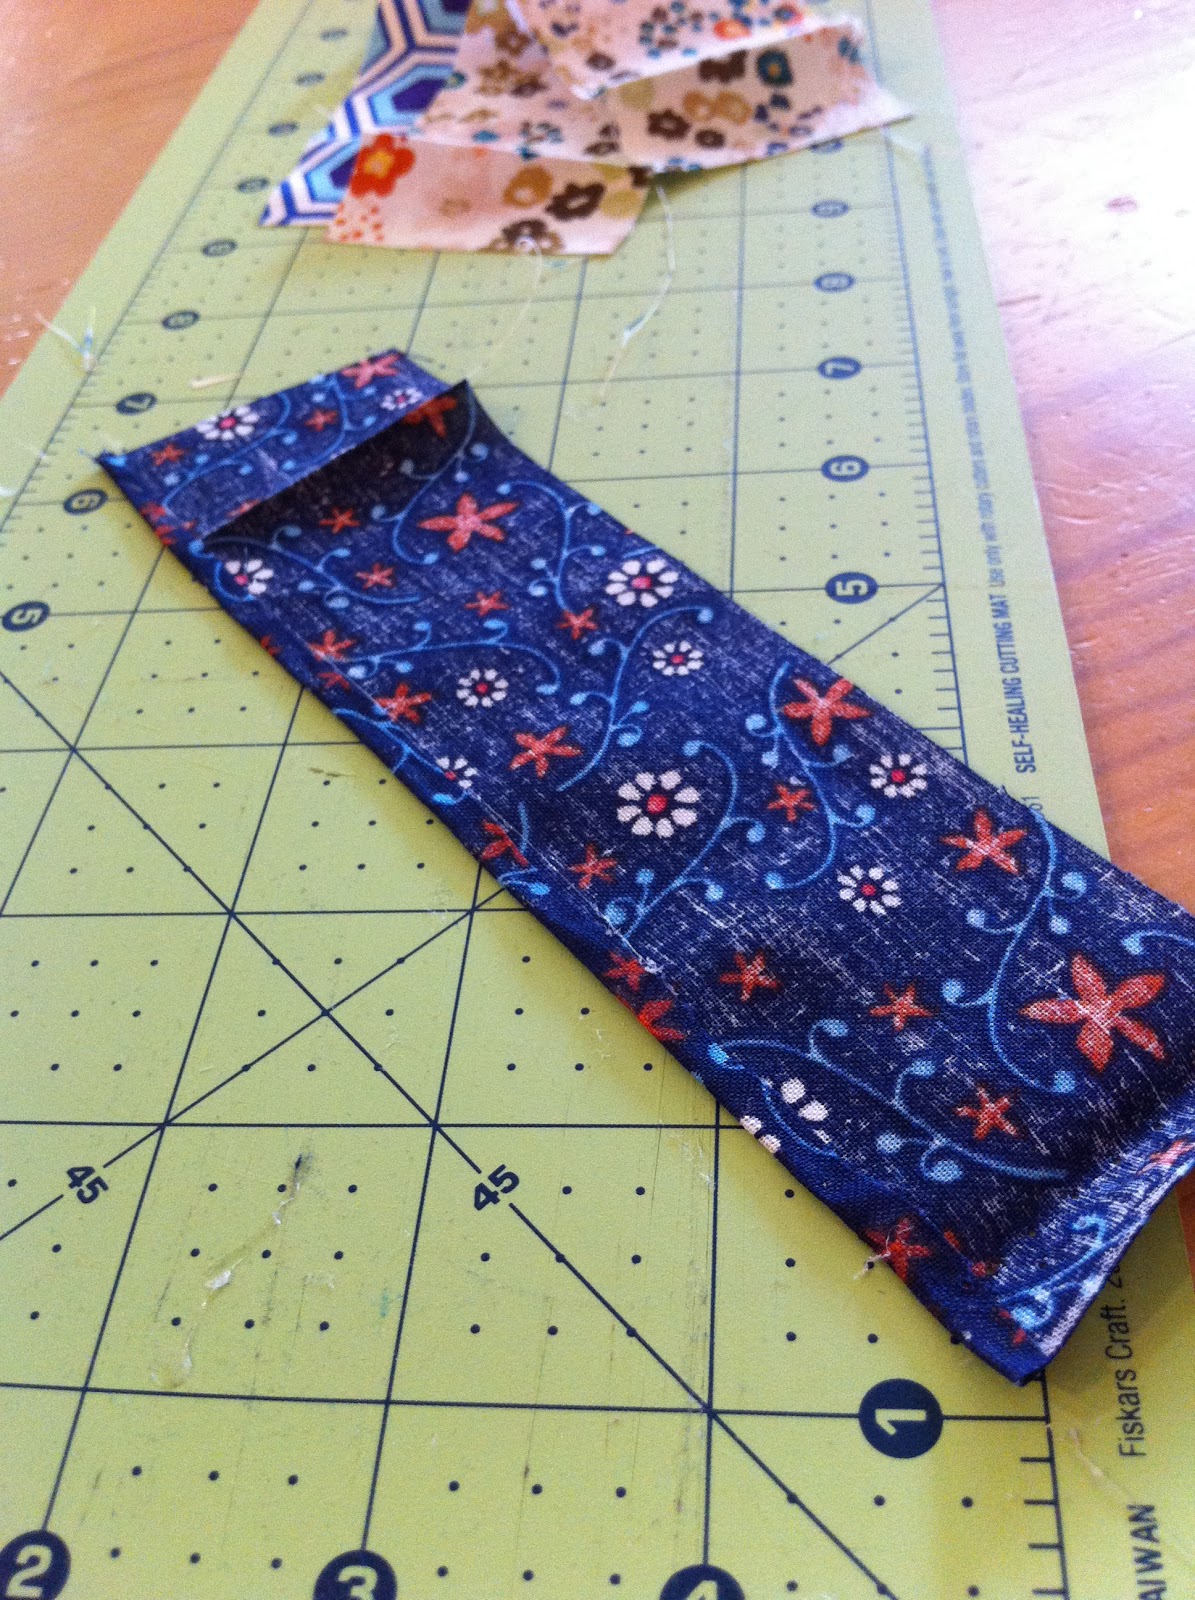
This step is optional, but I like things to look clean, so I folded over the edge on one side and glued it, so like a hem it will keep the fabric from fraying and it will look clean and finished.
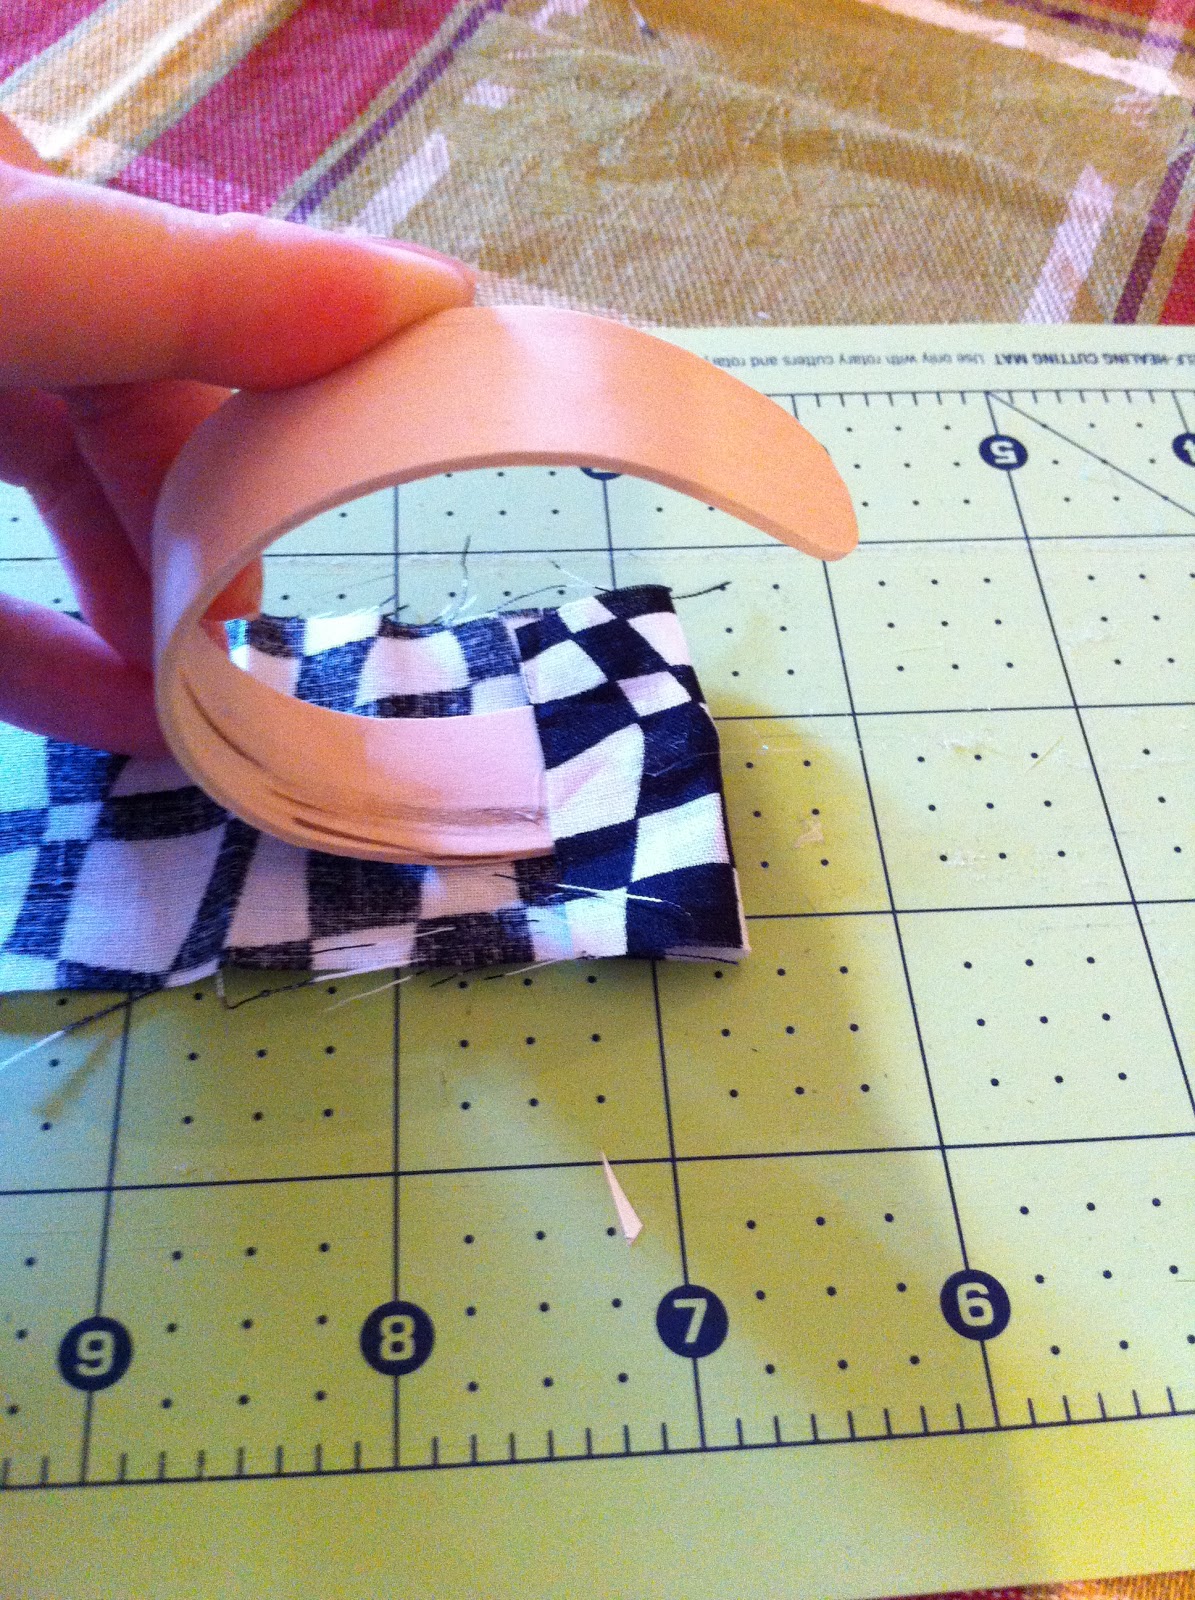
Next hold the bracelet at the end of the fabric so there is about 1/2″ to fold over the end like this.
Glue the flap over the end on the inside of the bracelet.
Now, pull the fabric tight and repeat to the other side. Again, you should have about 1/2″ of fabric on this side also. It will look like this.

Next fold the corners over and glue. On the “hemmed” side it can get kind of lumpy, so you can skip those corners if thats the case.
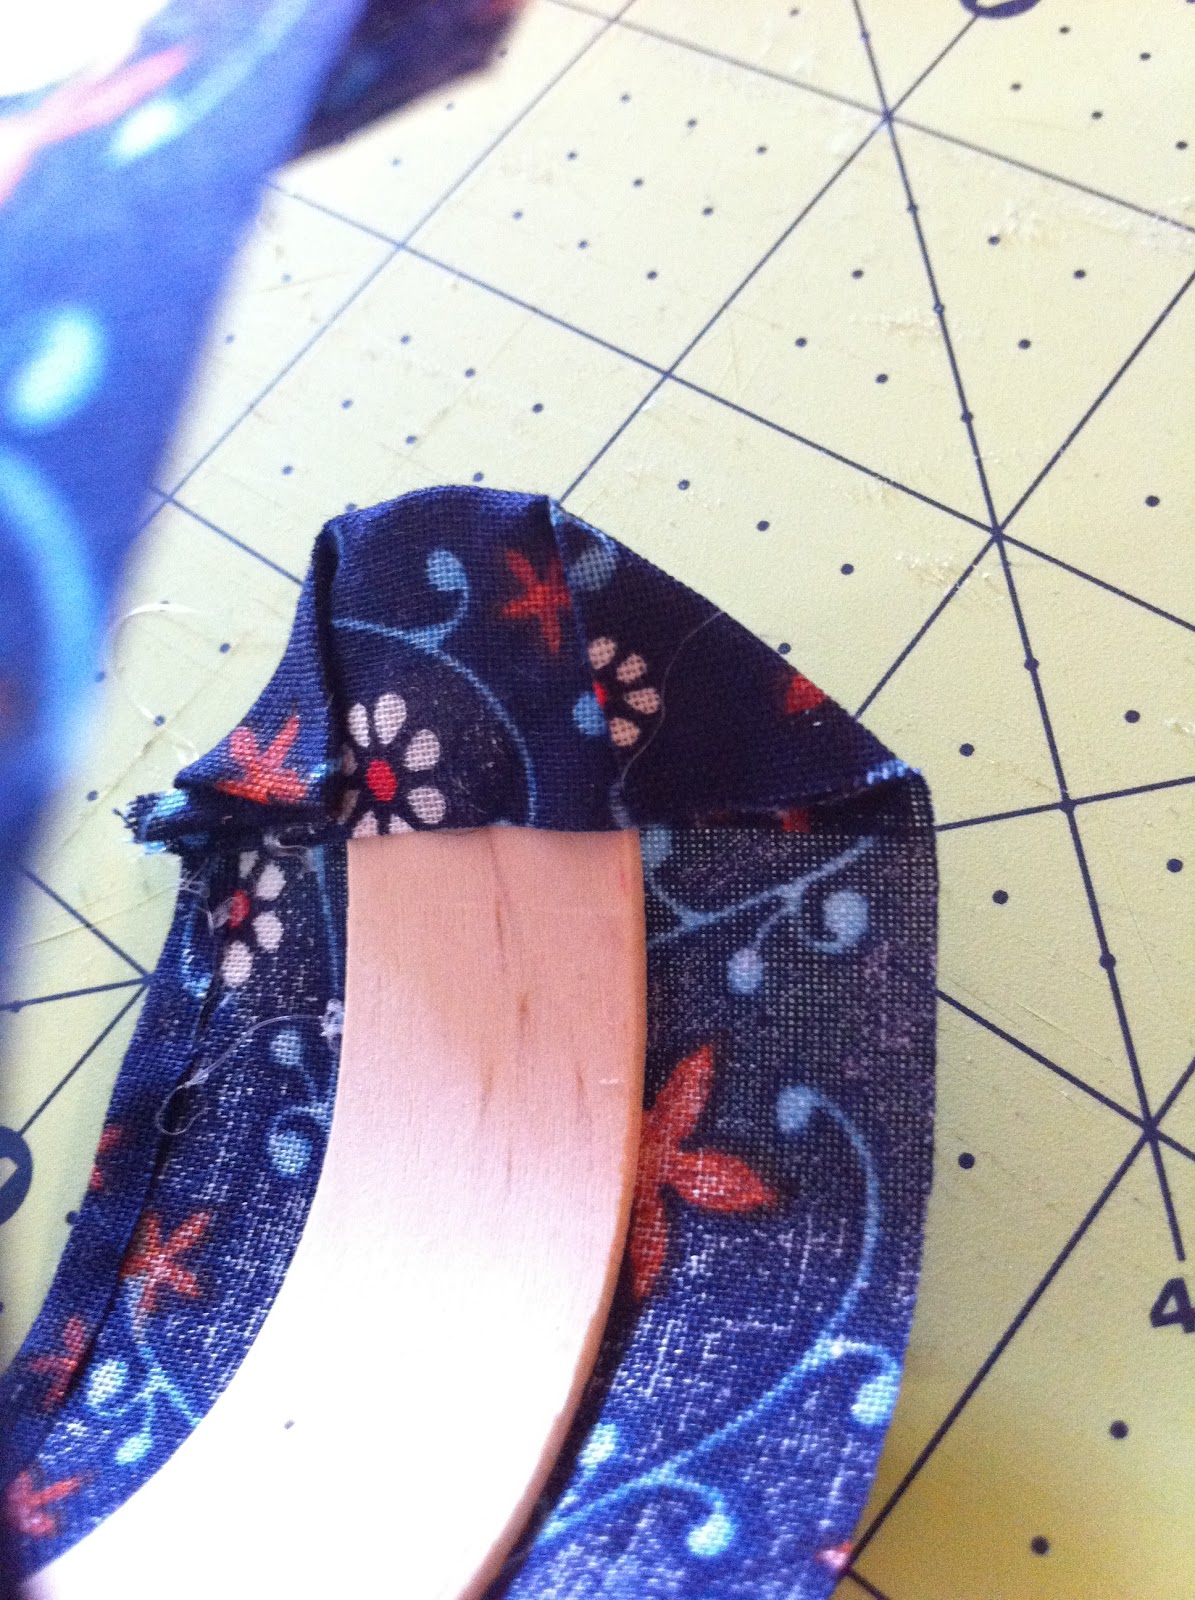
Fold the un-hemmed side over the bracelet and glue to the inside of the bracelet.
And pull the fabric slightly toward the middle of the bracelet and smooth down so there are no creases.
Then, fold the hemmed flap over and glue to the inside of the bracelet and pull and smooth, and you are done!
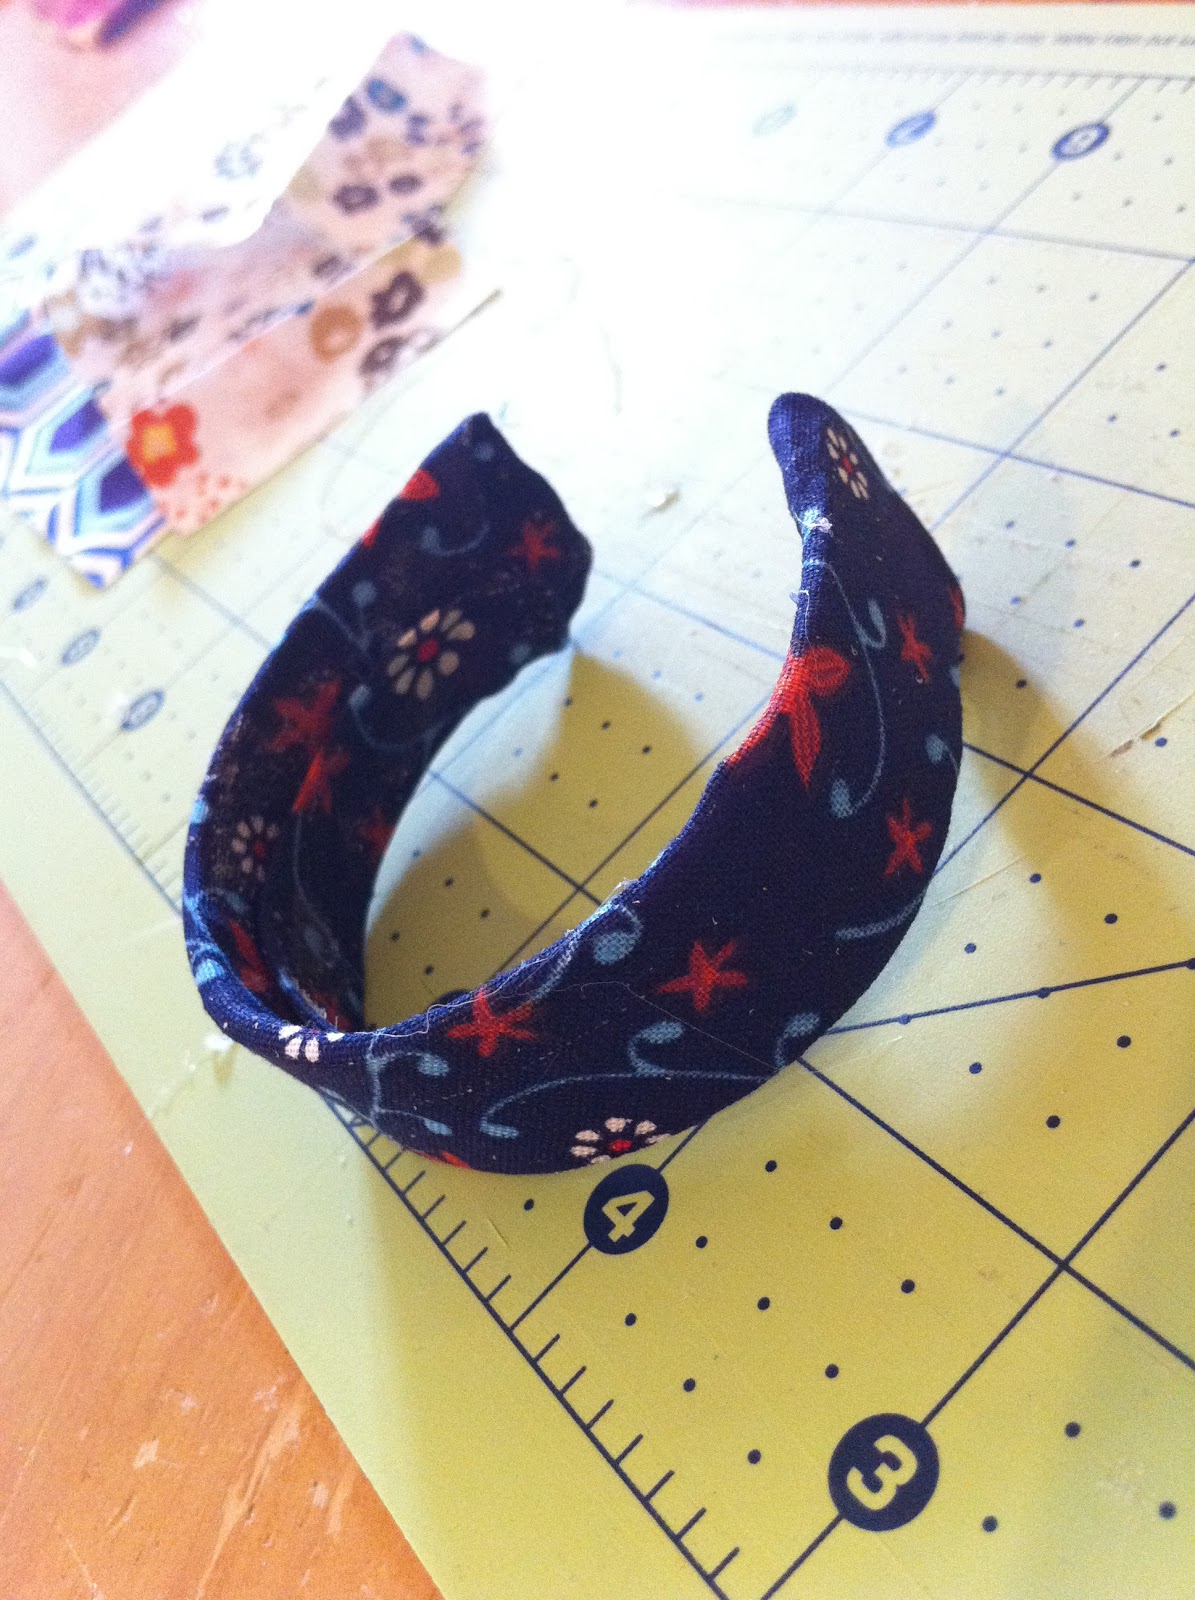
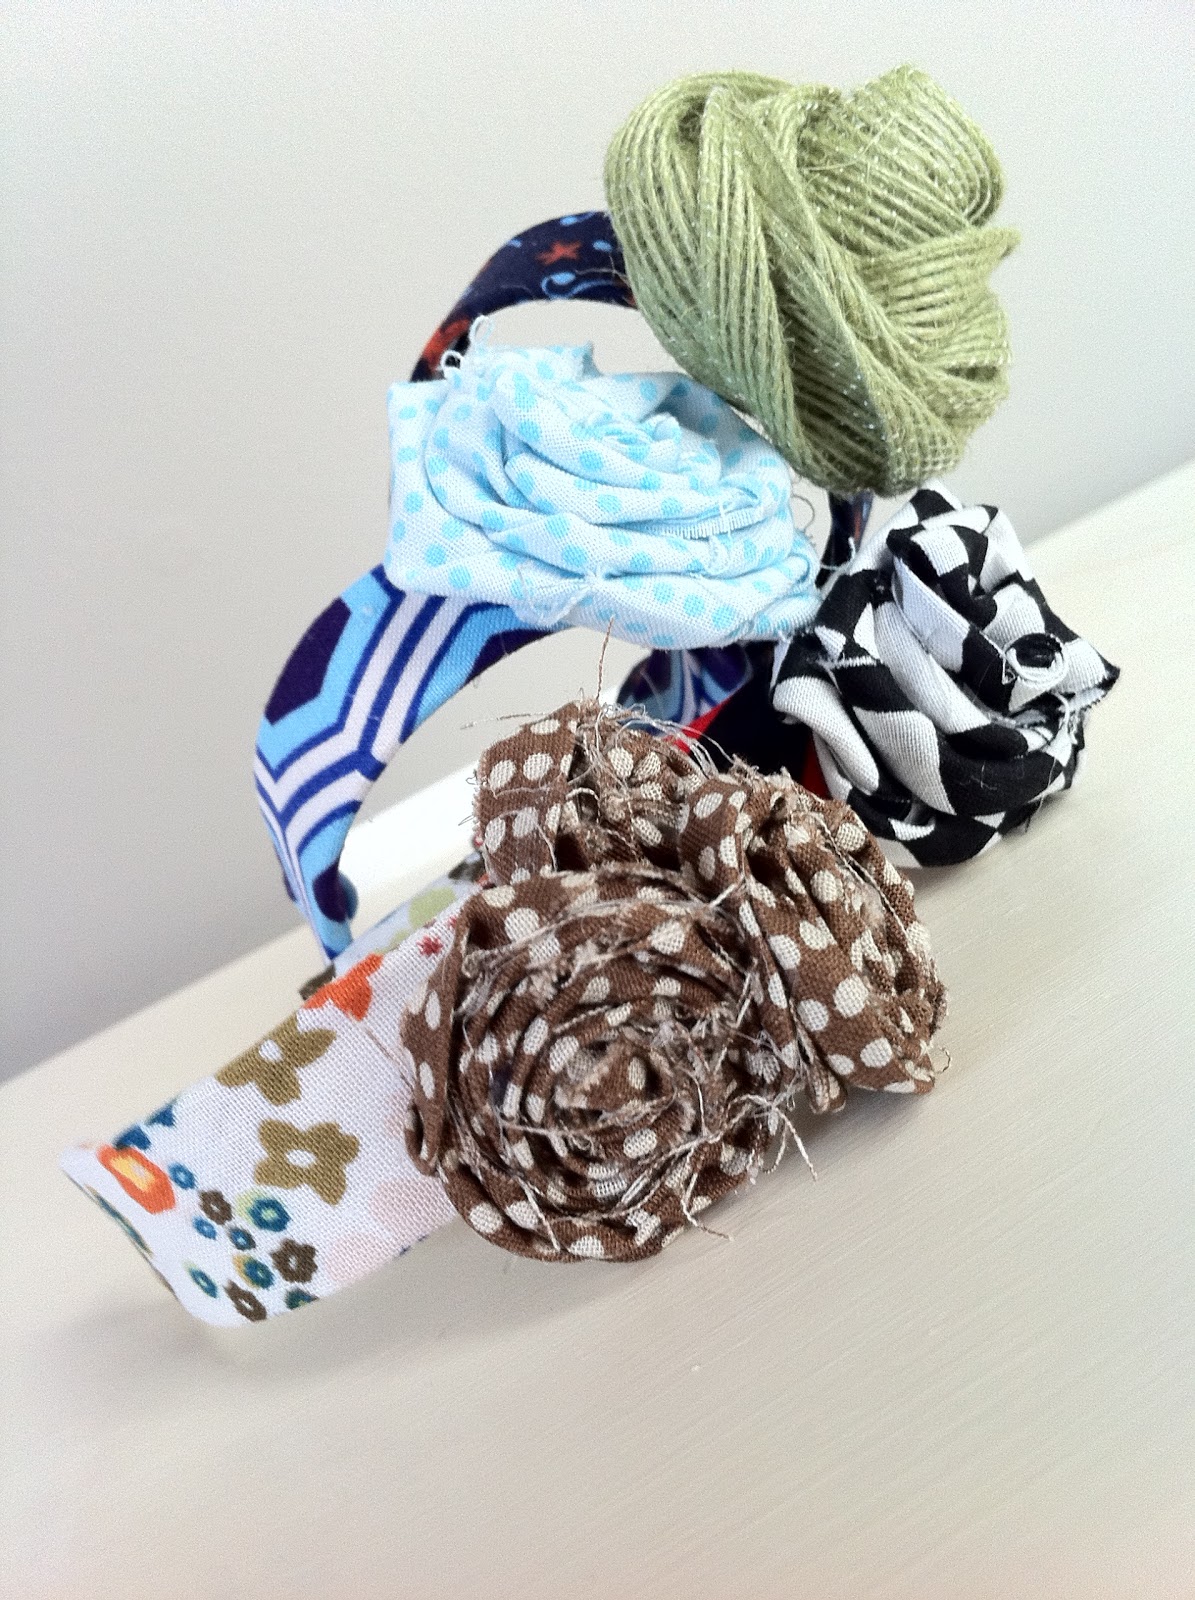
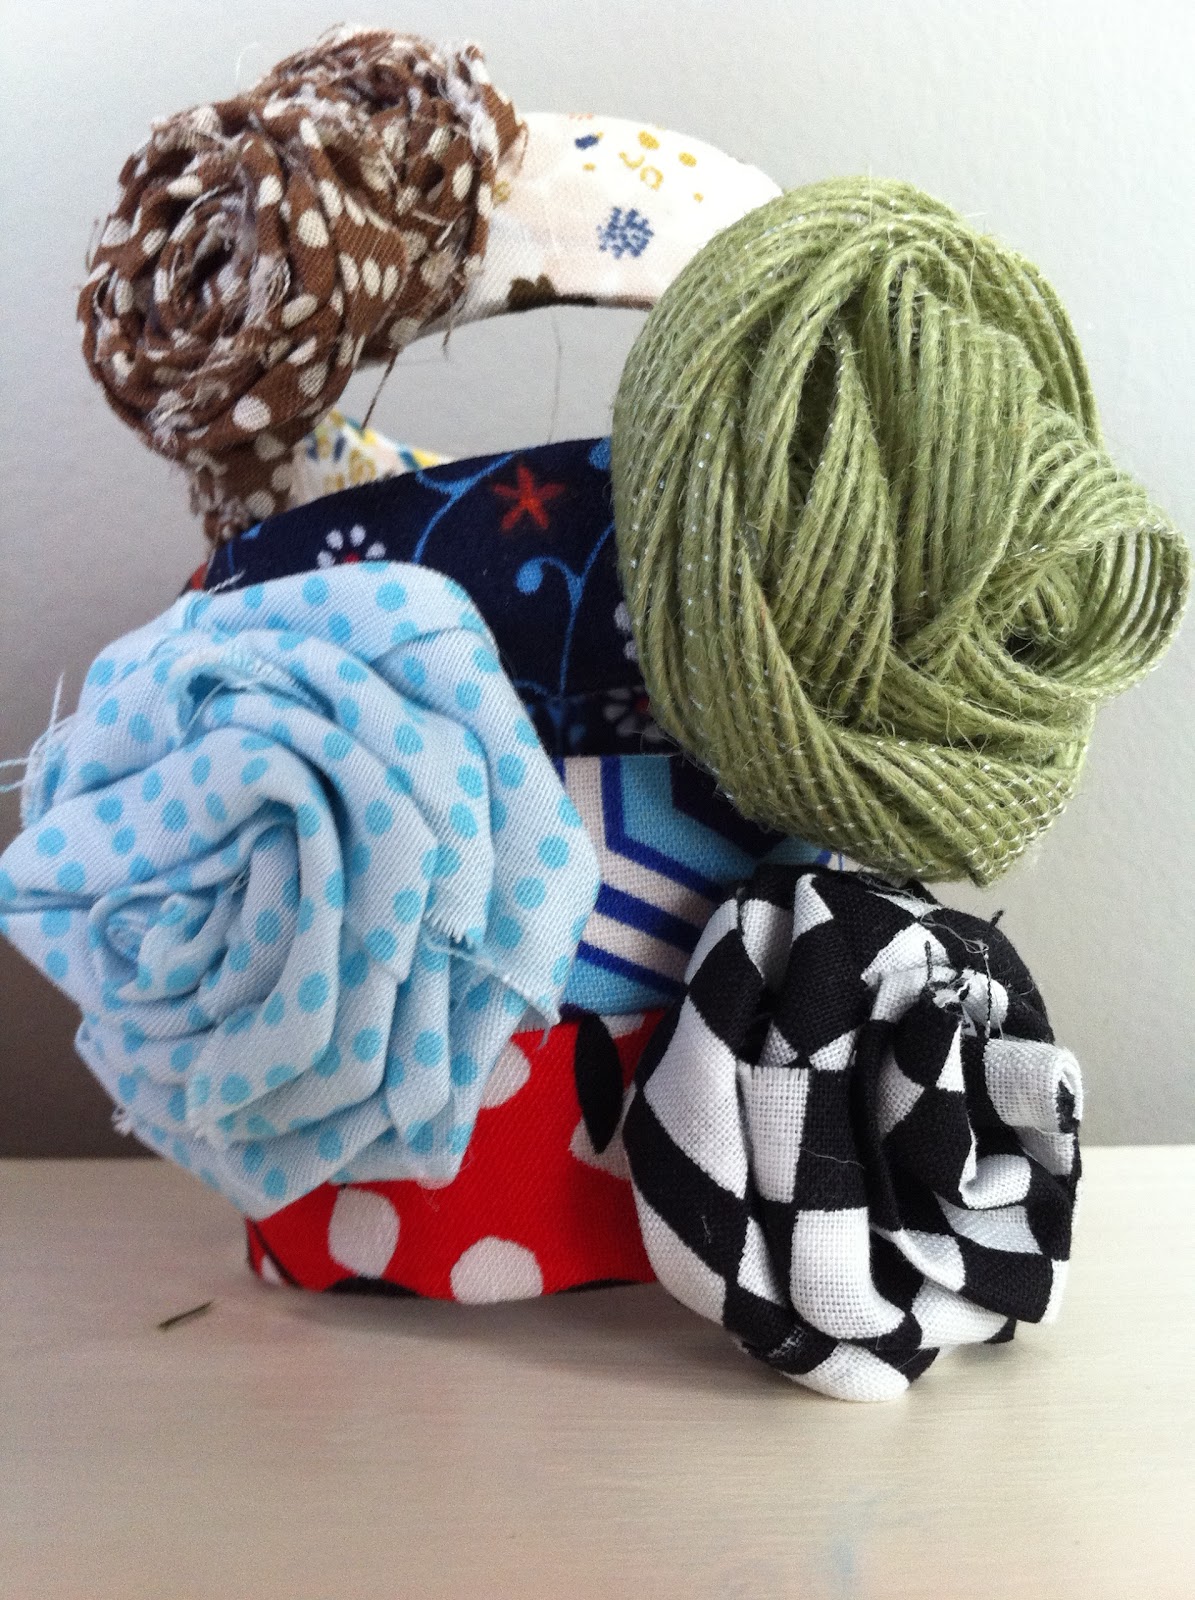
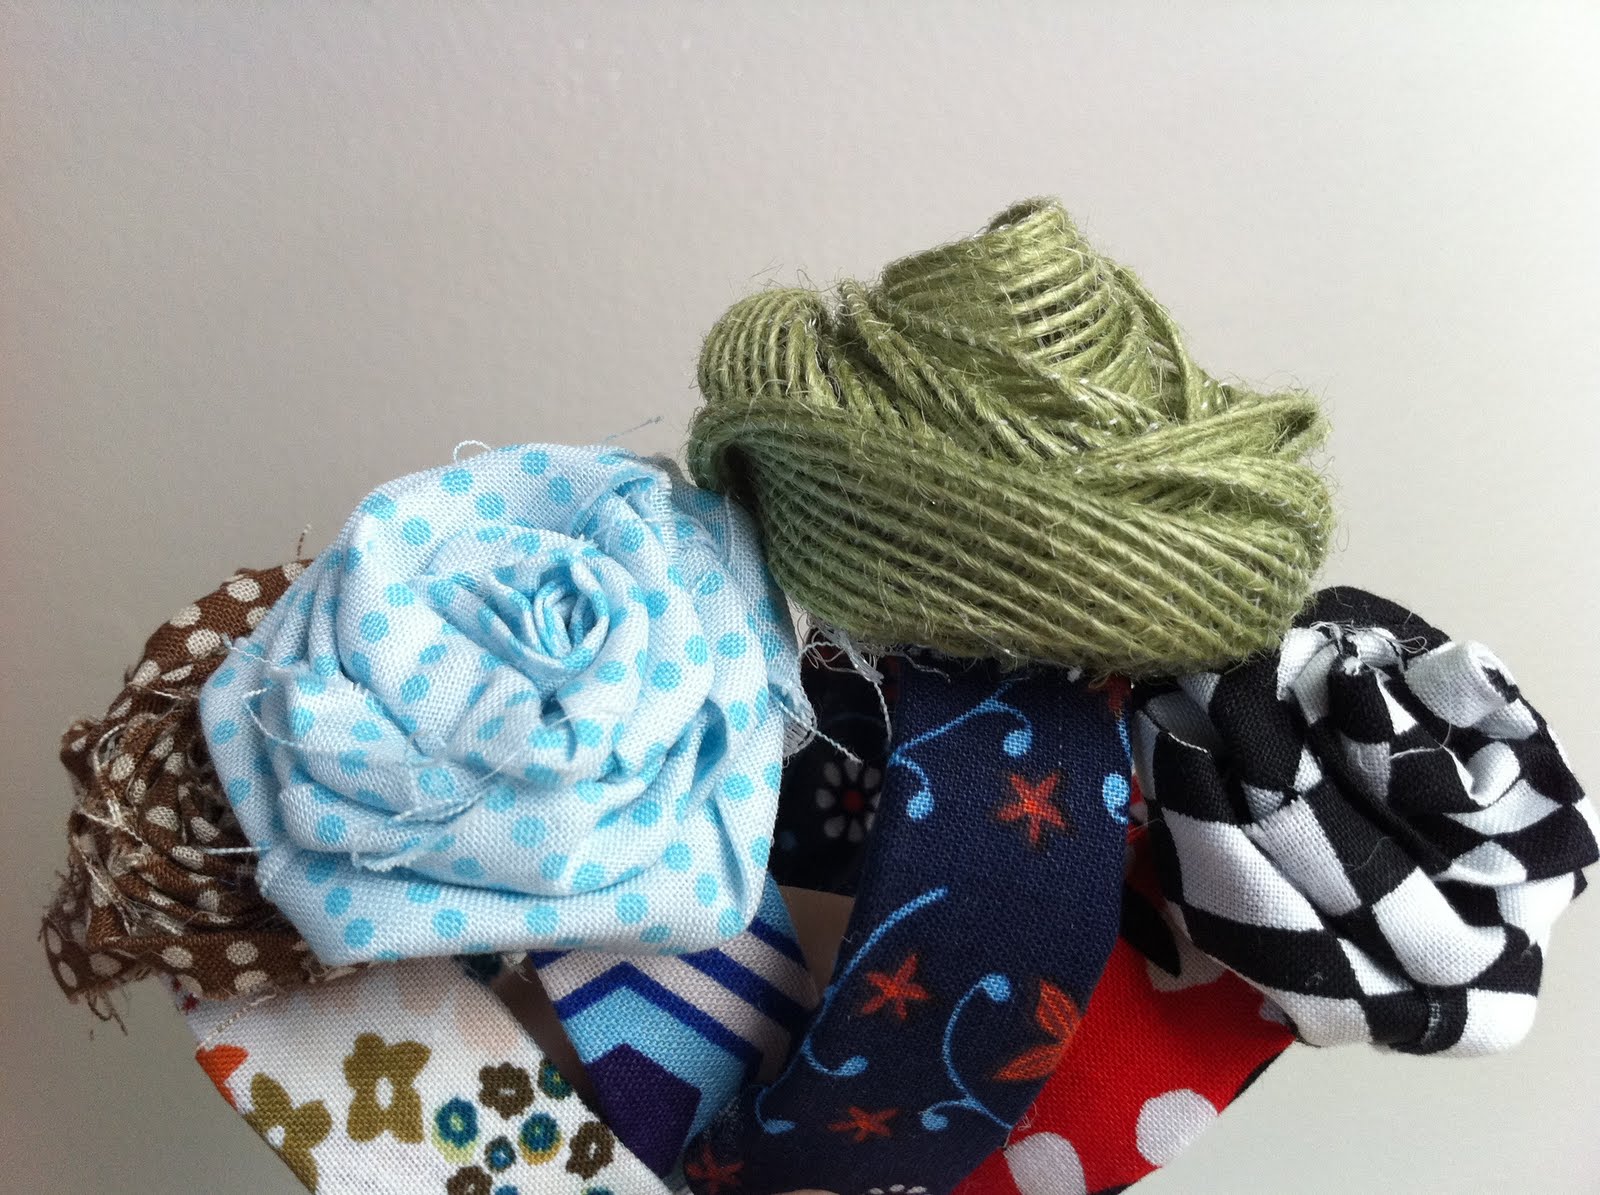
Attach desired flower and look at how cute those turned out!
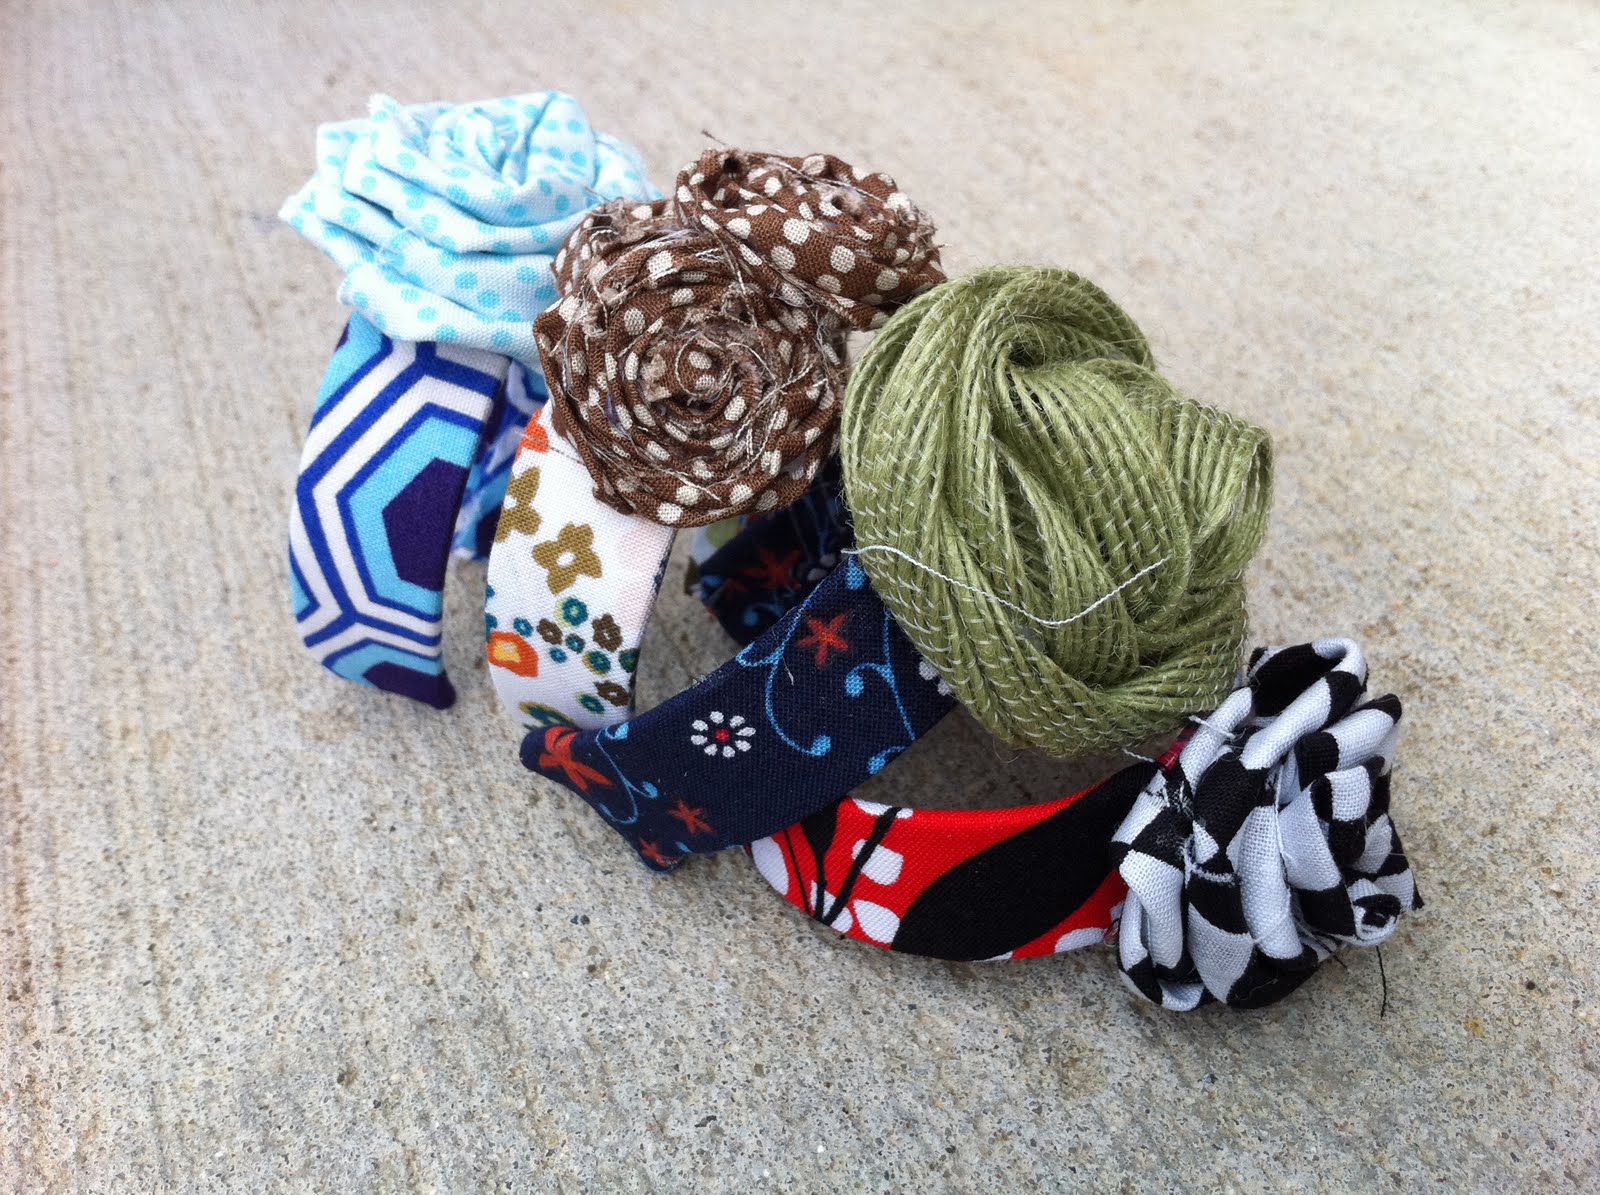
A homemade fashonista! We need some models!
Remember to send us your pictures if you make these so we can feature you on our once a month YOUR TAKE day! We can’t wait to see them!
………………………………………………………………………….
Oh my GOSH!
I am giving these girls the

I am giving these girls the
I REALLY can’t wait to make this bracelet as soon as I’m all moved and back on my feet…
SO VERY CUTE!
Thank YOU SO MUCH for sharing!
Desirée
I going to try, but how is the molding??? photos please!!!!
These bracelets are fabulous. I am going to try!
Thanks for letting us take over your blog, Desiree! It was so fun! And thanks to everyone for the comments! Come on over to The Letter 4 Blog and see what else we have for you! -xoxo Jade
What a fun idea!! And such an inexpensive way to make a bracelet!
Holy crapoly! How creative is that….thanks for sharing this idea 🙂
Hello Desirée,
Thanks for introducing us to the four sister; what a great group of Girls. I have seen the wooden bracelets on the Internet before and wanted to make them. I love the idea of embellishing them with the rolled flowers; just to cute. I may use them for a “Make N Take” at an event the I am hosting this weekend. Thanks for sharing.
Smiles, Paula
Love this idea!! Those girls at the letter 4 are adorable!!
Aw, too cute!
How smart is this? Love the popsicle stick idea!