
Hello Everyone!
As many of you know during the weekend Matt and I were working on our little laundry room.
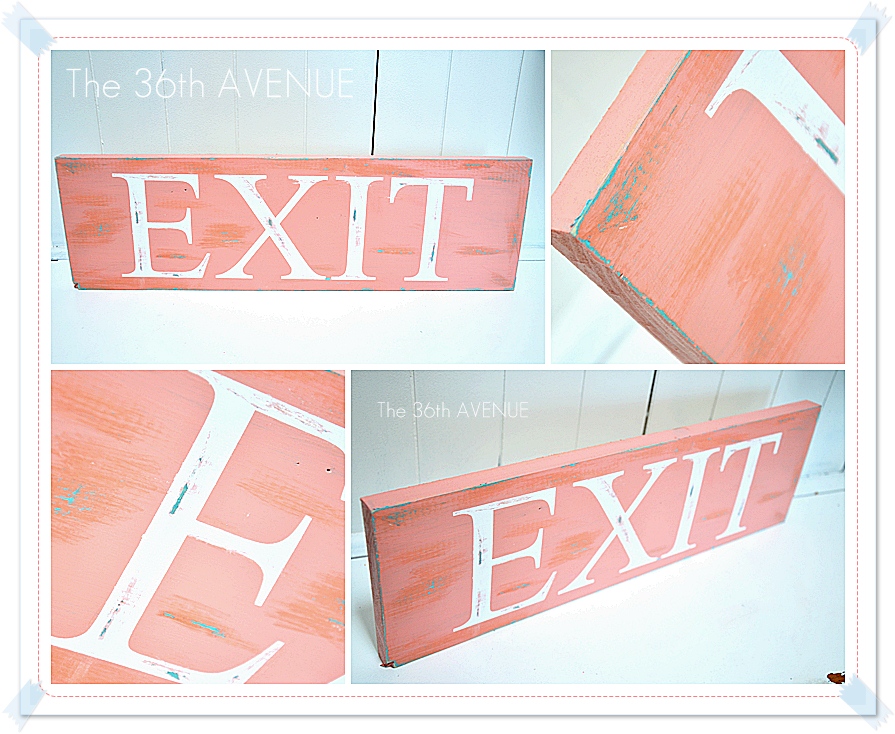
After doing the labor work { the counter-top} I needed a fun project and I made this little EXIT sign
that will go right on top of our laundry room door.

I know most of us know how to make a sign but I want to focus more on how to give your signs character and texture.
TUTORIAL
1
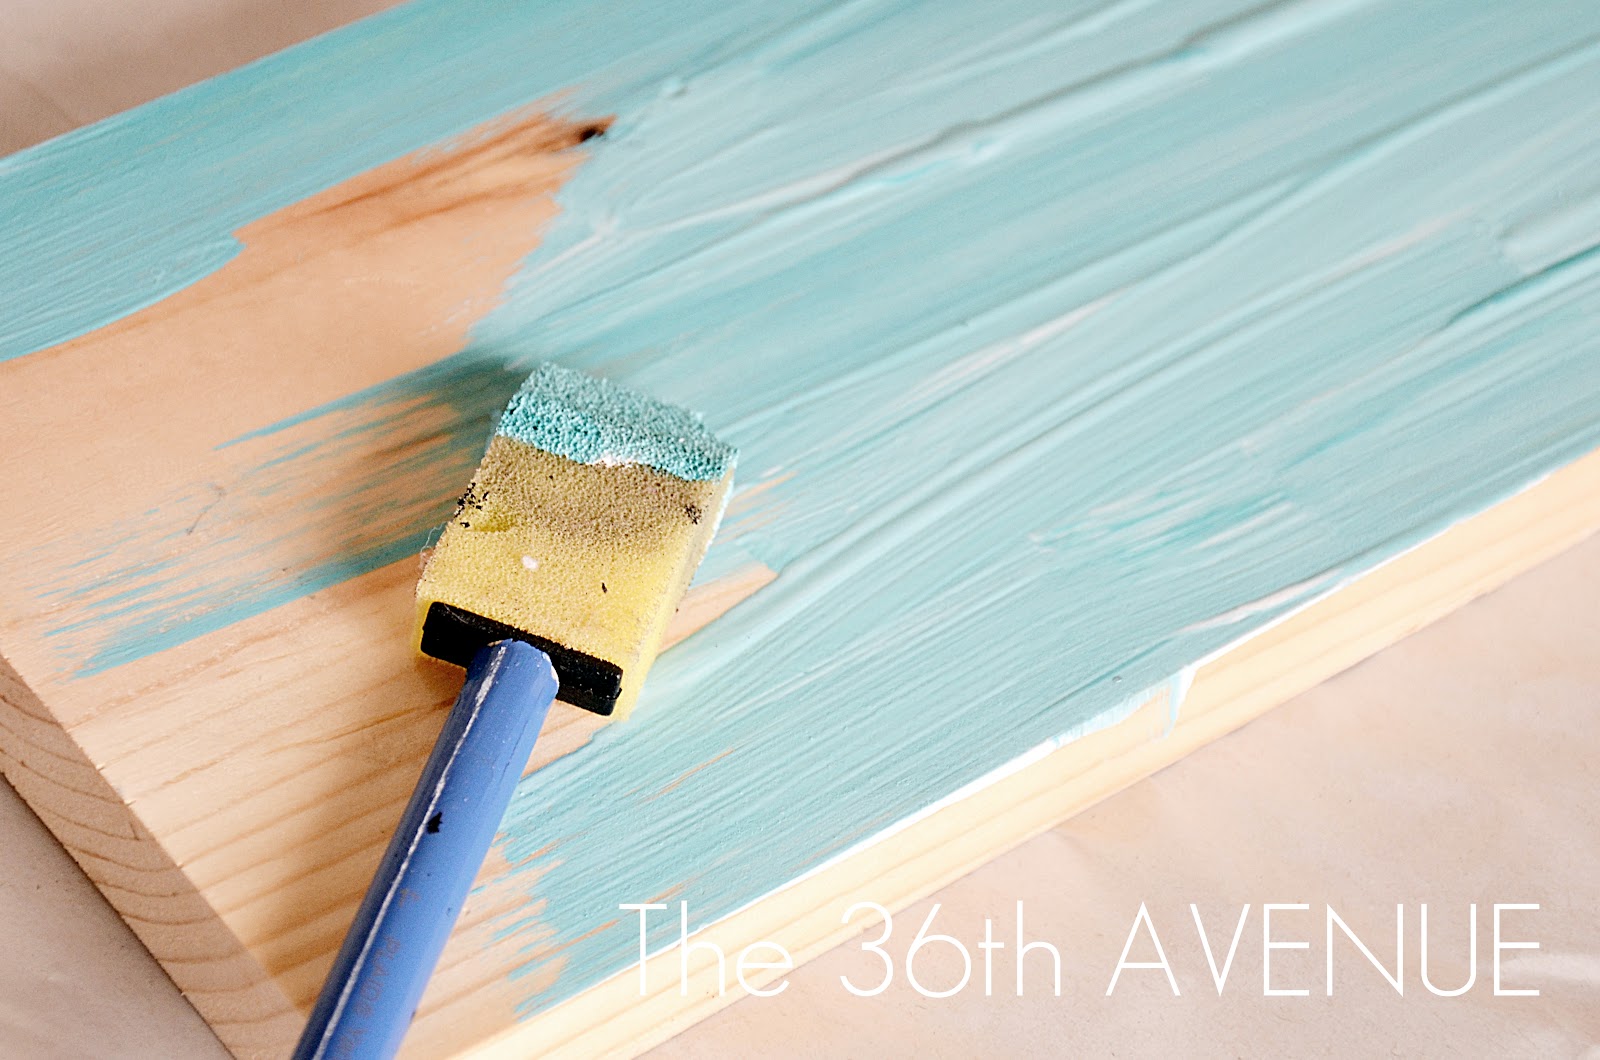
Get your wood.
I like to use pine for my signs. I use 1×6 or 1×8 depending of the sign.
This one is 1×6 and is about 18″ long.
First, paint the undertone you want for your sign, this is the color that will show after you do the sanding.
Make sure you let this first coat dry thoroughly because you don’t want the second color to blend with this one.
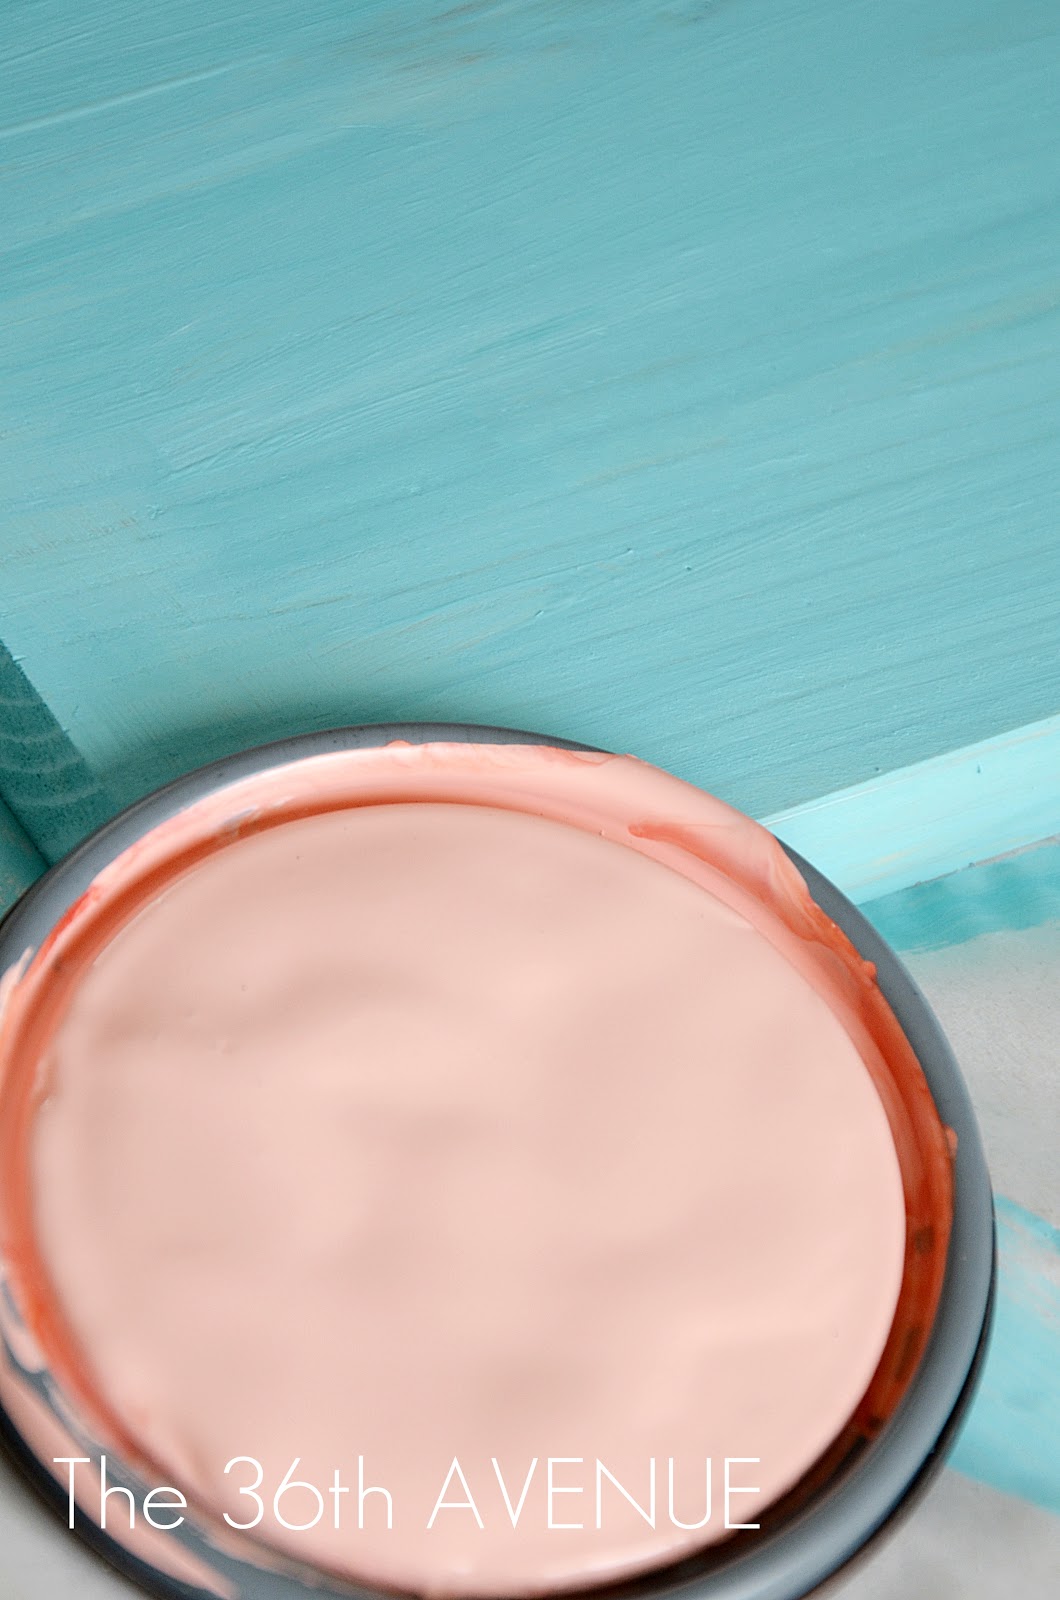
As you can see in the picture there is a lot of paint there.
I don’t use a plate. I just throw the paint right on top of my wood.
If the color of your paint is too dark { like mine was } add some white until it looks perfect for you.
2
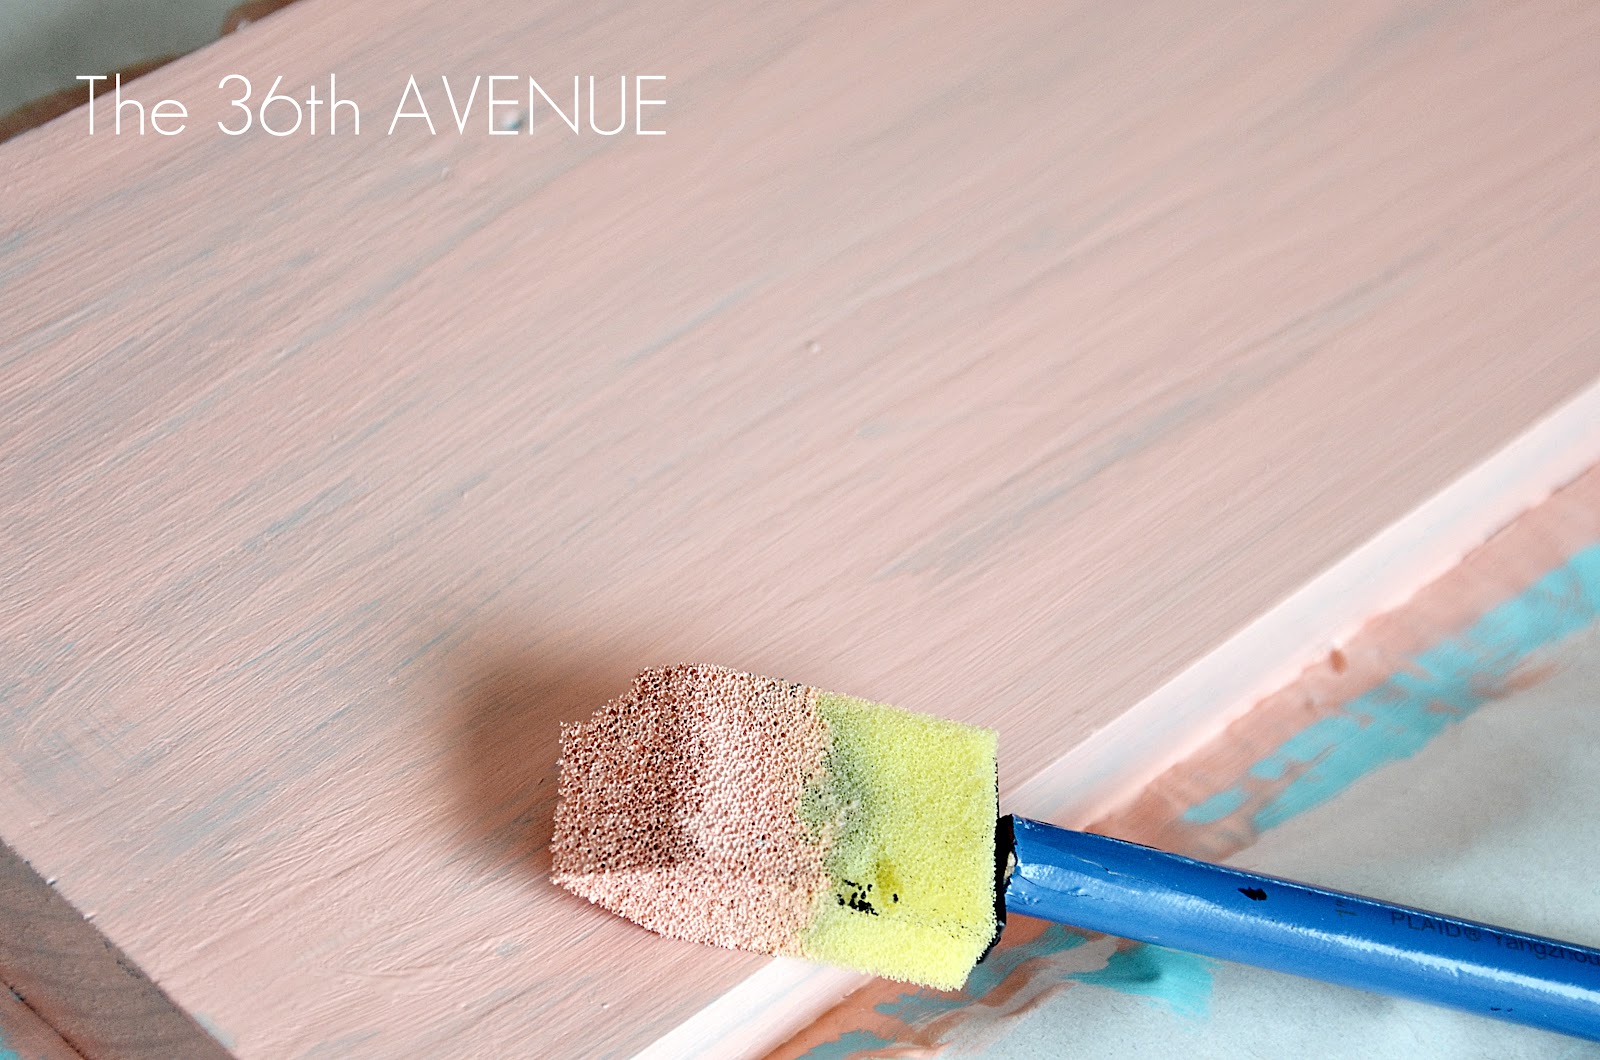
After your patience has been tried and the first coat is dry you can apply the main color for your sign.
I chose coral for mine.
Yummy!
You want to do a couple coats of your main color until you don’t see any of the first color.
I did a total of two… This is how mine looked after one coat.
3
The next step is to apply the stencil.
I love to use vinyl stencils because they stay put and you can make any design you want.
You can find or purchase this EXIT stencil here.
If you have never worked with vinyl stencils before you can click here for a full tutorial of how to do it.
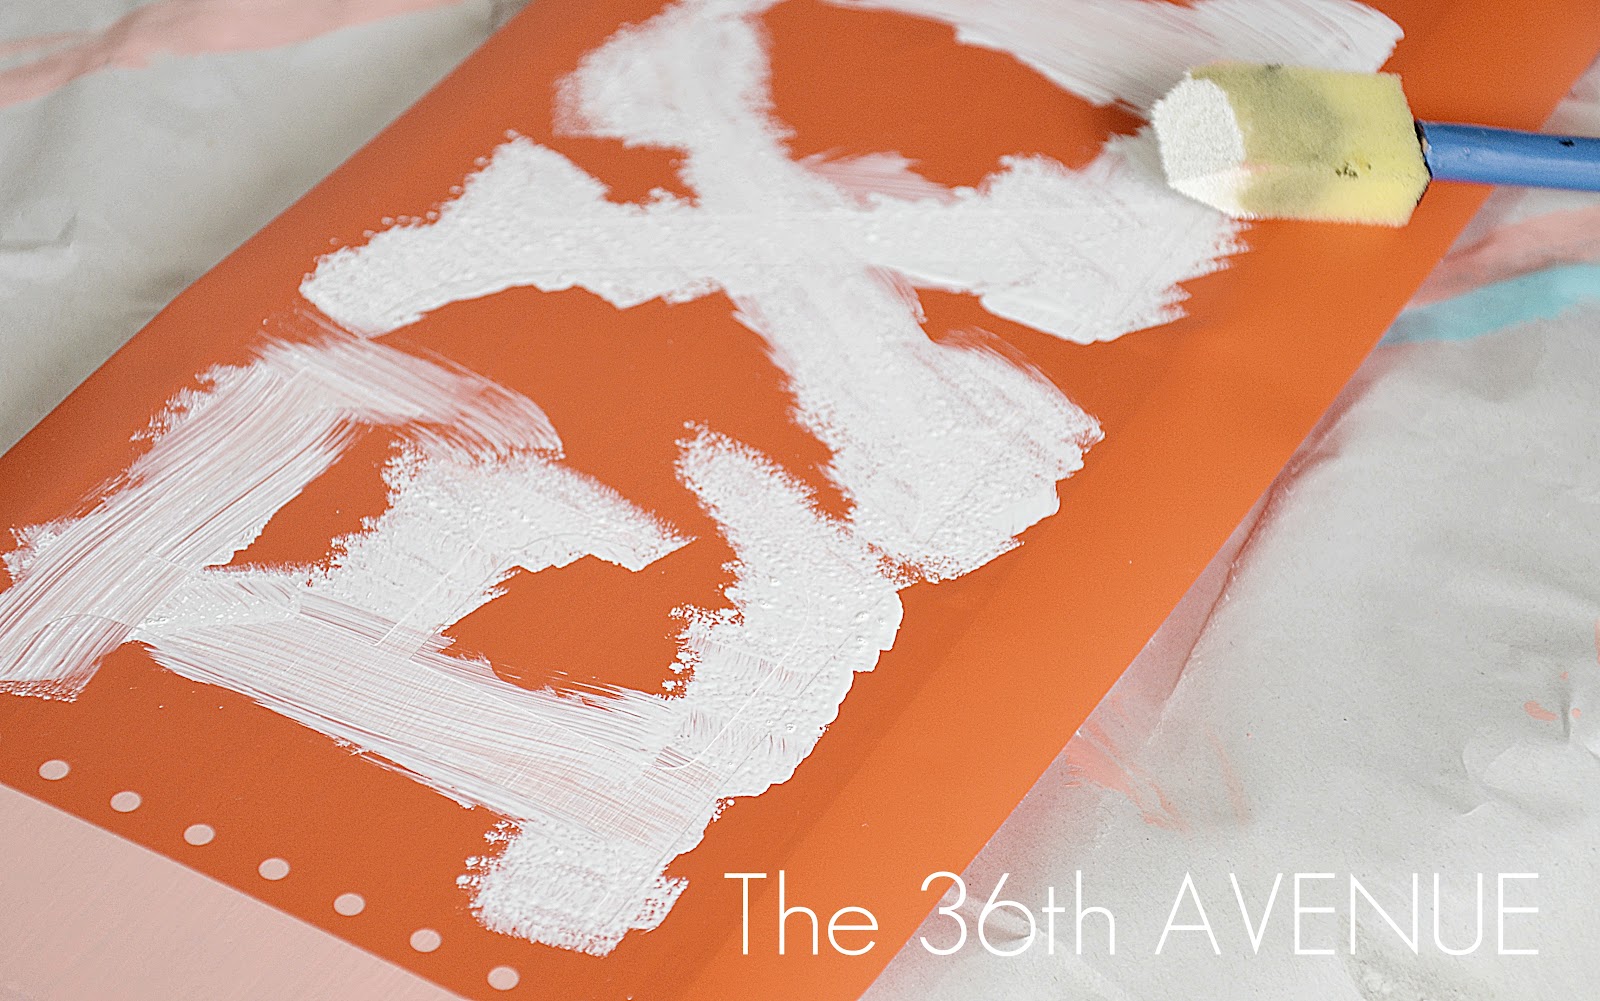
Remember to tap the paint instead of brushing side by side.
It took two coats of white paint for the letters also.
4
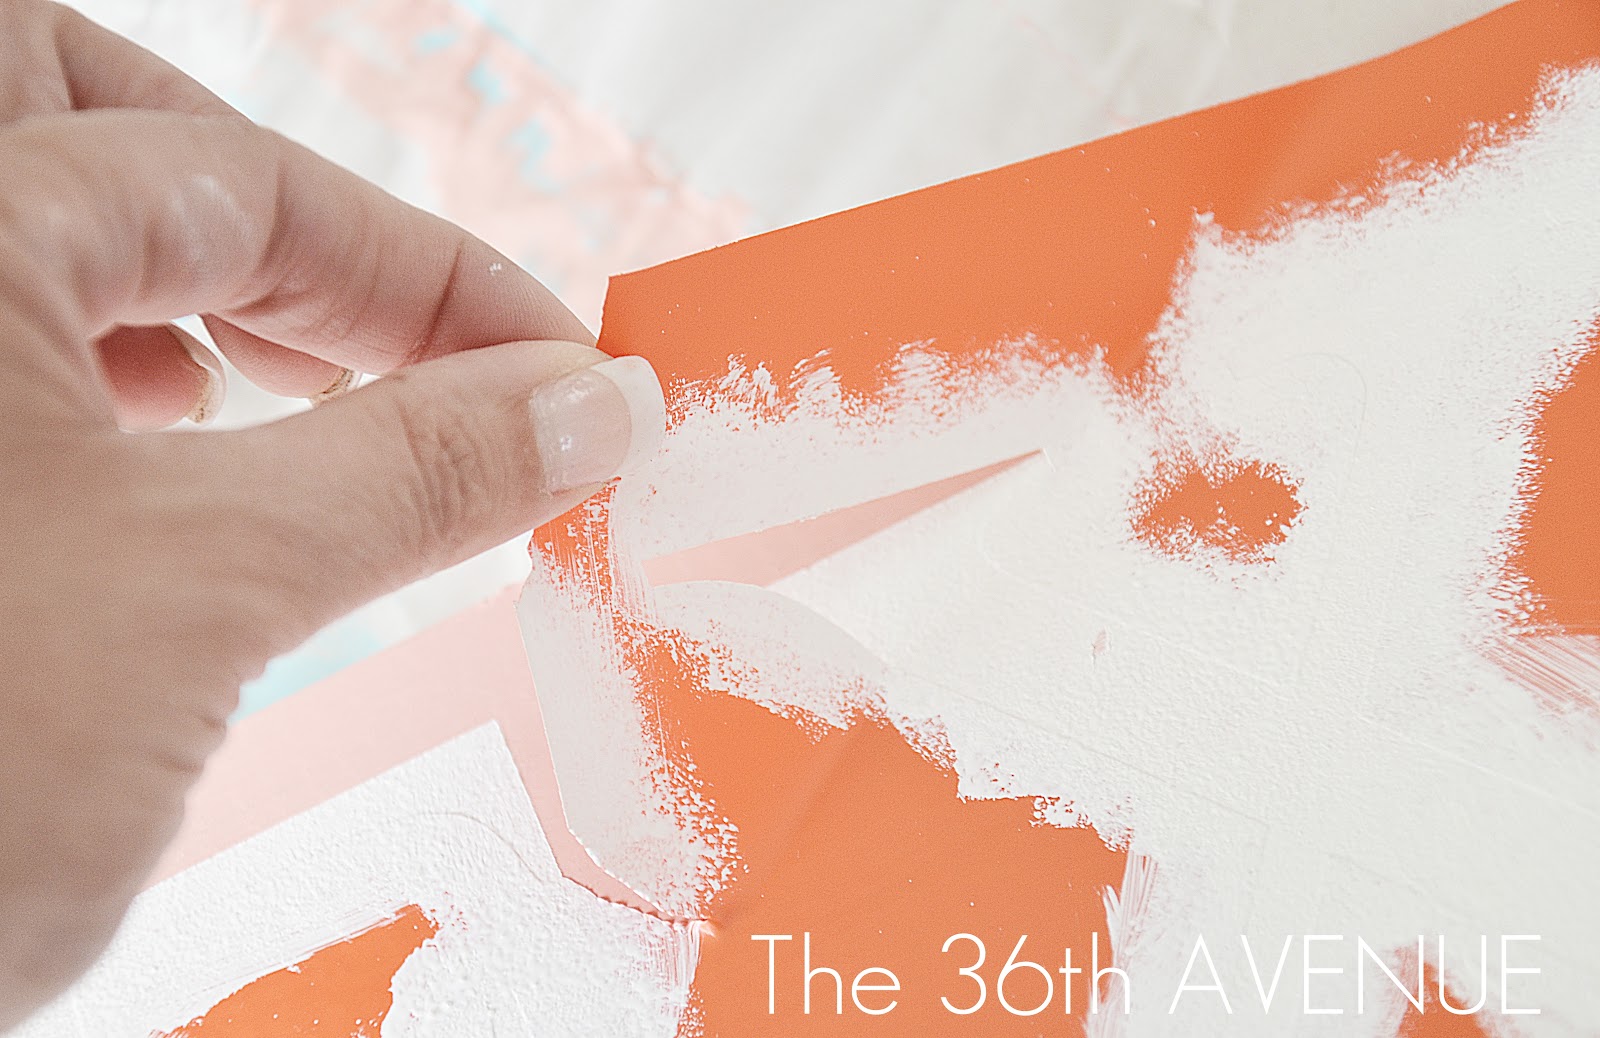
To be safe let the paint dry and then peel the stencil off.
I love this part!
5
Now that your sign is all dry, it is time to make it EXTRAORDINARY!
Use sand paper to distress it.
Slowly sand the areas where you want the first color { turquoise } to come through.
The more you sand…the more rustic it will look.

This is another reason why I love to use stencils because you can distress your entire sign,
something you can’t do when you apply vinyl.
We are done!

…I am loving the coral!
Thank you all for visiting with me!
Besos!
Desirée
If you are new to my blog I want to welcome you!
I hope you stay in touch with me and Subscribe to The 36th Avenue via Readers.
I am sharing this project over at these fantastic parties!

Hi there. I am enjoying many of your tutorials. What is the best type of paint to use to make this sign? And if one wanted to hang it outside do you have a suggestion for weatherizing? Thanks in advance. 🙂 Blessings!
Love it! I love making fun decor for my laundry room, too. After I made it over this past summer, I’m always looking for fun things to add to it. Thanks for linking to Handmade Tuesdays.
What a beautiful sign, nicely done!!! I love that color!
This is gorgeous. Love the colors. Thank you for the tutorial. Can’t wait to try this myself:)
/Annika
Annika, you are going to love it!
Desiree, this is AMAZING! I love the idea and the color combination! Coral is my new favorite color and I’m thinking about adding it to my living room… so I just might make one of these to hang above my front door. I’m scared of distressing but this project is going to force me to try it! 🙂
Britni,
You should give it a try… It is super easy to do and you can never go wrong.
Thank you for stopping by!
Another fabulous project! My you have been busy!!
Thanks for linking to a Round Tuit!
Hope you have a fabulous week!
Jill @ Creating my way to Success
http://www.jembellish.blogspot.com/
The muted tones of the sign make it PERFECT! I love it!
OK… awesome!! Please share the colors you used.
Hey Desirée! That sign turned out great! I love the colors you chose! Great job!
Besos desde España
Gracias a ti mi amor!
This turned out soooo cute Desiree! Love the color combination!