
If you were visiting last week the Share Your Awesomeness Link Party,
you may remember that I asked your opinion about what banner you liked the most.
{ You can see the three different banners here. }
The great majority chose the classic triangle shape.
Now, one comment woke up my creativity, this is what Amanda said:
“Thanks for hosting.
I SO look forward to your parties every week {pretty lady} 😉
I absolutely LOVE the half circle banner, however, knowing how creative you are~I am TOTALLY expecting some sort of awesome, “new” shaped, fabulous looking banner, that is unique and inspiring as well!
{No pressure}
Haha! 😉
Take care!
Amanda “
OK lets review the comment… This time this is how it sounded to me…
” …some sort of awesome, “new” shaped, fabulous looking banner, that is unique and inspiring as well?”
Mmmm… I am pretty sure my window treatment is not that exciting but Amanda my love, thank you for giving me the push to create something different…
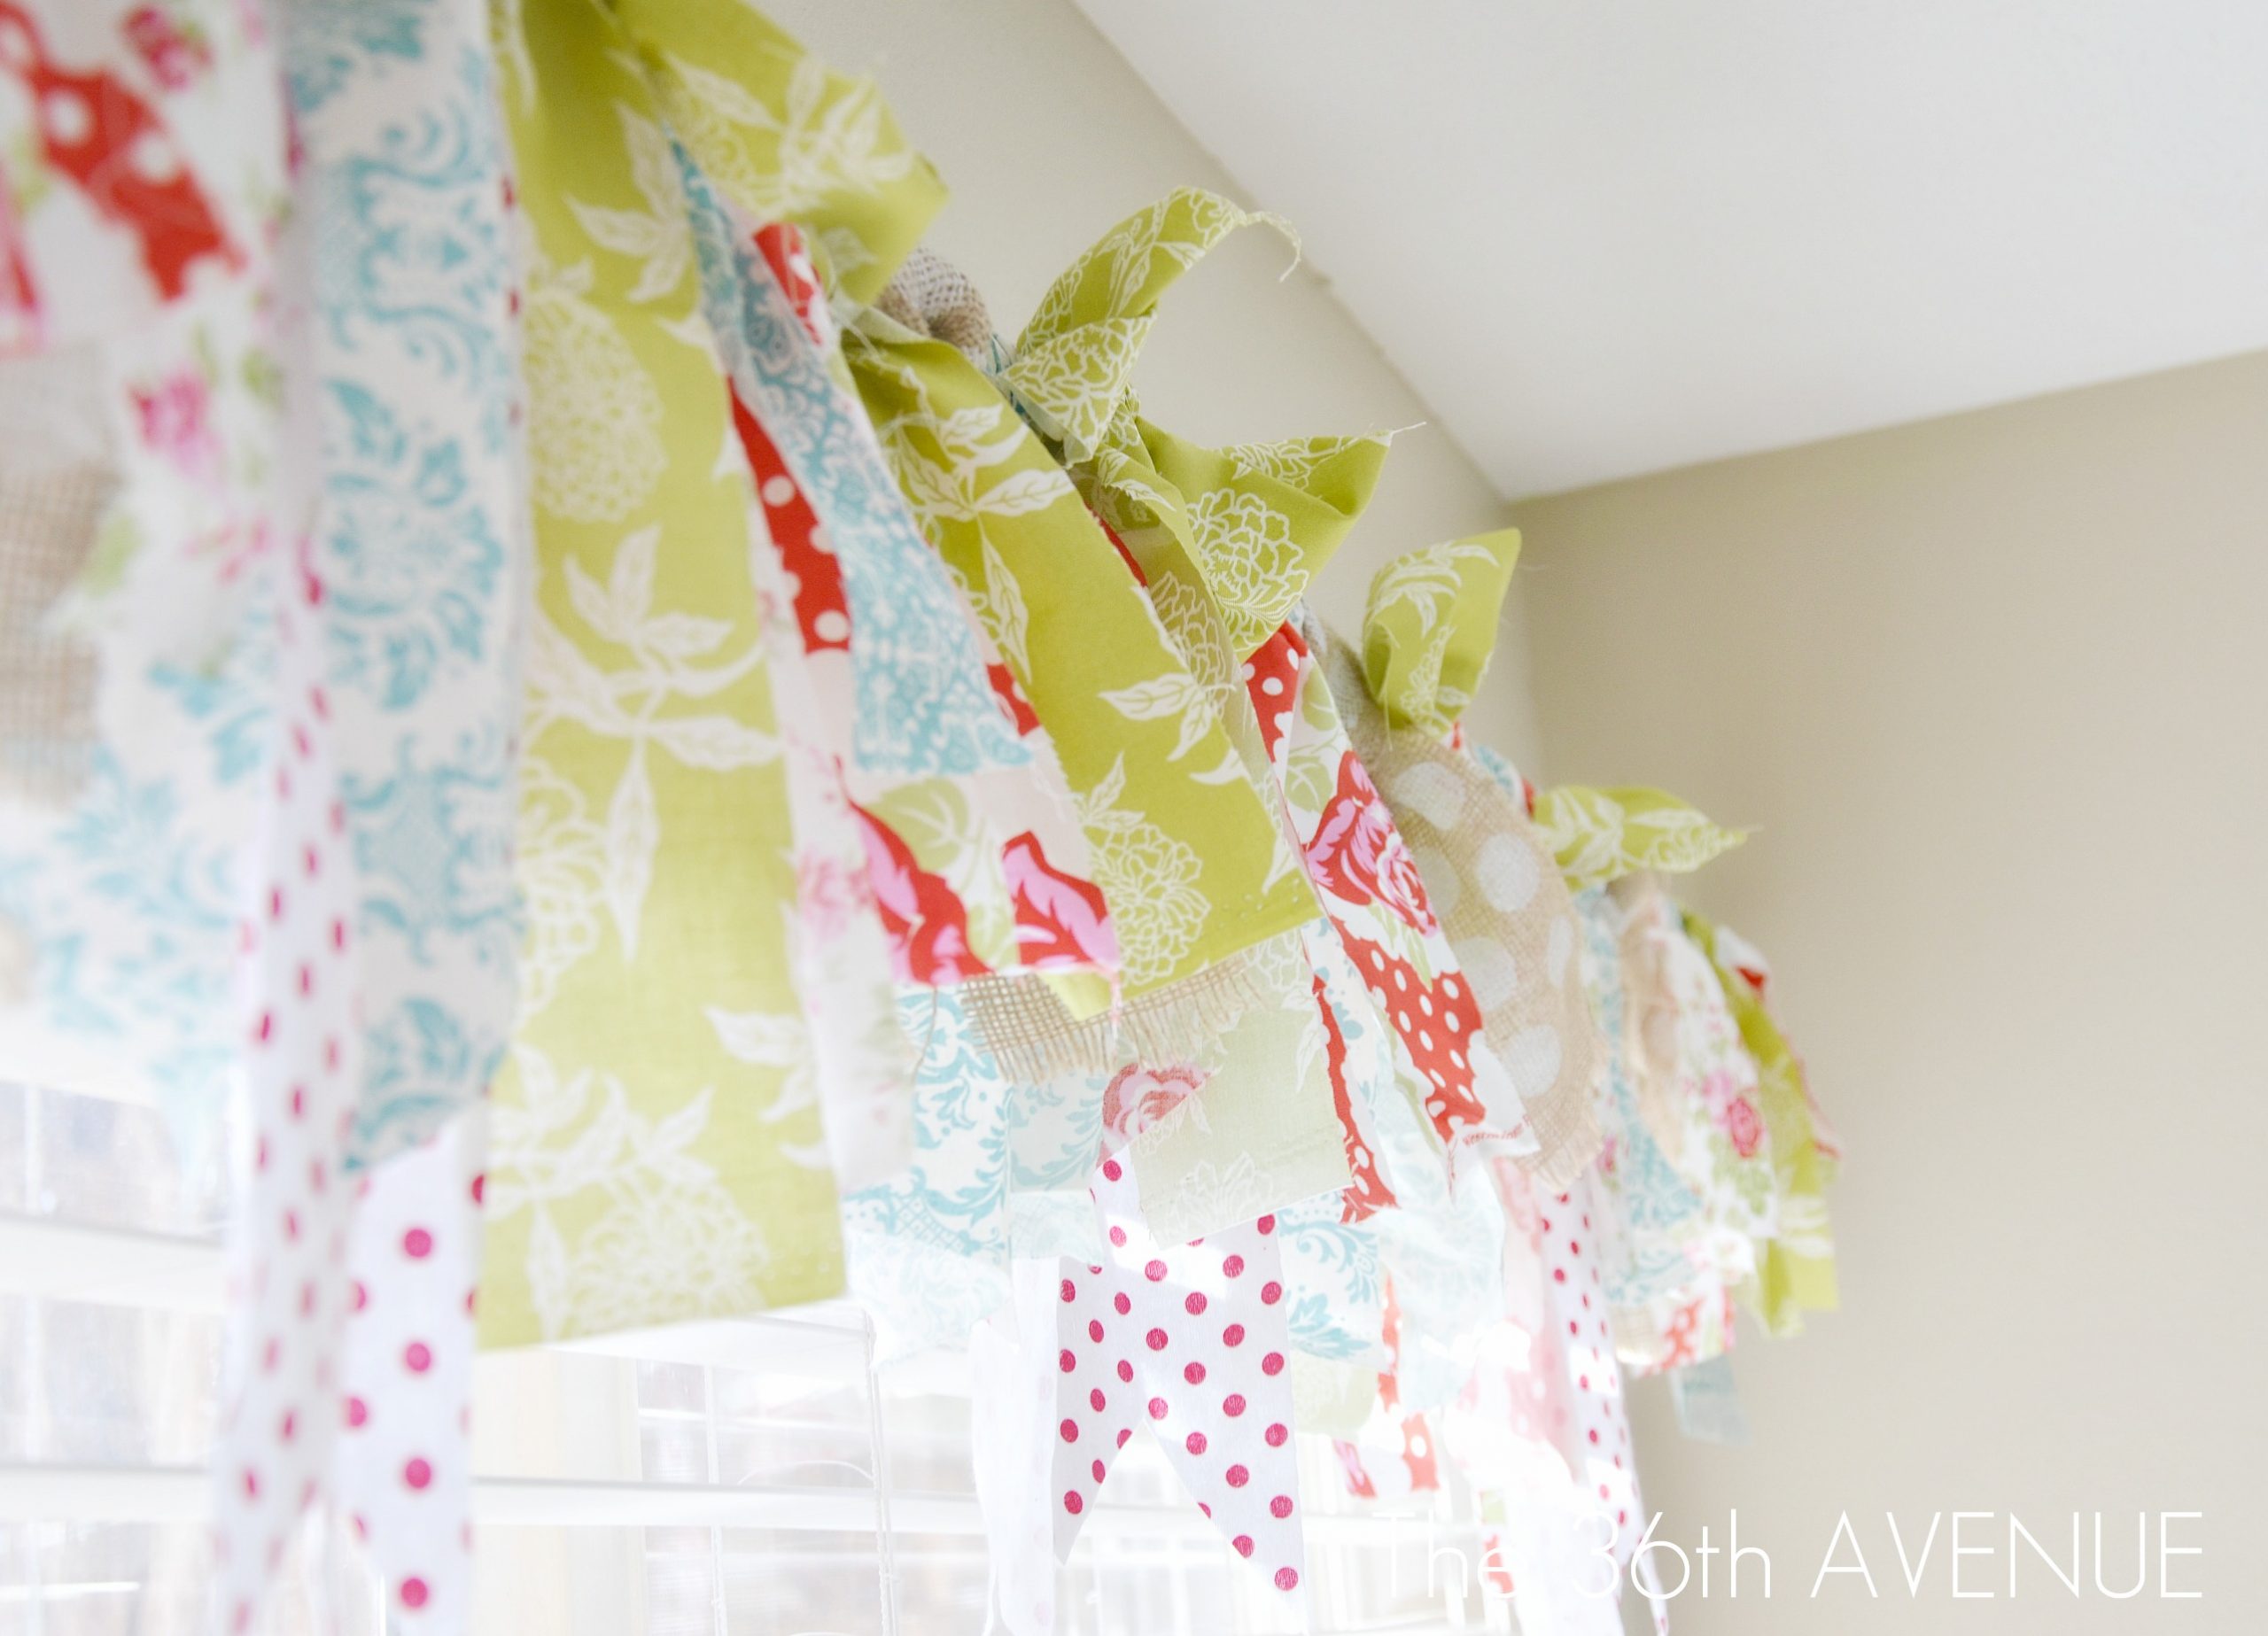
Here it is… and by the way my banner’s name is Amanda 😉

This banner was so easy to make that I really didn’t feel the need for a tutorial.
All you need is scissors and scraps fabric… no sewing here today.
All I did was cut strips of scrap fabric that I had around the house and then I tied them to the curtain rod…
I made the length of each color a little bit different to give it movement and interest.

My new craft room is all about color and brightness so I decided to mix different shades and patterns to really bring the fun out.
If you want to do something similar but you are not sure about how to mix match colors make sure to check out my
” 101 Color: The Color Wheel” Post. I am confident that by the end you’ll come up with something EXTRAORDINARY!

Now… while I was putting it together I realized that this was the fabric that I used for some of the projects that I made last year.
I love that! It is a little reminder of my 2011 journey.


When I first thought to be done I realized that the window and the polka dot wall was a little bit disconnected from each other.
I decided at this point to make my own polka dot burlap to take care of this problem…
Here is a little picture tutorial.

1
You’ll need a piece of card-stock. A circle punch holder. AWESOME Paint and a flat brush to paint.
{ image one }
2
Punch holes out of the card-stock.
You want them to have a consistency. I used as a guideline the previous hole, placing the punch holder at the edge of the previous circle.
{ image two }
3
Get ready to paint!
Since I was introduced to SoSoft Fabric Paint by DecoArt, this paint has become my FAVORITE for fabrics.
It is truly soft to the touch and it goes smoothly and evenly on the fabric.
You should give it a try!
{ image three }
4
Secure the stencil to your fabric with painter’s tape.
It is easy to paint that way.
{ image four }
5
Now it is time to paint.
Make sure when you apply any paint on fabric that you tap the brush up and down,
NEVER brush side to side.
Because of the tape you can lift the stencil from the fabric to make sure the entire surface of the circle is covered.
When you put the stencil down it will go back to the right place.
{ image five }
And that was it!
You are ready to do whatever you please with your Polka Dot Fabric…
Enjoy!

……………………………………………………………………………….
Click HERE to see my favorites Link Fiestas!


So, okay, first of all. You TOTALLY made my day with THIS post missy! Seriously, you have no idea! A little tear even came to my eye!
I am loving this idea, SO CUTE and ORIGINAL. {Go figure} 😉
I know the rest of your craft room will be fabulous as well and I can’t wait to see it. {Along with the rest of your readers, I am sure}
Thank you again for including my comment in your post. I am honored!
And…I just have to say. YOU are the next.big.thing. I can feel it, I see it in your projects, posts, ideas, everything. By no means am I a “professional” however, I do know fabulous work when I see it, and I KNOW you will “make it big”
I can feel it. So happy to have met you through this little blog world.
{HUGS} and Thanks again!
~Amanda
Amanda… Amanda… Amanda…
Look what you did 😉
Thank you sweetheart for your kind words. If I am ever the next “big thing” it’ll be bacause people like you and all of my readers.
Tons of love my friend!
I love the color scheme those go great together! So cute! Great job!
Beautiful, just like you! Have a great day!
Debbie
get out! what a fabulous idea for a custom window treatment – i’m adoring the fabrics you choose (& made!!!) so impressive!
http://www.northerncottage.blogspot.com
Thank you for sharing this!! My kitchen window needs something just like this, I can’t wait to make it!!! =]
I love this idea I did something similar with long strips for a shower curtain years ago and had totally forgotten about it (pre-blog days haha)
That has got to be THE happiest little window treatment! Perfect for keeping your pep level up while crafting =)
This is absolutely adorable Desiree!! I just love it! I’m thinking something like this would look so cute in my daughter’s room! I adore all the different fabrics you used!
After I was done I thought the same thing for my girls. Honestly it took me 5 minutes to make.
I can’t wait to have you on my blog this month… I am so excited for you to be my guest.
Thank you again!
What a FABULOUS banner! I am so in love with polka dots, I think I have looked at your “teaser” picture of your wall on Facebook about a million times this evening. I can already tell this craft room of yours is right up my alley, you need a new friend to craft with right?? 😉 ha
Meagan,
Anytime my friend!
Tons of love!
Oh ho…creativity abounds! Even in making banners! You took it to a whole new level! It looks great!
Thank YOU my love!
I had fun with this one!