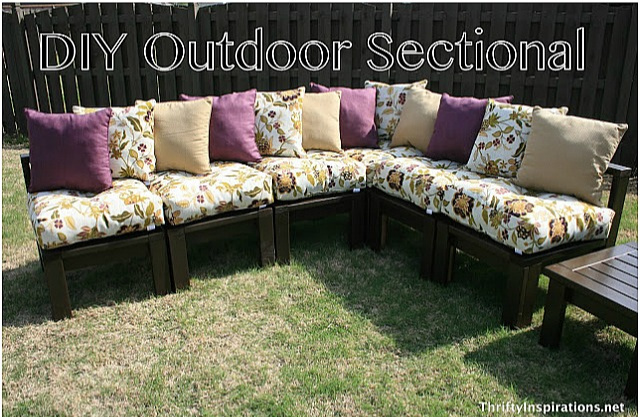
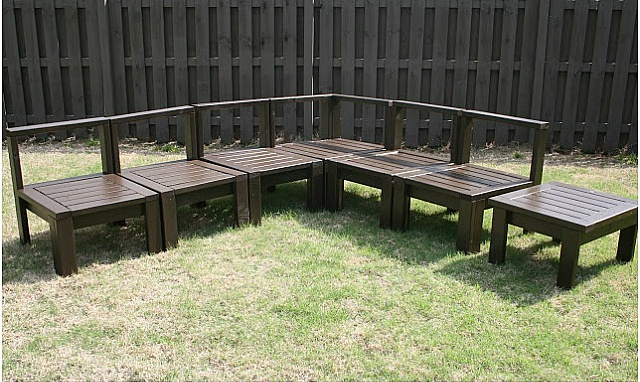
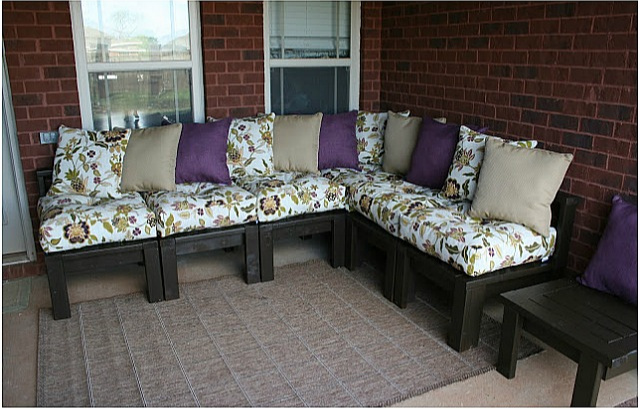
DIY Outdoor Sectional Instructions – Make this outdoor sectional with easy to find materials. This is the perfect piece of outdoor furniture to add comfort and the look you want for your backyard or patio.
My name is Rachel and my little slice of blog heaven is Thrifty Inspirations. Today I want to share with everyone a huge project my husband and I recently finished all by ourselves! Our super comfortable outdoor sectional!
I got the inspiration from an Ana White Project Plan “Simple Modern Outdoor Sectional”.
If you have never been to Ana White’s blog, I forewarn you, you will be inspired to madness. Back-breaking, muscle-aching, paint-covered madness. I wanted to keep with her style but make it a little more within our budget so we use 2″x4″ lumber instead of 1″x4″ because they were about half the price, and let’s face it, it’s always all about the price.
Here is what we did:
If you are looking to use 2x4s as we did you will need to make the following adjustments:
Armless section:
2 @ 24 1/4″ (Seat Side Aprons)
1 @ 18″ (Seat Front Apron)
2 @ 22 3/4″ (Seat Supports)
2 @ 24″ (Seat Sides)
6 @ 17″ (Seat Boards)
2 @ 13 1/2″ (Front Legs)
2 @ 27 1/2″ (Back Legs)
1 @ 24″ (Back Top)
2 – 2×4 @ 21″ (Seat Back Board & Seat Back Apron)
Corner section:
1 @ 24 1/2″ (Front Apron)
1 @ 18″ (Seat Front Apron)
2 @ 22 3/4″ (Seat Supports)
2 @ 24″ (Seat Sides)
6 @ 17″ (Seat Boards)
2 @ 13 1/2″ (Front Legs)
2 @ 27 1/2″ (Back Legs)
1 @ 24″ (Back Top)
2 – 2×4 @ 21″ (Seat Back Board & Seat Back Apron)
Corner section:
1 @ 24 1/2″ (Front Apron)
2 @ 23″ (Seat Supports)
1 @ 24 1/2″ (Side Apron)
1 @ 24″ (Side Seat Board)
6 @ 20 1/2″ (Seat Boards)
2 @ 13 1/2″ (Front Legs)
4 @ 27 1/2″ (Back Legs)
2 @ 21″ (Back, Short Top Apron and Seat End)
2 @ 22 1/2″ (Back, Long Top Apron and Seat End)
1 – @ 24″ (Short Top)
1 @ 27 1/2″ (Long Top)
1 @ 24 1/2″ (Side Apron)
1 @ 24″ (Side Seat Board)
6 @ 20 1/2″ (Seat Boards)
2 @ 13 1/2″ (Front Legs)
4 @ 27 1/2″ (Back Legs)
2 @ 21″ (Back, Short Top Apron and Seat End)
2 @ 22 1/2″ (Back, Long Top Apron and Seat End)
1 – @ 24″ (Short Top)
1 @ 27 1/2″ (Long Top)
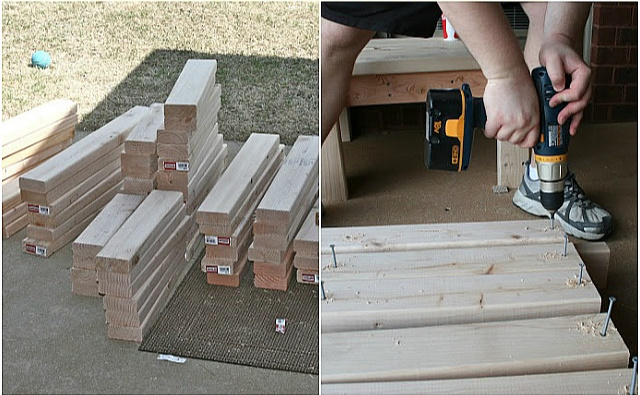
I recommend cutting all of your wood first so that you can get the most out of each board.
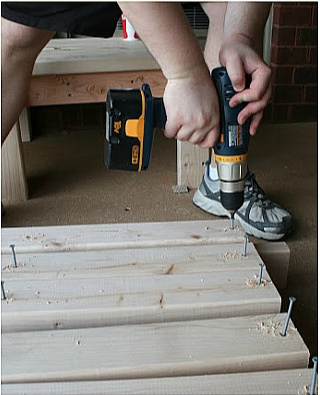
Then, using Ana’s project plan assembly instructions we built each section one at a time. I built two of these sections by myself. I do not recommend this! My back hurt, hands hurt, head hurt, knees hurt. You name it, it hurt. The worst part was that they weren’t even sturdy and we had to go back and re-screw a bunch of sections where I just couldn’t hold it properly by myself to get it nice and tight. Get help! After we went back and fixed those sections we got a rhythm going (I made the pilot holes and he screwed in the screws) and it was much smoother sailing.
Once you have all of your pieces assembled you will need to use wood filler to fill all the visible holes.
Then sand smooth.
Once all of your pieces are puttied and sanded it’s time to paint 🙂
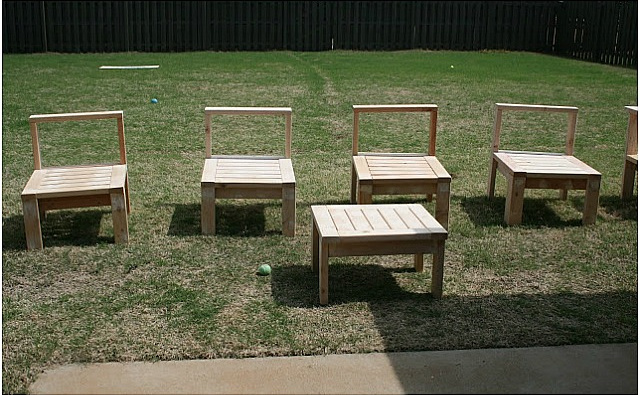
Line them up like a little sectional army. I recommend using a paint sprayer. It will require fewer coats and shorten your painting process from an entire day to less than two hours. However, if you do not have access to a paint sprayer you can certainly paint by hand with a brush. You may want some company though! There are a lot of angles on this project! I chose to use a Behr Exterior Latex paint in Coffee Bean.
I allowed each piece to sit in the sun (it was a beautiful day for painting) for several hours before reassembling all the pieces. Once they were good and dry it was time to put them back together!
Want to see what the power of pillows can do?
Pa-pow! Pillows!
The cushions/pillows were actually the most expensive part of this entire project. They were a Costco deal… I love me some Costco deals! I had looked for a very long time online for 24×24 cushions with little to none in my price range. You can also head to AMAZON HERE to find outdoor pillows that you may like!
My Total Cost Breakdown:
Lumber – $87 (I had about 8 boards left-over and made 6 sections)
Screws – $13 (I used regular exterior wood screws)
Cushions/Pillows – $213 (this was obviously the most expensive part)
Paint – $0 (I had a whole gallon of brown exterior paint leftover from a tiny project)
(It would have cost me ~$30 had I required purchasing the paint.)
Total Cost: $313
Items I used that I already had on hand:
Wagner Power Painter Plus (Paint Sprayer) – Find it HERE
Dewalt Orbital Sander – Find it HERE
Rigid “10 Compound Miter Saw – Find It HERE
Ryobi 18V Cordless Drill (kit) – Find It HERE
Elmer’s Wood Filler – Find It HERE
Behr Exterior Satin Paint in Coffee Bean
What I prefer to do is buy 1 tool per major project and borrow everything else from neighbors and friends. This will cut your costs significantly while still allowing you to gear up your garage at your own pace making it much more likely you will acquire the tools you need in the future!
All said and done, we absolutely love it. It’s super comfortable and plenty big enough for us both to lay out completely stretched with our laptops and just relax. It will be perfect for a summer BBQ too!
Thanks, everyone!
XOXO,
Rachel


