

These are the materials you need:
paint & paint brush. 4×4 lumber. scrapbooking paper. scissors. ruler. 3/4″ washer. pencil

Tools:
Sander and drill with a 3/4″ bit and a dice for guidance.

1st:
After cutting two cubes of 3.5″….
{I am not sure why they call it 4×4’s}
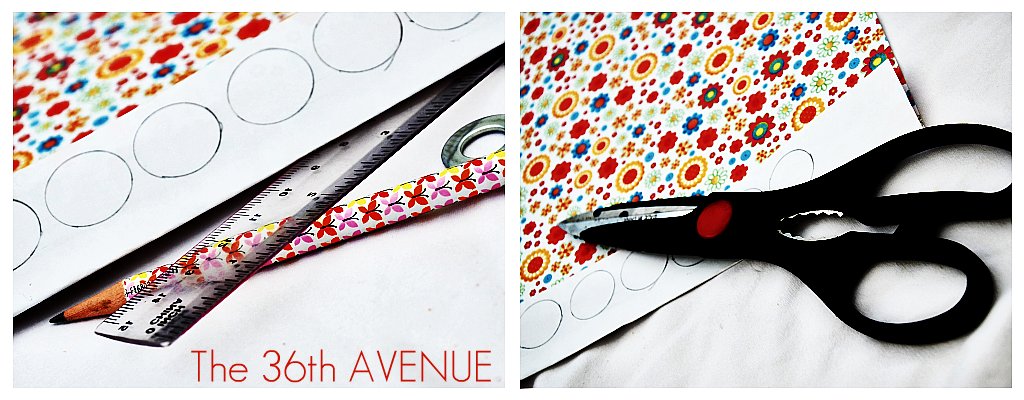
trace with a CUTE pencil and a ruler two lines that go from corner to corner
making an “X”… on each side of ONE of the cubes.

2nd:
When you are done it is time to get serious…
The POWER tools are coming…
The POWER tools are coming…
For me it was time to wear my husbands shoes…
Oh yeah! I am tough 😉
{One of my feet has panty hoses and the other one dosen’t…
how that happened I’m not sure}

Where was I?
…The power tools are coming.
With the help of a small regular dice start making holes
using the drill and a 3/4″ special bit…
Let the “X” be your guide. I eye ball EVERYTHING but you can measure if you want.

…I went approximately 1/8 of an inch deep…
You better do this OUTSIDE…
it makes a mess.
it makes a mess.

3rd:
It is time to sand…

…and paint

While the paint dries, trace the circles using as a template
the 3/4 inch washer. You’ll need… let me see…
the 3/4 inch washer. You’ll need… let me see…
1+2+3+4+5+6 = 21
Twenty One circles so what I did was trace 11 of them,
fold the paper and cut double the amount at once…
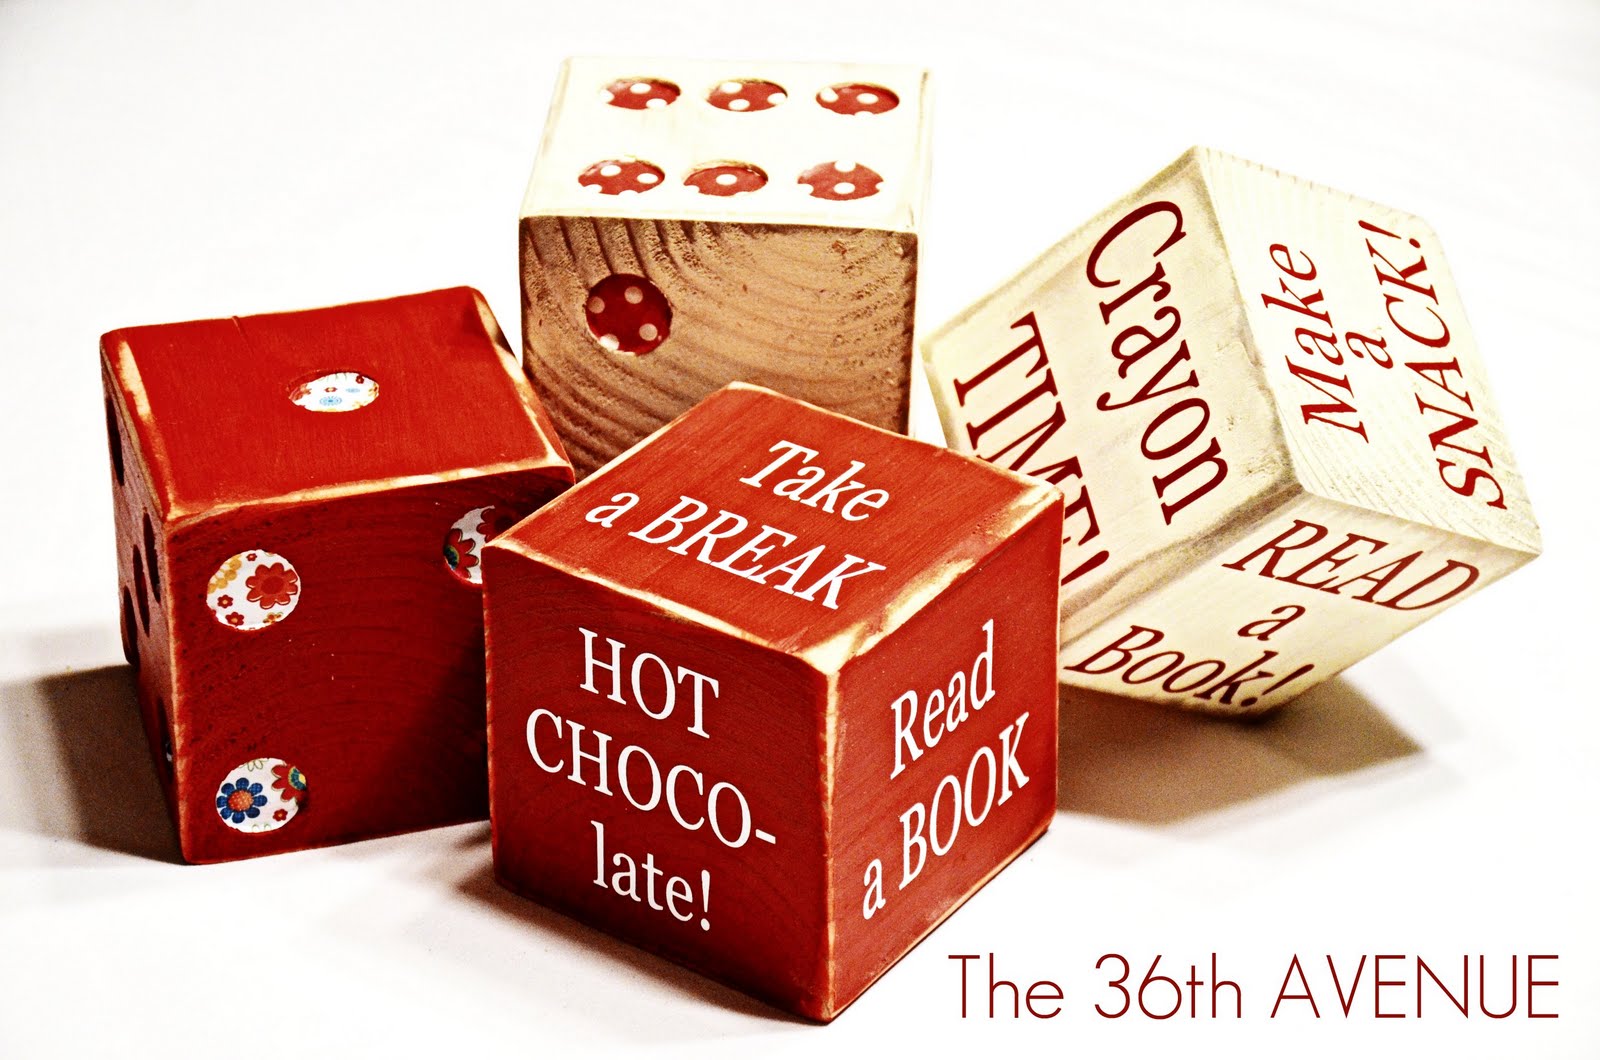
Now that the paint is dry and the circles are done it is time to assemble the dice.
Take one paper circle at a time and center it on top of each hole.
Press it down evenly and with your nail push in the ends…
You have 20 more to go!

For the other dice. I made and cut some vinyl with sayings.
{I will have some sets ready at The 36th Avenue this weekend}
{I will have some sets ready at The 36th Avenue this weekend}
All I did was to apply the vinyl.
For the blue OUTSIDE set I actually used the vinyl as a stencil…
and I painted the words on the wood.
{ click here to see how to use vinyl as a stencil }
So, here they are…

…a closer and FINAL look!
Click here to see what I used them for…
The END!
STOP:
Click HERE to check OUT the best
PARTIES in town 😉

These are adorable (even if you did have only one pantyhose on)! Great project!
Susan @ homeroad
You crack me up… and these are just to much, I love them. I want a set. You are super creative. Love it. winks-jen
I just love these!!!
I love the idea of putting fabric inside the holes!
Cute! Cute! Cute! I need to add on a "woman cave" just to display these chic, oh-so-girly betting symbols! 😉
Seriously these are the Cutest thing EVER!
These turned out great!
I love these! In fact, I love ur entire blog! soo cute and soo inspiring! keep up the fabulousness, you rock at this whole creative thing! 🙂 Have a happy, happy day!!
I saw your link-up over at Mindie's party and just had to come by. What a great tutorial and awesome project. Totally digging your humor and style too — pantyhose on one foot — you're killin' me!
So pleased to "meet" you!
Jenn/Rook No. 17
Love it, I want to roll a dice sometimes and not make decessions. Thanks for linking to Bacon Time. Following you with GFC. Hope to see you each week.