

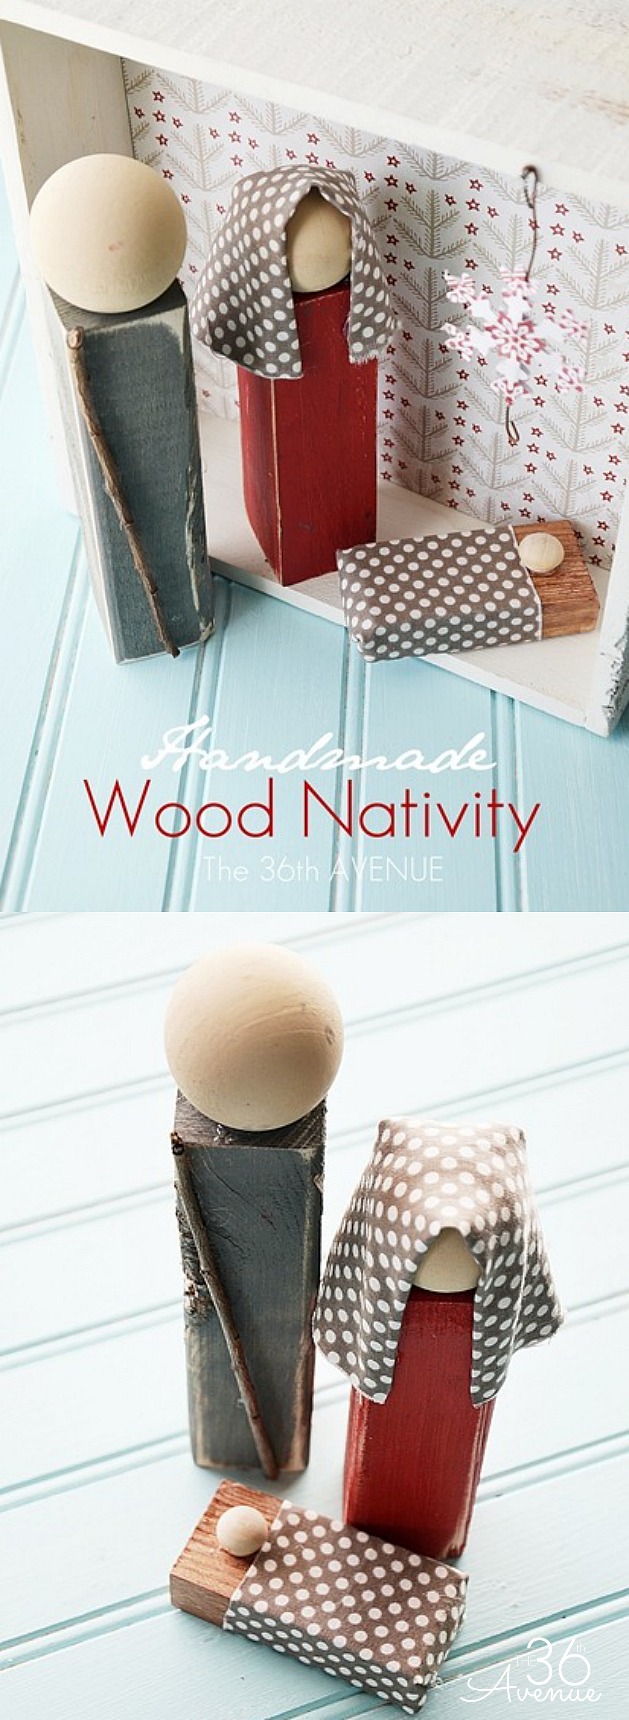
Today I’m sharing the tutorial of our DIY Wood Nativity…
It is super easy to make and they are great for gifts!

So many of you asked me how I made our Wood Nativity
so I had to put together a quick tutorial for you my friends… Enjoy!

You’ll need:
Two pieces of 2×2 wood.
{ For Joseph’s body: 6” long. For Mary’s body: 5” long. }
1 small piece of wood for the manger: 1×2 that is 3” long.
2” Wood Ball for Joseph’s Head.
1.5” Wood Ball for Mary’s Head.
1 Wood Peg
DecoArt Santa Red Acrylic Paint
{ because this is the most beautiful red ever. I use it all the time.}
Gray Acrylic Paint
1/8 yard fabric.
Scissors, brush, glue gun, and sand paper.
Handmade Wood Nativity
TUTORIAL
First plug in your glue gun.
While it is heating up paint your wood towers and stain the small wooden manger.

When the wood is dry, glue the wood balls on top of each tower
and the small wood peg on the other piece of wood.

At this point it will look like this… So cute!

Now it is time to dress them up!
Cut two pieces of fabric one about 3.5”x5” rectangle and the other one about 7.5”x7.5” square.
For the blanket use the rectangle piece.
1. Wrap the front and glue the fabric on the back.
2. Fold over the other side and glue it.
Trim the length so it is easy to work with.
3. Fold the end like you would do if you were wrapping a gift and glue it.
These pictures are showing the back of the manger.

Use the square piece for Mary’s head piece.
Fold the fabric in half. This way you’ll see the polka dots from every angle.

Ready?
Let’s make the head piece.
1. Place and center Mary on top of the fabric.
2. Bring the two top corners towards the body and glue them to the wood.
3. Turn Mary around and secure the fabric to the wood with the glue.
4. Fold one of the corners towards the center and glue it.
4. Do the same thing with the other end.

She is done!

For Joseph my little girl found me some sticks in our backyard.
All we did was pick the perfect one and glue it to his body.

Here is the entire family!

At this point I thought I was done but then Mimi reminded me that they didn’t have a home.
My little girl was right and we had to do something about that.

I have this crate that I used to have in my Sew Cute Corner.

I love the look of it and I didn’t want to change it so paper was the solution!
All I had to do was cut a 8×8 piece of paper and put it inside of the crate…
The hard part was choosing what background I liked best.

Fromm the same paper stock I punched two snow flakes, I added some rusty wire,
glued them all together and I had the perfect star…

…for our Handmade Nativity.

Isn’t it sweet?
©the36thavenue.com DO NOT Copy, Save, or Paste this image.
Here you can see it as part of our Red and White Family Room.

If you haven’t yet, click here and take a tour of the entire room.
You have to see the Christmas Trees!
As I mentioned in the beginning I am giving away the Nativity I made for the tutorial.
I don’t need two and it is the CHRISTmas Season after all!
Don’t you think this would made the cutest Christmas Gift?

Love it!
Happy day my friends!
Besos
Desiree

My favorite thing about Christmas is the JOY. And … the music!
Love this!!
I saw this little wood nativity on another blog, but love how you dressed yours up and added a little manger home! As for Christmas, I love spending time with family & friends….parties, dinners out, family get togethers. It seems like it is the only time of year that we actually make time to spend with those we love!
I pinned it, Thanks for the chance to win one!
I just love your sweet and simple Nativity craft. Thanks for sharing!
Amazing! I love that it is both rustic and modern and I love love love that you used coordinating papers!
Aww… Thank you Angela!
Homa Style is having a 12 Days of Christmas link party going on now. I would love it if you linked up your Nativity Wood Set. It’s right up my alley!
The link is
http://homastyle.com/wp/2012/12/01/12-days-of-christmas/
My Christmas wish is to see you at the link party!
So cute! I have been eyeing these for a while! Thanks for sharing!!!
I love this idea — my 4 kids need some nativity they can actually play with!
I love family gatherings, lights and peppermint ice cream