
I’ve been waiting for November to arrive to share with you my first DIY Christmas Wreath of the year! I love Christmas, it is my favorite Holiday and it is the only Holiday when I decorate pretty much every corner of our home. I am kind of a traditional girl when it comes down to Christmas Decor and I am so happy that gold is back!
Today I am sharing with you one wreath three different ways , so you can see how easy it would be to customize your own.
Let me start with the simple version of it…
Golden Bow Wreath
I love this simple wreath for any occasion.
I think it would look fabulous during the Christmas Season and then for New Years!

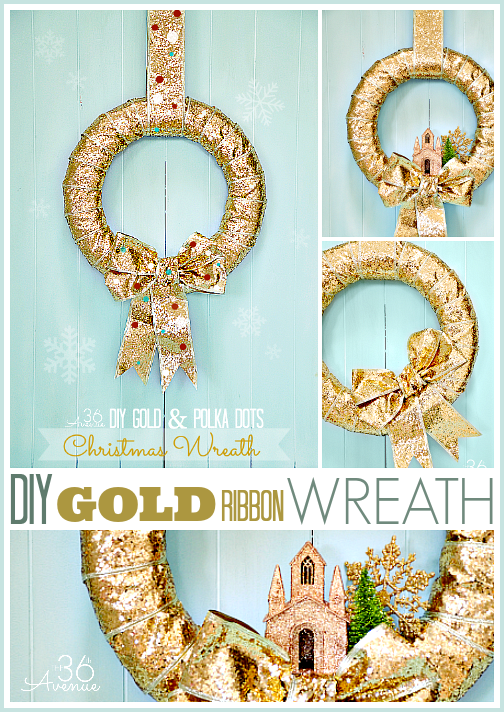
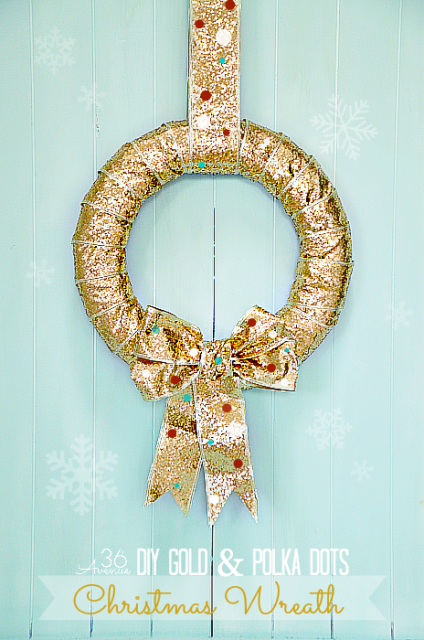
For the second look I wanted to make something fun but timeless, traditional but modern, elegant but cute.
The gorgeous gold ribbon with the fun cute polka dots was the perfect combo for me…
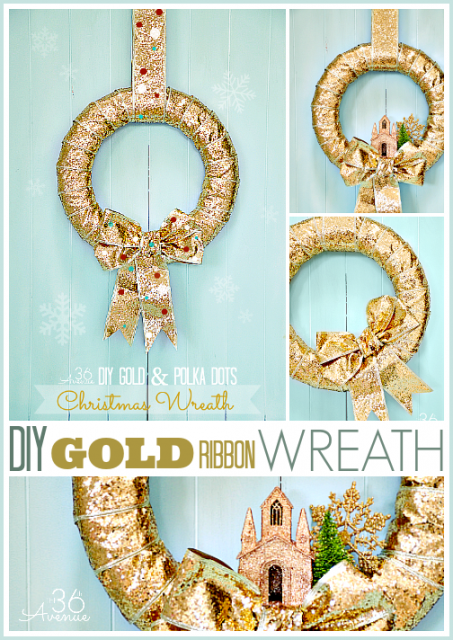
DIY Gold and Polka Dots Wreath
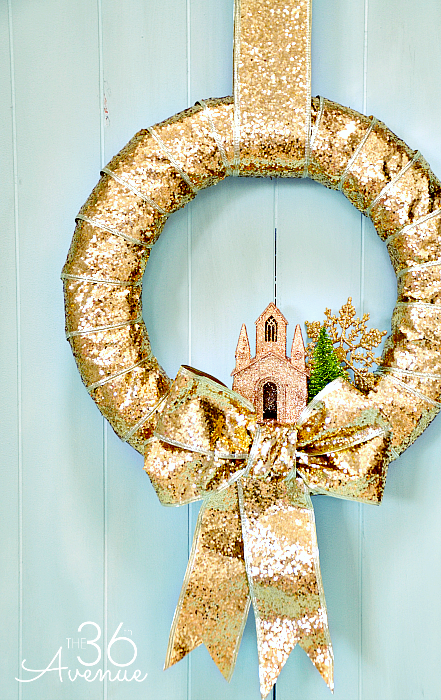
…but if you love a more traditional look you are going to like this
next wreath that I made thinking of you.
Going Home for Christmas Wreath
Do you like them?
Let me show you what you are going to need to make your own.
1 foam wreath
1 Roll of Super Shining Glittered Gold Ribbon (try saying that 10 times quickly)
{ My heart almost stopped when I found my ribbon at Wal-Mart in the Christmas area}
Acrylic Paints and Stencil Brushes
Pins, scissors, and embellishments such as ornaments.
Frank Sinatra singing Christmas Songs.
Christmas Wreath Tutorial
One…
Secure one end of the ribbon to the wreath using pins and start rolling the ribbon around.
I like to keep adding pins here and there to make sure the ribbon stays in place.

…Two!
Put your wreath aside… it is time to paint.
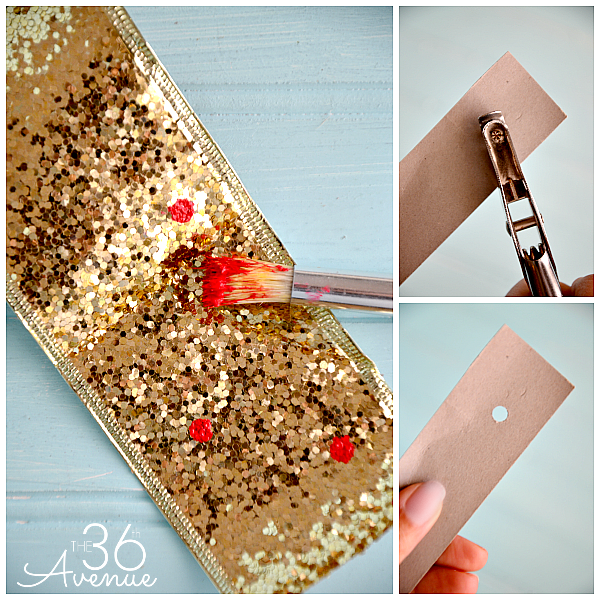
Cut the length of the ribbon that you are going to use to hang your wreath.
Punch different size holes on a piece of card stock to make your polka dot stencil.
Choose where you want your dots and stencil away my dear!
three
The Ribbon
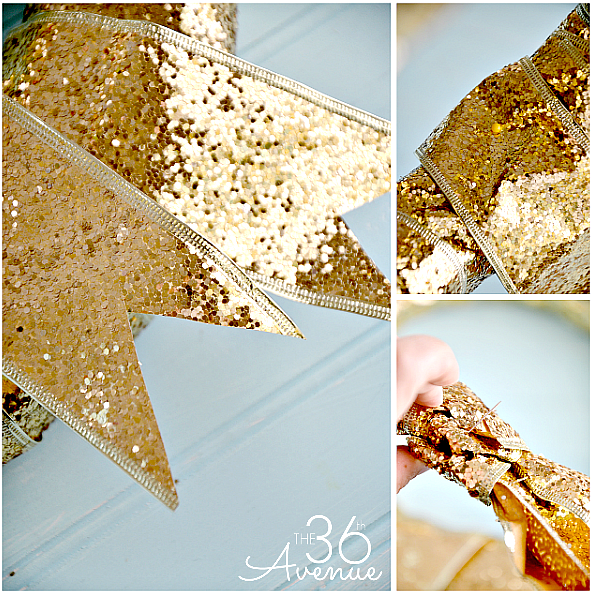
Make the bow following the directions here from my bow tutorial.

After your ribbon is done stencil it carefully, adding the polka dots where you want them to be.
While the paint dries cut two other pieces of ribbon about 10-12 inches each.
Trim the ends to make them look like this and stencil it.
Pin the two long pieces to the wreath and after pin the bow on top.
You are done!
If you like the simple all gold look follow all the steps but the stencilings.
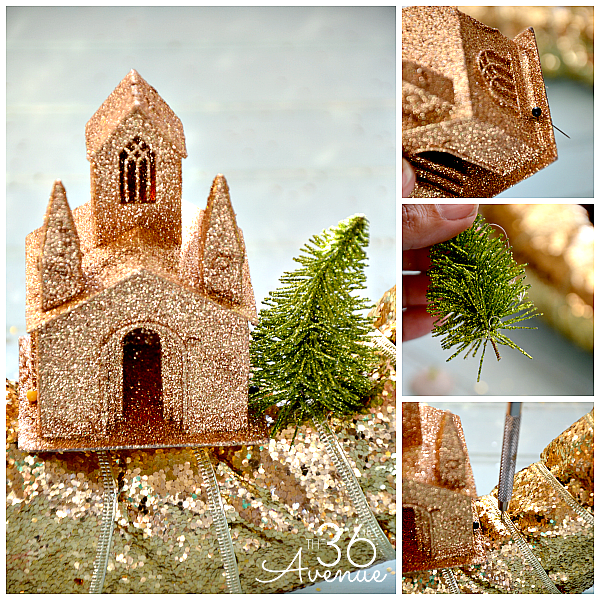
If you like the more traditional look pin any embelishments you like to the wreath…
I think it would also be adorable with ornaments.
So there you have them one wreath… Three Ways!
Thank you for hanging out with me today!
Besos
Desiree

Love the simple bow wreath! Just gorgeous, Desiree!
My goodness that wreath is gorgeous! Your tutorial is great but I still think I’ll need a lot of luck for my wreath to turn out that beautiful. I can’t wait to try, though! : )
Heather, it is super easy to make… Trust me you can’t go wrong.
I love these wreaths! I need a new one this year and this might be it. Thanks for the inspiration.
Tammy @ thecoloreddoor.blogspot.com
Have fun creating Tammy!
Just gorgeous!! Well done, girl! XO
Love, love, love this! Absolutely beautiful!! Pinning!
Love it Desi!!! GOLD!!!
xoxoxo
Love this Desi! So fun and festive. Pinned. xoxo
Can’t go wrong with glitter- how fun my friend.
That’s what I say Gina… Glitter all the way!!!!
Have an awesome weekend!
OMG I love it! I am doing a Gold Christmas this year, and that ribbon is Ah-MAZING! Pinning : )
Ashley one of my Christmas Trees is decorated in gold and I love it. I can’t wait to see your decor!
Hi Desiree! I am so excited to see the first Christmas project of the season and it is gorgeous! I’m totally with you, it is my very favorite holiday and I go just a wee bit overboard with decorating. 🙂 I am traditional, too! Love all three versions of your beautiful ribbon wreath – though the one with the little church is my favorite and Frank singing in the background makes it perfect! Thanks so much for sharing this beauty and pinning! Have a happy weekend!
Cindy, I love your comments my dear… You are so sweet. Have a wonderful weekend!