
DIY Furniture Makeovers are a lot easier to do than what you may think. This farmhouse table makeover transform our old kitchen table into a beautiful and new focal point for our dining room. We love it!

I bought this table almost two years ago from a young couple for $25.00. The top of the table has never been in great shape but I didn’t mind since it was meant to be abused by countless amounts of spills, craft paint, hot glue and many other things.
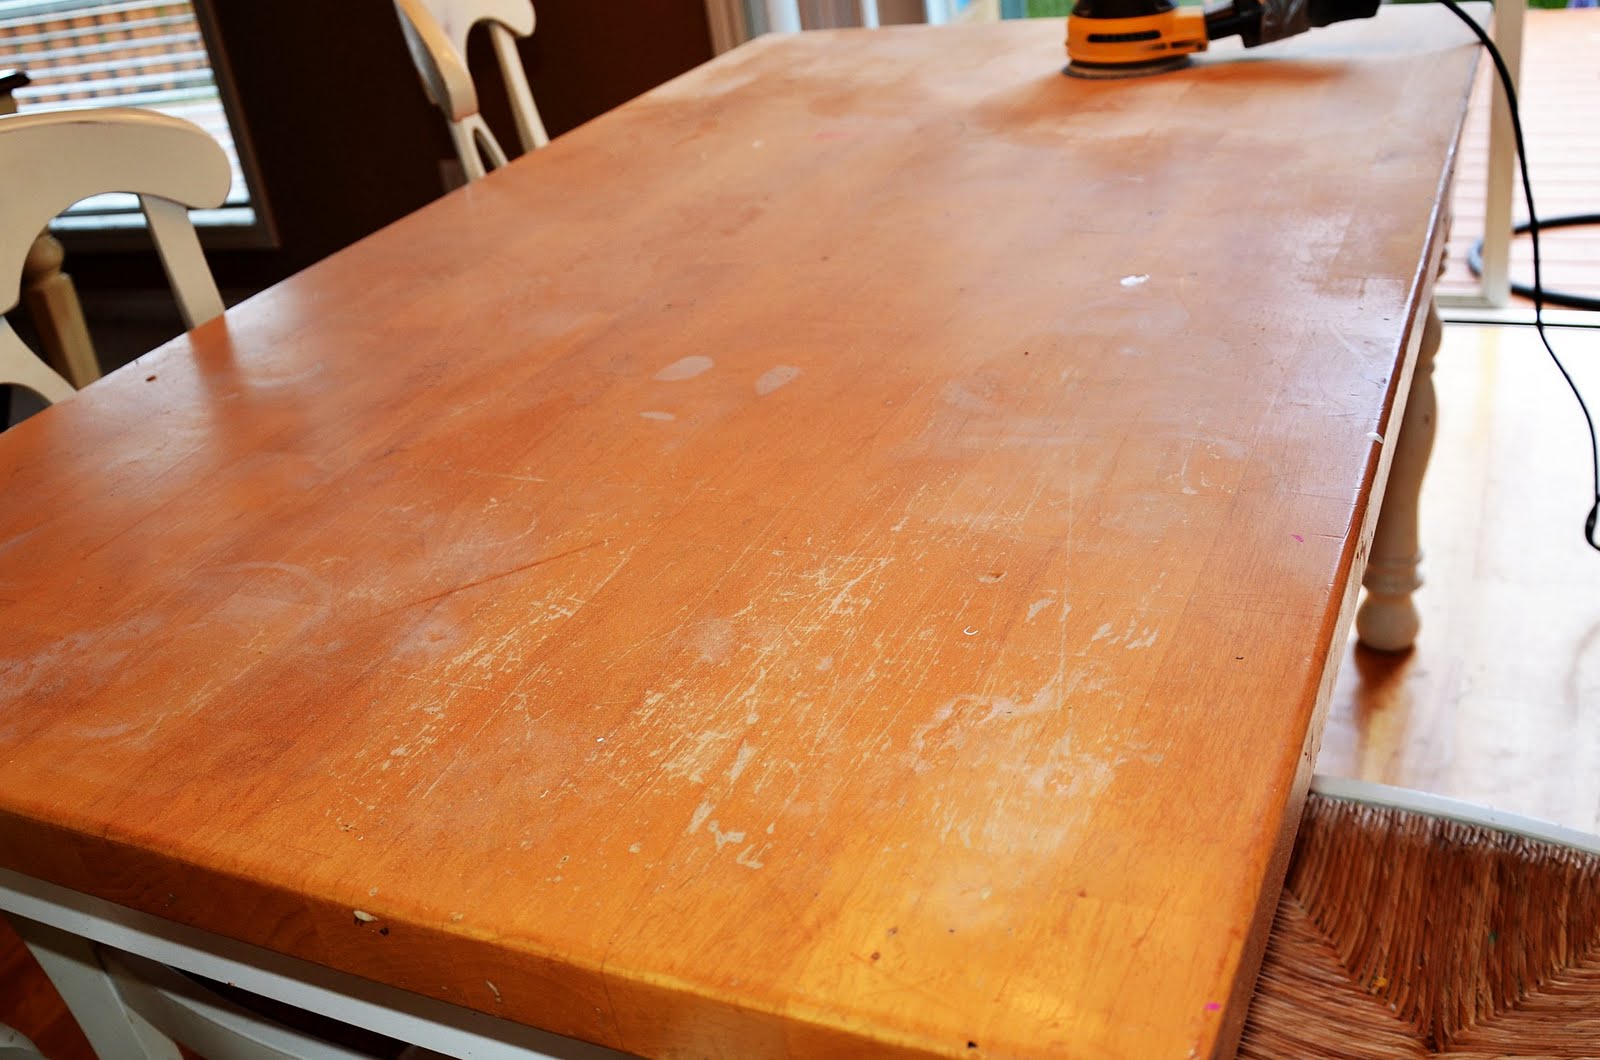
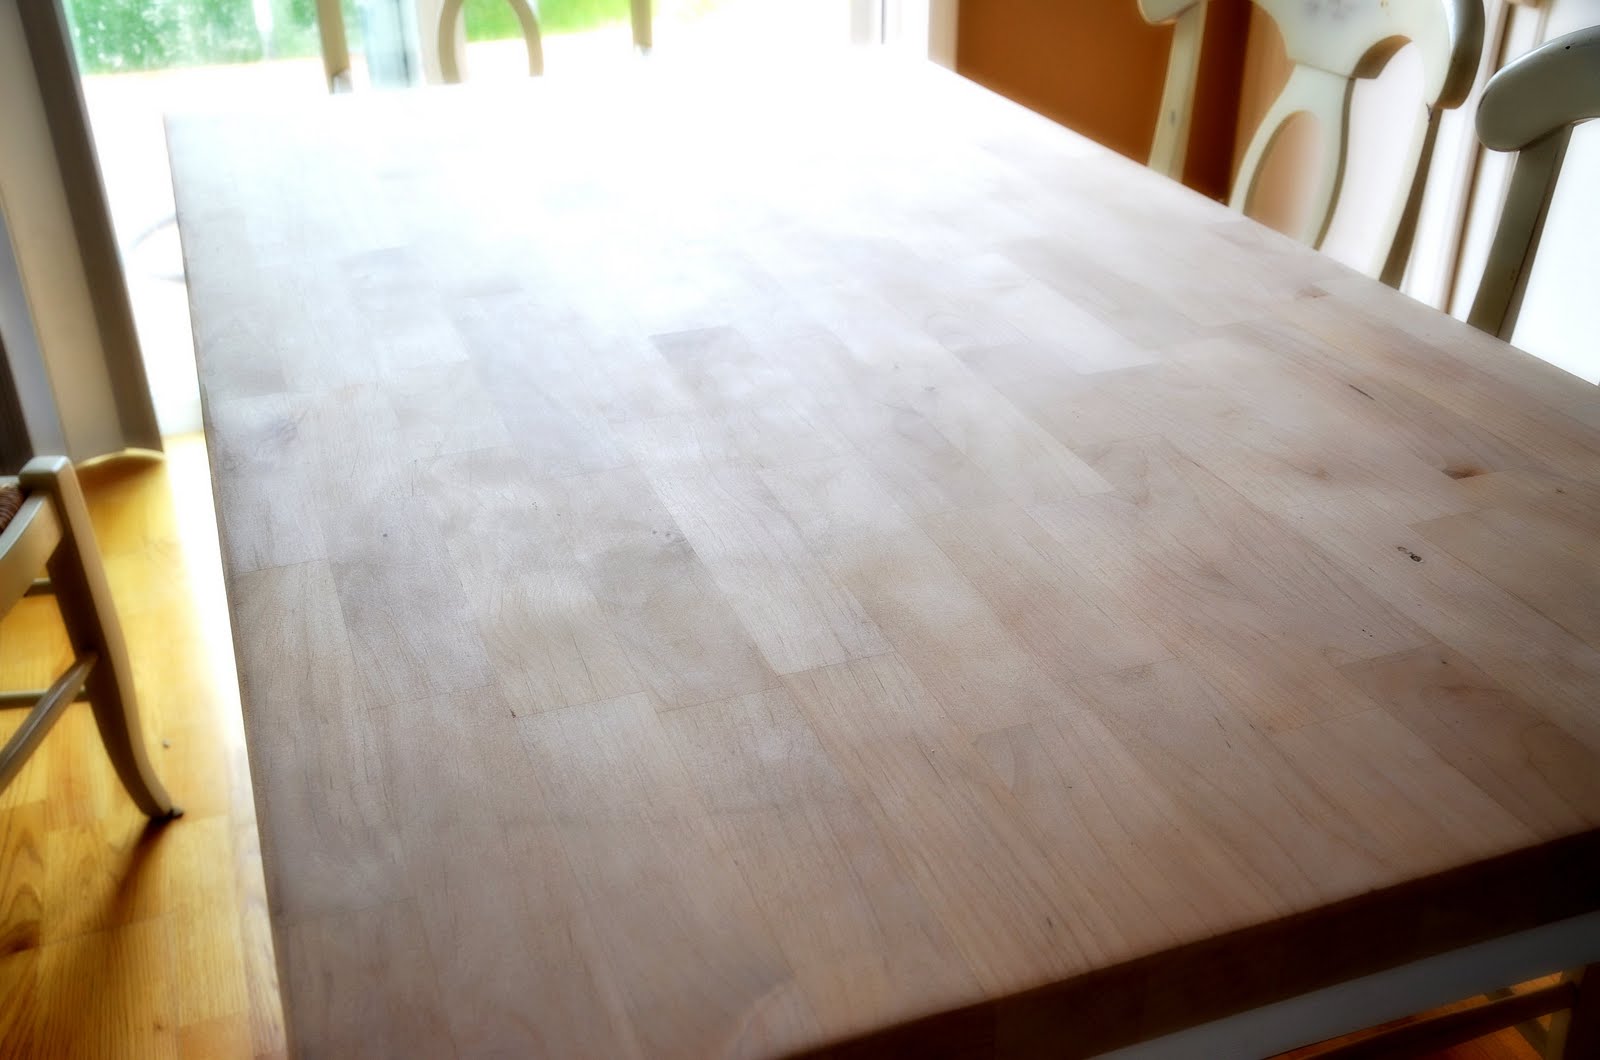
Now it’s time to let the table retire from her previous duties and be a little pampered and even honor her for been the foundation of so many great dinners and moments. The first thing I did was sand the table PERFECTLY down. It looked like a completely different table already!
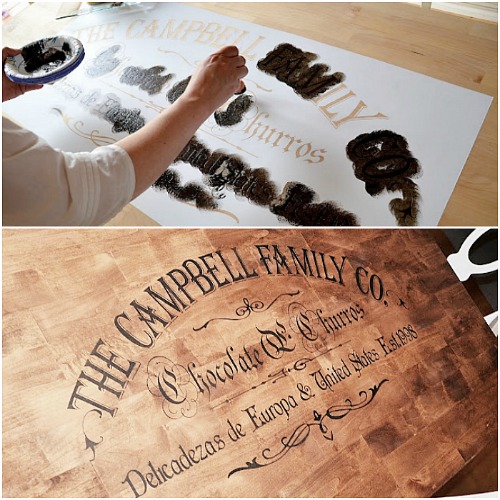
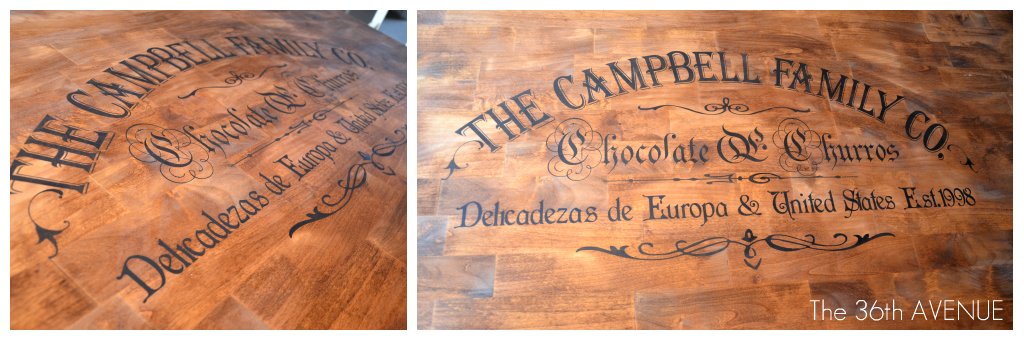
After this part was done it was time to apply the vinyl stencil that I had previously designed and cut.
You will need a large vinyl machine to do something like this, or order a stencil.
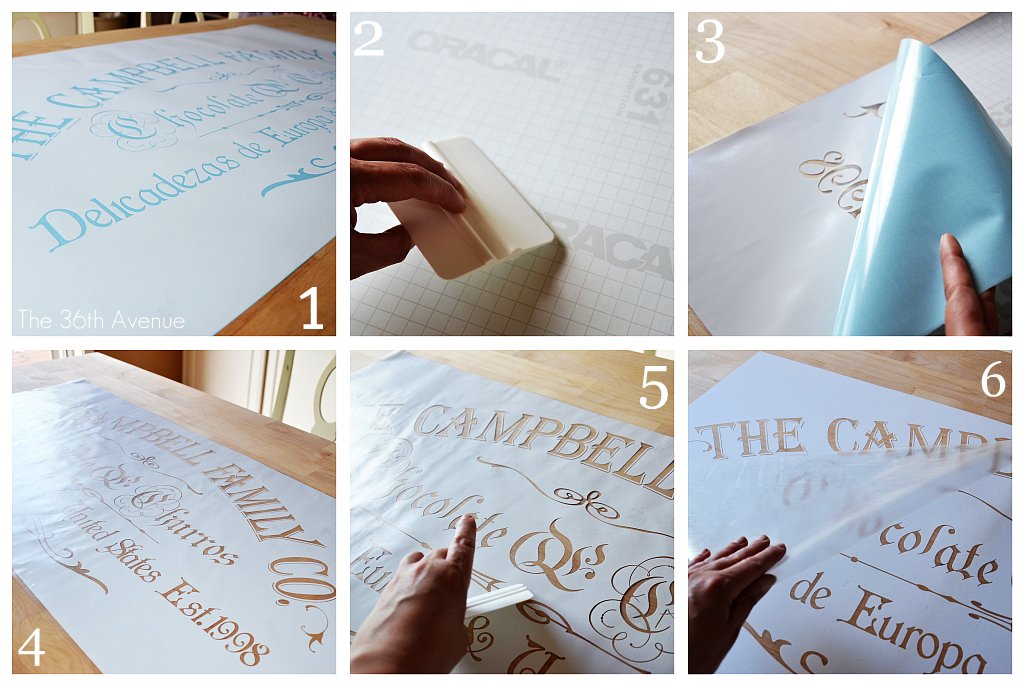
Then I was ready to stain the design. I used an antiquing dark glaze by Valspar. My advice if you are thinking to do something like this is to use small amounts of paint at a time. Paint or a thick glaze is better that regular stain {too “liquidly”} for this part of the process. I know you know BUT DO NOT BRUSH THE PAINT side to side or up and down. When you are working with STENCILS ALWAYS tap your paint with a flat brush.

Then it was time to let it dry… Perfect for me and Mimi to take a HOT CHOCOLATE break while Papi and the other little savages
were playing basketball at the Church.

Then we were ready to stain the table. I always like to test my stains in a piece of similar wood before I apply it on the final surface… Check out my fancy gear 😉

At this point I ended with this…
…and after the final clear glaze with this.

From ordinary to EXTRAordinary!

And now I better say good bye because we are ready for dinner 😉

Here are some other DIY Furniture Projects that I love!
Click HERE


Click HERE


Thank you for sharing this. I found it very useful. p.s. I totally knew you were Mormon when I read the part that said, “Papi and the other little savages were playing basketball at the Church.” I decided to read your about me post and whammo! there it was! Kind of fun when I catch little things that totally say, “They’re Mormon!” Made my day.
Hi Candis, that’s crazy that a simple sentence would give it away! Thank you so much for stopping by and visiting!
Hi, I LOVE this idea, but having trouble finding a place to create a stencil like yours. Can you tell me where you had it made?
Elizabeth I made the stencil using an industrial vinyl machine many years ago.
i would like to buy the Campbell family co stencil do you sell this item can you call me at 702 202-7386.
Unfortunately we don’t have them anymore :/
http://www.pinterest.com/pin/77757531040924635/
I LOVE this stencil. I cannot find what i am looking for on the link provided. Can you help me out?
Table looks great! Do you remember which “color” stain you used? Thanks!
What stain did you use for the table?
You can find the info in the tutorial! http://www.the36thavenue.com/2011/06/so-much-inspiration.html
AWESOME!!
Where do you buy your stencils?
I made mine!