
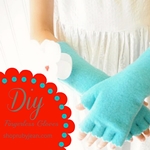
DIY Fingerless Gloves Tutorial that are perfect for Christmas Gifts!

Hello The 36th Avenue readers!
My name is Angelina and you can find me blogging over at Ruby Jean’s.
Today’s tutorial is How to make Fingerless Gloves.

This is a very quick and easy project and one that even the children can get involved in.
I used basic fleece that I got on sale at Joann’s.
I also used felt and pom poms for the embellishments.

Using a blank piece of paper I traced around my daughters arm and for the fingers
I marked where I wanted the edge of the glove to be.

Using my cut pattern I placed it on top of my fleece and cut a total of 4 pieces.
I wanted the edge to be scalloped so I used myFabric Scallop Scissors,
size Large ( LOVE these things, they work REALLY well on Felt ).
I then stitched along the sides of the arm and thumb ( right sides together )
leaving the place for the fingers open. Turn right sides out.

Try on to make sure it’s a good fit and to mark the placement of the stitches for the fingers.
If working with little people hands you can always use a Water Soluble Pencil
or Marker to make your finger placement marks.
Now would be the time to make any adjustments needed for sizing before you stitch your finger holes.
I ended up re-trimming the edges on the thumb and hand to clean them up a bit.

Now!! Like any good DIY Crafter we can never just leave things plain and boring,
we have got to find ways to embellish and make things a bit more exciting. S
o I decided to add some fun flowers to these Fingerless Gloves.
I drew a basic flower shape for my pattern and cut a total of 6 flowers ( out of white felt ),
each flower was made up of 2 big flowers and 1 smaller flower for the top.

I layered my flowers, being sure to of center each flower ( giving it more dimension ).
Using a coordinating thread I stitched my flower together pinching it in the center as I went along.

For the center I used 3 mini Pom Poms and hot glued them into place.

Using my bigger pom poms I took some embroidery floss ( leaving a knot at the end )
and pulled it through the center of the pom pom with a needle.
I made a total of four, knotting two of them together. I
then sewed the pom pom to the back of my flower, then sewed the flower to the glove.
Another option would be, to hot glue a clip to the back of the flower so you can remove it when needed.

I hope that you enjoyed and will be inspired to make your own Fingerless Gloves.


Thank you again Desiree allowing me to come over and share with your lovely readers.
I love Angelina!
Let me tell you a little more about her.
Angelina is a stay at Home Mom to 5 wonderful children
and they are excitedly awaiting the arrival of their 6th baby ( any day now ).
She loves all things Crafty and DIY.
Sewing is something that she feels so very blessed to be able to do,
being that it was a desire of hers since she was a little girl.
She has never taken a class and have only learned what she knows through trial and error over the years.
She does however think taking a class on Period Costume making would be so much fun,
she says… “Who know, maybe someday in the future I will be able to do just that
but for now I will just continue to share the little bits that I do know 🙂 “
And we surely enjoy that!
Here are a few more projects from her that I adore!

And the most gorgeous Sewing Room ever!
You really need to go visit Angelina over at Ruby Jean’s and take a tour.
Also make sure to follow Angelina on Facebook, Twitter and Pinterest.
Thank you all for visiting with us today!
Besos
Desirée

So, so cute! I love your embellishments too!
Hi, these are so cute, so I’ve been looking at your blog since the summer and it inspired me to make my own http://diyafy.blogspot.com/ I’m only twelve but you are amazing to me <3
Gorgeous gloves! Thanks for sharing the how to!
Soo SOO sweet! Just like the creator and the creator of this over the top fabulous BLOG!!! Thanks for sharing girl…they are FABULOUS!!! — only wish I could sew : ) hugs and Here’s Wishing you and yours the most wonderful Thanksgiving ever! : )
Oh I will definitely be making many of these- I’m going to need them this year.
Oh my, I am definitely pinning her sewing room! These fingerless gloves are awesome. I especially LOVE the flower embellishments she put on them. They would look great on so many things. Thanks so much for sharing this talented lady with us. I’m heading over to her blog now.
Debbie