
This adorable DIY Spring Wreath will make your Easter Decor fun and festive. Enjoy making this cute Easter Craft with your kids. It’s super easy to do and fun to display.

Easter is one of my favorite holidays. I love the bright colors of the season, the warmer temperatures, the smell of rain and nature in the air. I love what this holiday represents, hope in eternal life, faith in the resurrection of our Savior Jesus Christ, and knowledge that there is more than just this life, and that families can be forever.

When I saw these cute carrots at TaiPan the first thing that came to my mind was the Easter Bunny and the second thing was making a wreath. I could picture in my head how fun the green and orange colors together could look. Then I got me some ribbon and before I knew it I was having fun while making this cute and festive handmade wreath!
MATERIALS
You may find these materials at your local craft stores or below online for your convenience!
One foam (12 to 14 inches in diameter) wreath HERE
6 Yards of 1.5″ wide Green Gingham Ribbon HERE
3 Yards of 1.5″ Orange Gingham Ribbon HERE
Paper Easter Grass – Find It HERE
Sewing pins HERE
3 Craft Carrots – I found these ones at TaiPan.
TUTORIAL
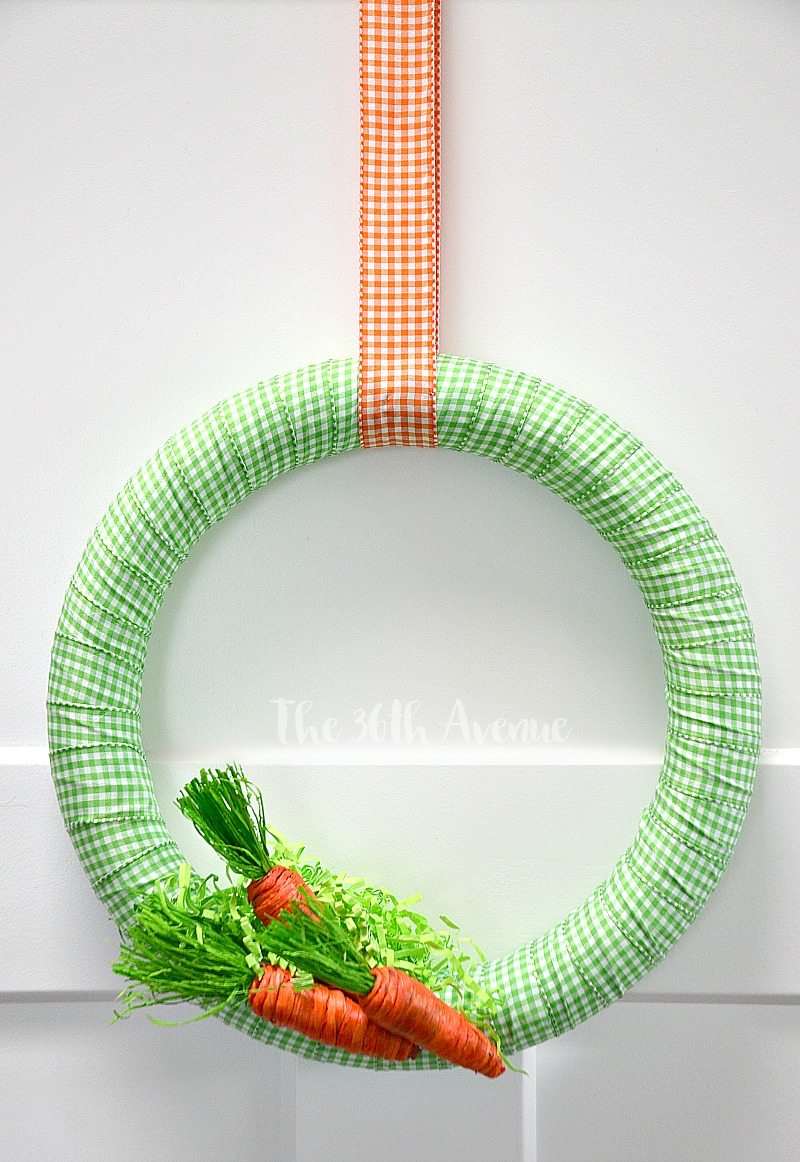
The first thing we are going to do is wrap the green ribbon around the wreath. Use a pin to first hold the ribbon in place.

Then start to wrap the entire wreath overlaying the ribbon enough to hide the foam. Make sure you wrap the wreath tightly so the ribbon stays secure. When you reach the end use additional pins to hold the ribbon in place!

The second step is to embellish your wreath. We are also going to use pins to place the carrots. Try to place the pins in places where you can’t see them so the final projects looks clean and perfectly made!
When the carrots were pinned I used paper Easter Grass to fill the spaces between them… SO CUTE!

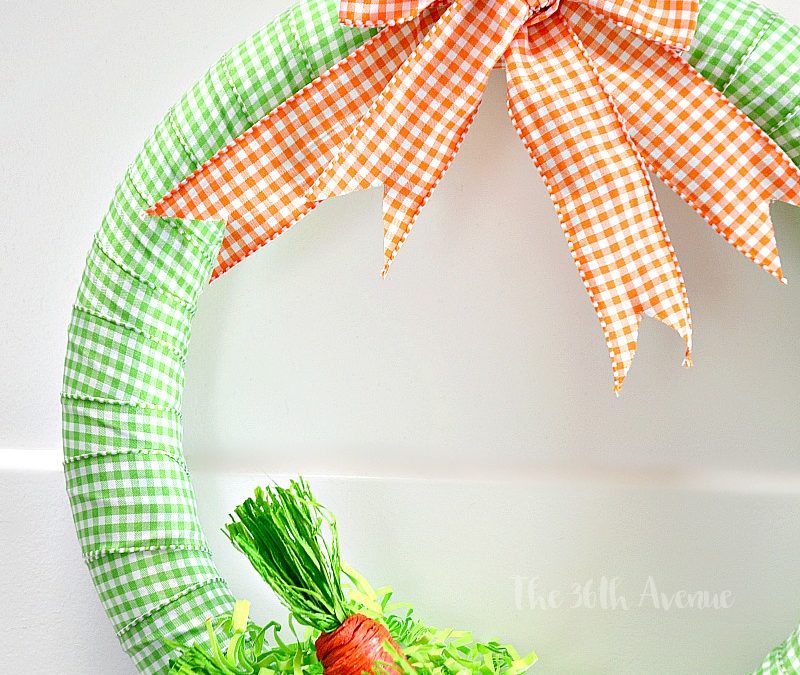
The third and final step is to make the bow! Everyone makes bows differently so use your skills to make your own masterpiece!
To make mine I cut one yard of ribbon to make the long hanging piece!
Then I cut two other one yard pieces and layered them on top of each other. Then I made a regular bow.
The last thing was to open the bow loops and cut off triangle shapes from the ends… Isn’t it adorable?
I again used pins to keep the bow in place. Then when Easter is over I can unpin everything and reuse the same wreath for a different season over and over again!

We did it! High fives!
Now all we have left is to hang it on our door!
I love it!

As I mentioned before I love this time of the year! Here are some other beautiful handmade Easter Decor Ideas that I thing you are going to enjoy!
Home Decor Spring Ideas HERE

Easter DIY Home Decor – Click HERE

The Best Backyard DIY Projects – Click HERE

Thank you my friends for taking the time to stop by and hang out with me!
I adore you guys!
XO
Desirée
( This post contains affiliate links)
For more DIY Spring Decor Ideas subscribe below!

So cute! And so smart – -using pins so you can reuse it for the next season.
Hi Susan,
You are right… This way you can use the wreath over and over again!
Have a greet week!
XO
I love the gingham ribbon on your wreath!
Thank you so much!