
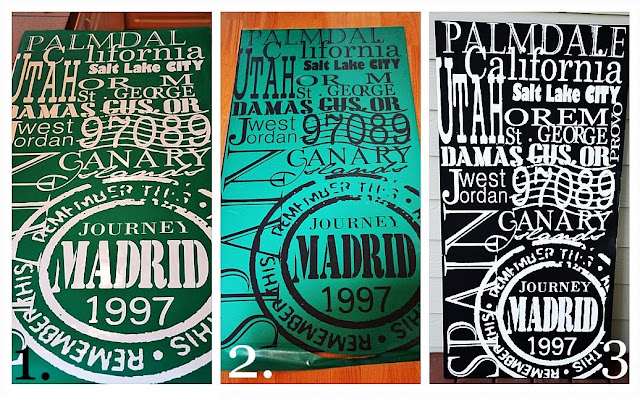
Materials:
Board.
Paint.& Brush.
Vinyl Template.
After painting the board in black
making this sign was as easy as 1, 2, 3…
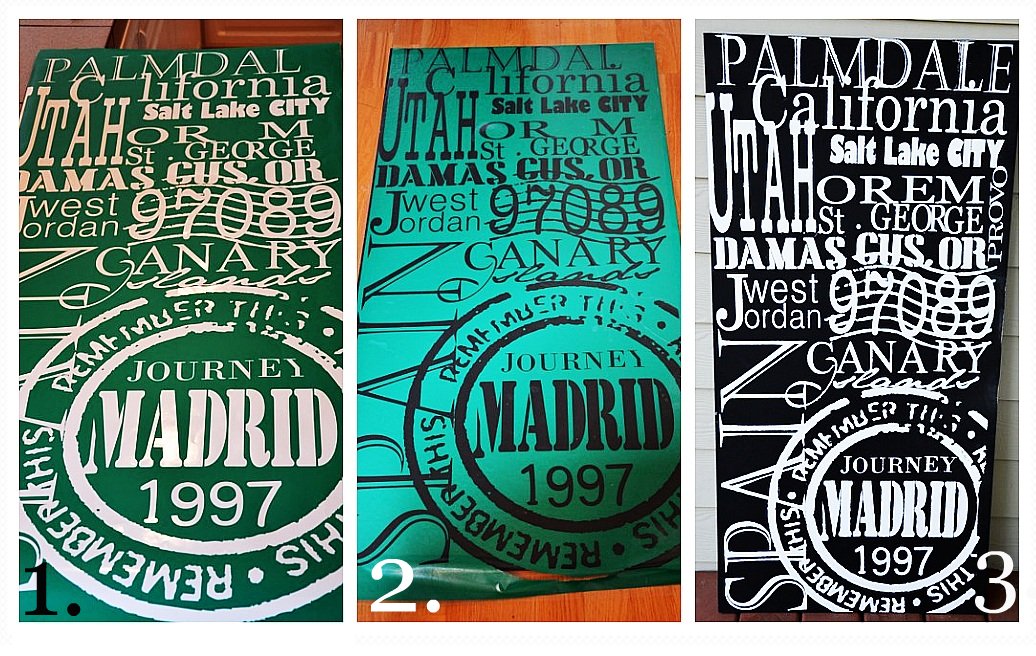
1. After designing and cutting the vinyl I peeled the letters out
to use the vinyl as a template or stencil.
2. I placed the vinyl on top of the board and I pressed around the edges to prevent paint going under it.
3. I painted it tapping instead of brushing to prevent once again
any leaking of paint under the vinyl.
Then it was time to remove the vinyl from the board and let the sign come alive…

…That’s it!

I love it! The Madrid part is what had me hooked. We just moved from Madrid and landed at 97035 -so pretty close. We moved around a bit before Spain (including Provo), and I would love something like this in our entry way. I’m crafty, but being in Spain the last few years, I’m a bit behind in technology and have no idea about vinyl stencils, how to make them or go about getting one. Any help?
The best machine to get has to be the Silhouette Cameo. Keep you eyes open, many blogs including mine have special promotion offers almost every month.
Just wondering how you set this up. We have a roland gx 24 with Corel software. I would really appreciate it if you could walk me through the steps…thanks!
A friends of mine did ours so long ago that I don’t even remember. Do you have the manual?
How did you do the layering on this sign?
Just stumbled across your site and LUV it! I would love to make one of these for my daughter who has spent much time in Europe! Question, how do you actually make the vinyl template? Not sure I can do that myself!
These are fantastic! I’d love to make a board for each of my daughters, who have been big world travellers. Thanks!
I just love your signs. You are so talented. I have been browsing around you site several times for the last couple of days, pretty new to it, and I feel so inspired. Thank you for that.
And thank you for wanting to share our little “sweater snowman”. Looking forward:)
Have a great weekend!
Annika
I just posted!
It’s fabulous – great graphic design! What are the dimensions of the final piece?
GREAT JOB. LOVE IT. I ALWAYS WONDERED HOW TO MAKE ONE OF THESE.
LAUREN
Thanks for the link to how this was done. And ohhhh yeah… to see a tutorial of the steps for the multi layering would be very cool. 🙂 It's a fabulous piece! Well well done!
Donna
http://funkyjunkinteriors.blogspot.com/