
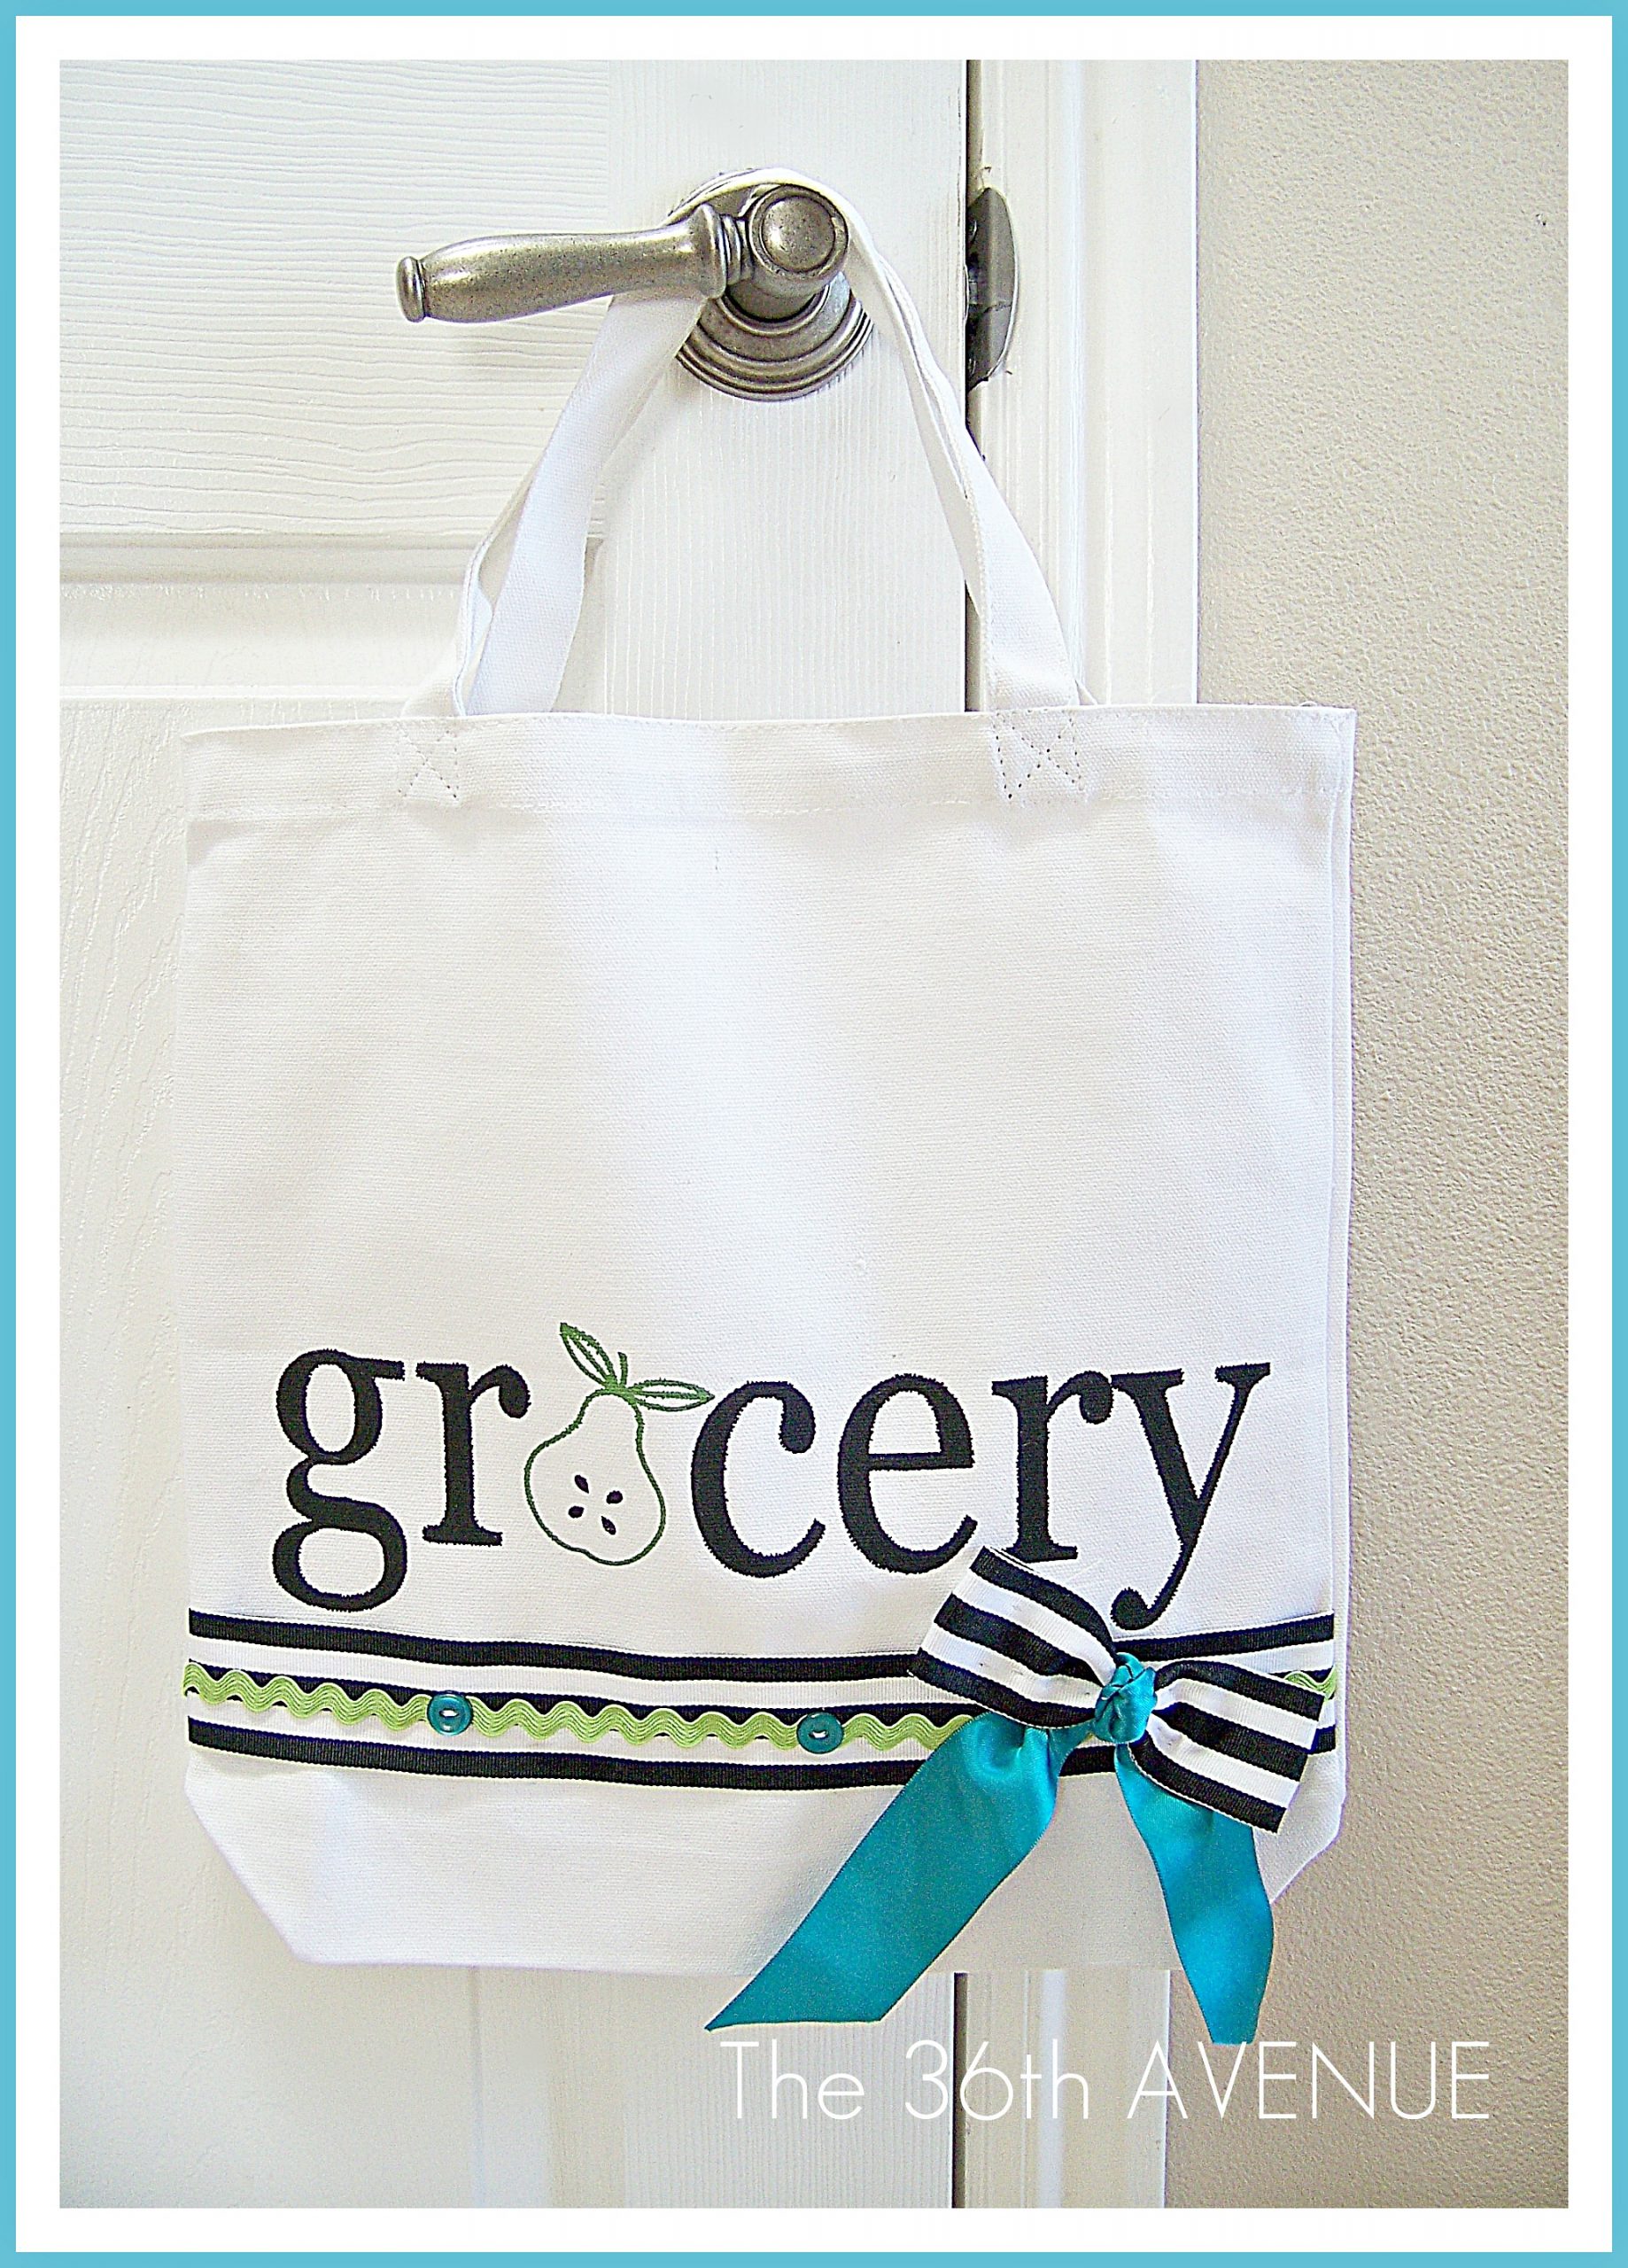
Last month I shared over at Tatertots and Jello this tote that I made while working on my kitchen.
I can’t tell you how lucky I am to be a contributor to Jen’s blog.
I love hanging out there and being a part of such an amazing and inspiring blog.
Thank you Jen for being YOU!

I think this kitchen makeover is giving me gray hair.
It is done… the weather however is not cooperating and I want to take the pictures on a sunny pretty day!
So please my friend bare with me and hopefully the beautiful Southern Utah sun decides to come back one of these mornings.
Now back to the tote!
I love an easy project. I don’t have the time to go crazy and make everything.
The best part about this bag it is that you can purchase these totes at your local Wal-Mart for about $6.00 for 3 of them.
We are just going to give them a quick makeover using paint, ribbon and buttons.
In about 30 minutes you can have one of your own!
TUTORIAL
1
The first thing I did was to iron the tote.

2
After the fabric was smooth I applied the vinyl stencil that I had previously cut.
I always like to press against the edge of each letter to make sure no paint will bleed under it.

3
The third step involves paint.

I like to use fabric paint for my projects since it is softer than regular acrylic paint.
Before I started painting I placed a piece of paper inside of my tote to protect the other side of it.

It is a good idea to add some painter’s tape to those areas where the edge of the vinyl is too close to the fabric.

You don’t want to paint out of the lines.
Use a flat brush for this step and tap small amounts of paint against the fabric.
4
Peel the vinyl off.

I used a pin to peel off those hard to reach areas.

5
After the paint was dry it was time to have some fun and give some personality to the tote.
I used ribbons and buttons to do so.
With the help of some pins I placed the ribbon in place.
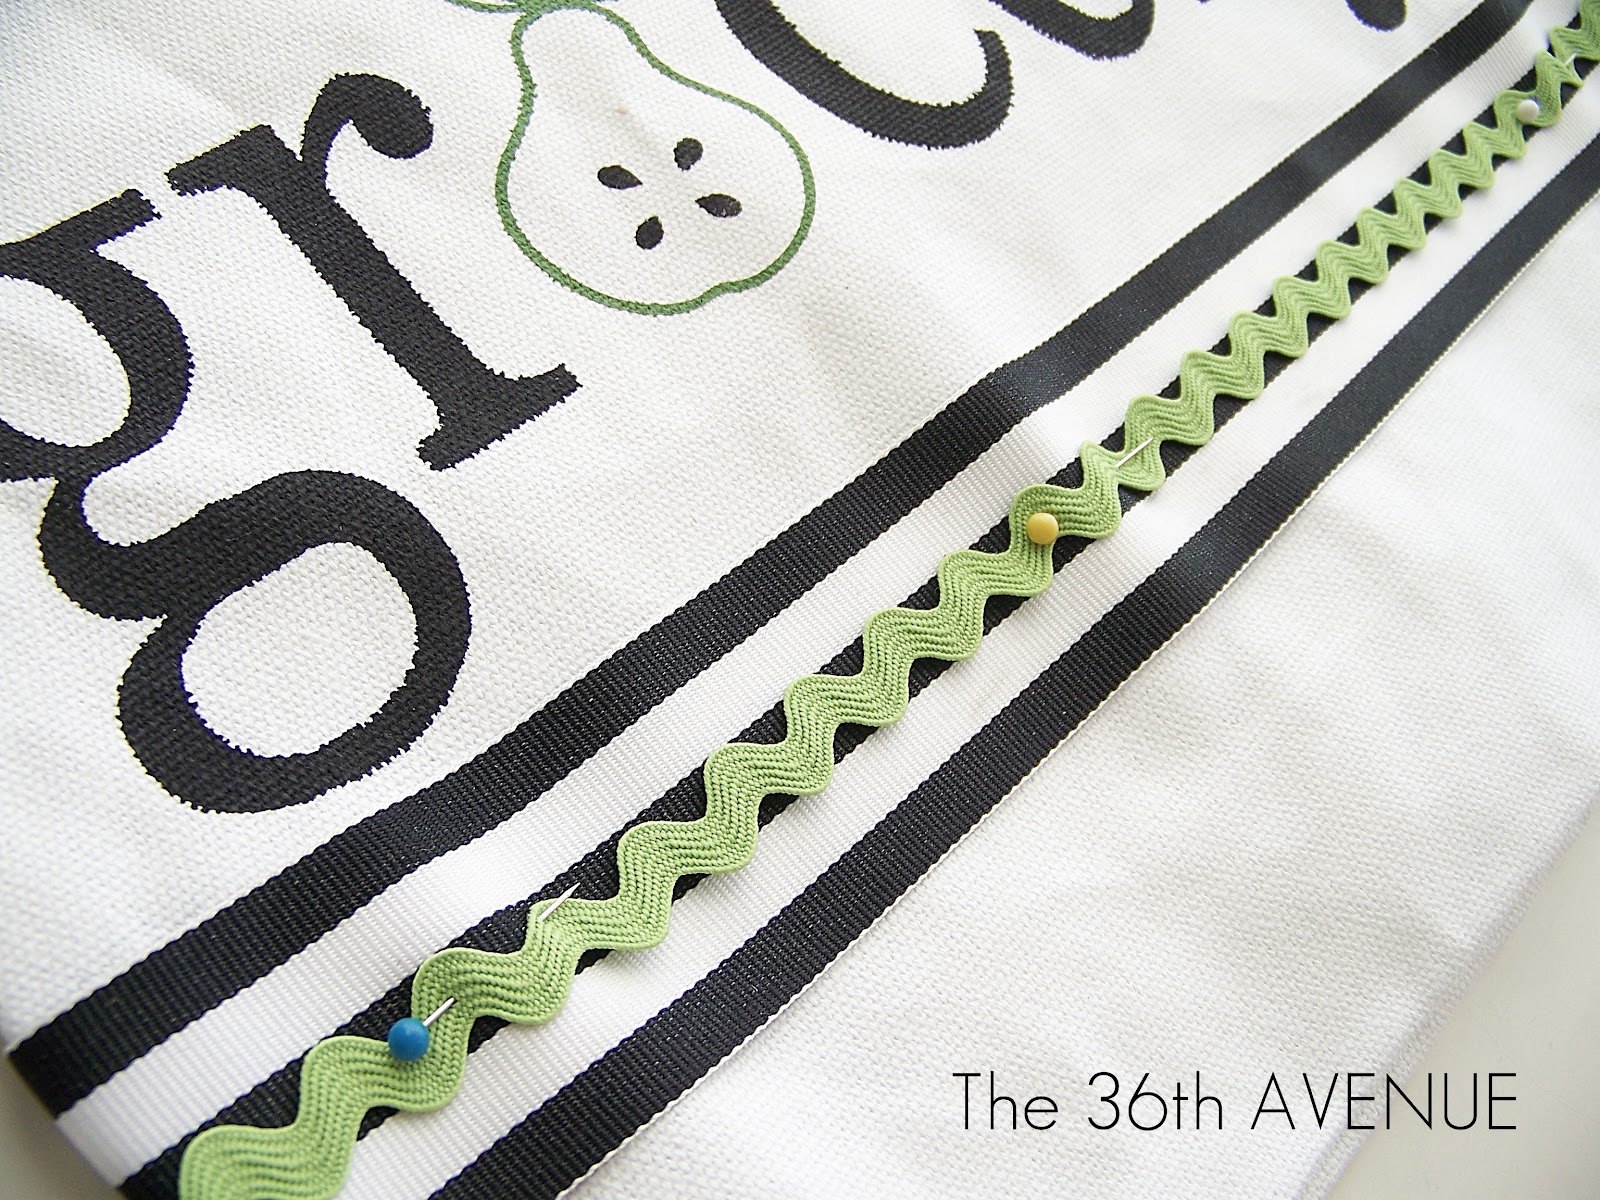
Then I opened a few stitches of the tote and I placed the end of the ribbons inside.

6
I turned it inside out and I sewed it again securing the ribbons in place.

7
To secure the rest of the ribbon I sewed some buttons on top of it and a little bow at the end.
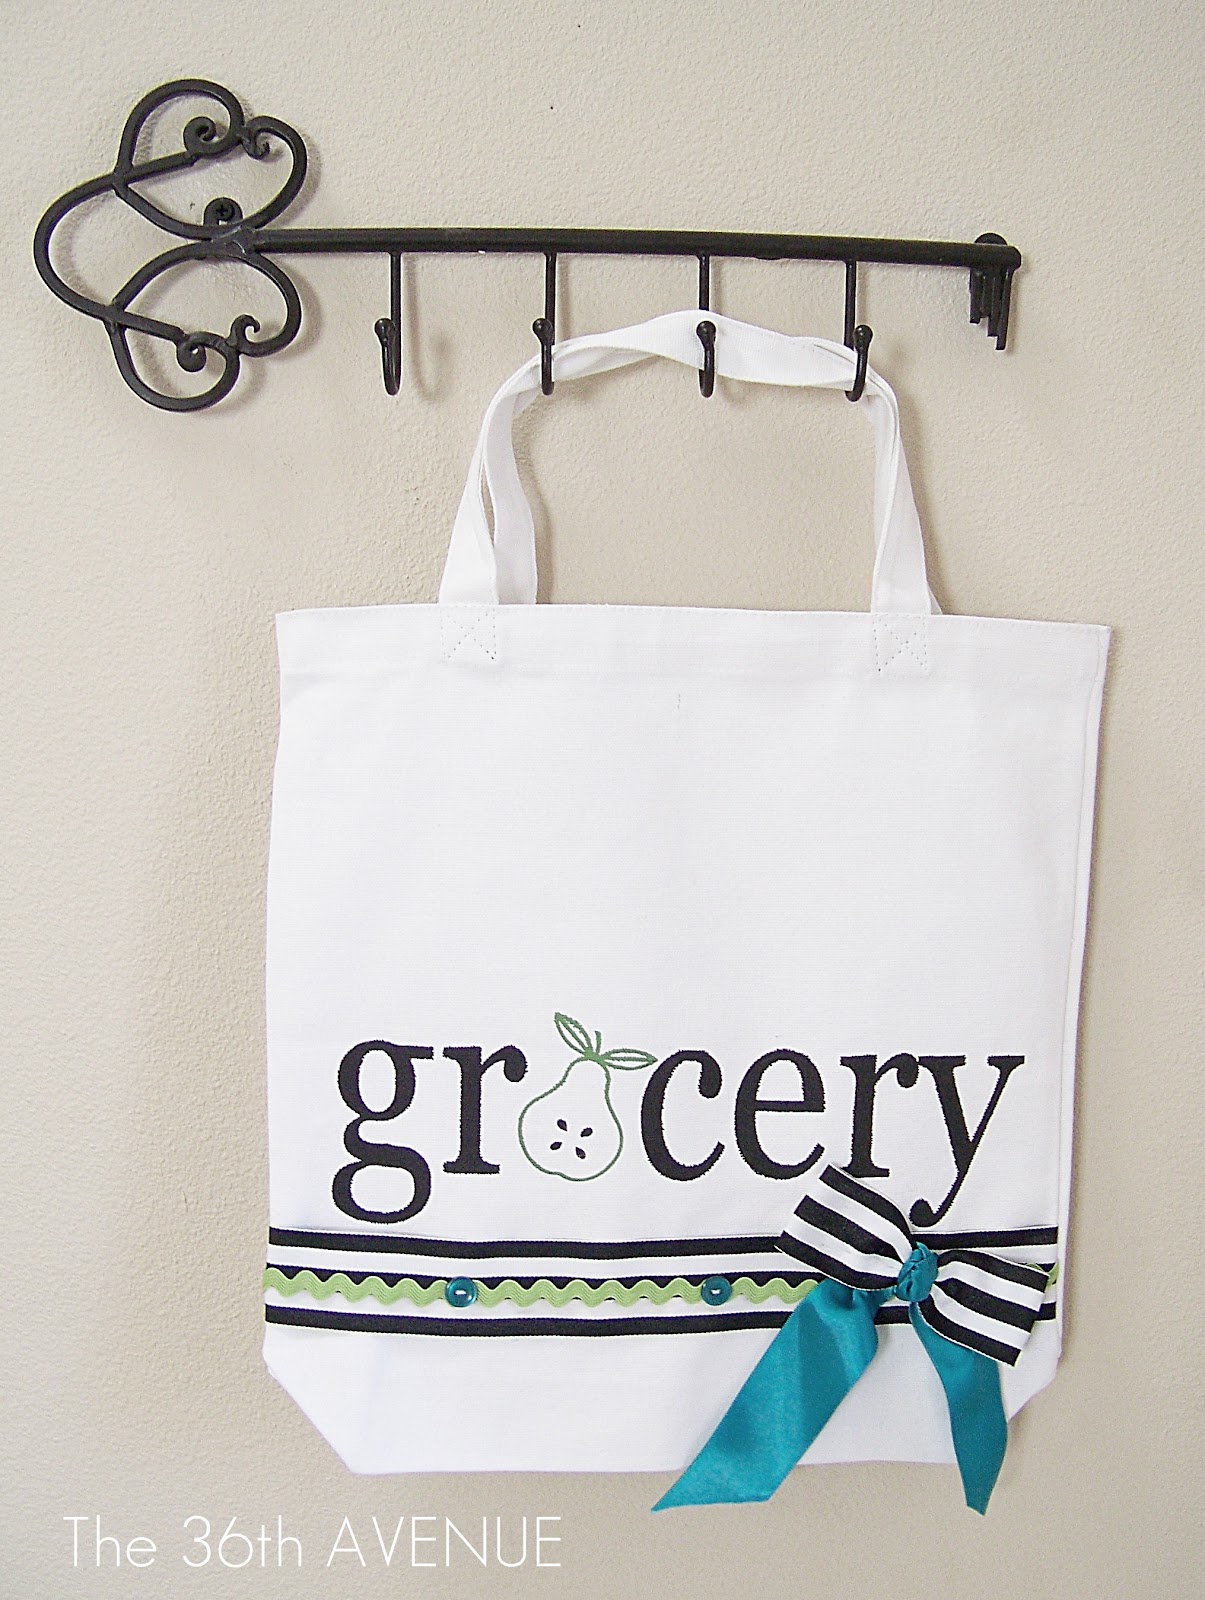
Before I knew it I was done.
My little tote will be part of my kitchen…
I am going to use it to store all of those plastic bags that come home with me from the grocery store.

I hope this simple tutorial inspires you to stencil some fabric of your own.
Pillows, curtains, totes and even rugs are some fun surfaces to work with.
If you have never stenciled before you can click here for a step by step tutorial of how to use vinyl stencils to paint fabric.
Happy TUESDAY Lovelies!
♥
Desirée

Neat idea, but rather than using it only as a kitchen decoration for storing the plastic bags from the grocery store, I would also use it for shopping trips, which would help reduce the number of plastic bags brought home. Thanks for sharing a cute idea!
I love the grocery tote, would love to make some for my family. How can I order the grocery stencil?
Carolyn,
Visit my shop at http://www.the36thavenueshop.com you will find it there.
I hope this helps!
This is probably a silly question, but how do you keep the inserts of your letters ie. the g on the vinyl when you have to transfer it to the canvas? I don’t use a silhouette, but a cricut and when I cut and lift my vinyl up off of the backing the inserts usually come away from the letter. (I hope this all makes sense)
Just use transfer paper to keep the pieces you’ll need in proper position. Don’t peel the vinyl off the backing with only your hands.
This is such a cute bag! I love it!
Have a great night and thanks for hosting a lovely party each week!
Lina @ Fancy Frugal Life
Thanks for the great idea! I just pinned this. You always have the best projects.
blessings,
karianne
Great Project. Many thanks for sharing 🙂
I love this project, Desiree! What a great little gift, too ~ I haven’t stenciled anything in a while, so maybe it’s time. 🙂 Thanks for sharing!